
I'm frequently asked by Foglight administrators how they can configure their FMS to send text message alerts to their phone. The process is rather straight forward, and this blog post will outline the steps you'll need to take in order to:
- Create a new registry variable
- Create a custom rule
- Customize the rule to send to the email address of the mobile device
- Customize the rule to only fire during nights/weekends
Step 1: Creating a new registry variable is the easiest way to "create a contact" within Foglight that we'll use as the recipient address in a later step. To make a new registry variable, navigate to Dashboards > Administration > Rules & Notifications > Manage Registry Variables. You can add a new registry variable, or copy an existing one. In this example, I copied the variable "VMAdmin" to "VMAdmin-Mobile". I updated the default value of the variable to reflect the email-like SMS address of my mobile device.
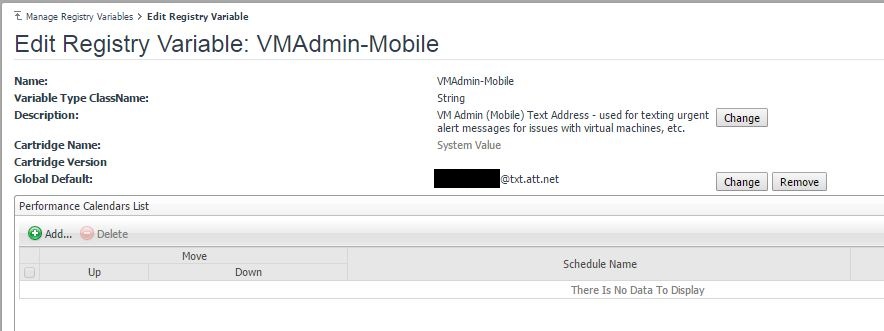
There are several Internet resources to help determine the proper SMS Gateway address for your carrier(s). Check out this one, this one and this one. You can also confirm that Foglight can deliver messages to your mobile device by using the "Test Configuration" tool under Dashboards > Administration > Setup & Support > Email Configuration.
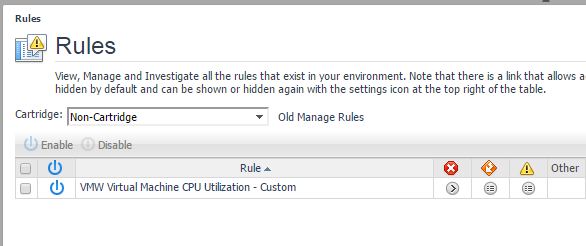
Step 2: Many times, an administrator will only want a subset of alarms sent to their mobile device -- typically, the most crucial alerts in the environment. After those alarms have been identified, find the rules at the source of those alarms, and make of copy of them. Rules are found under Dashboards > Administration > Rules & Notifications > Rules. Remember, that after making a copy of a rule, the copy will be found in the "Non-Cartridge" cartridge within Foglight.
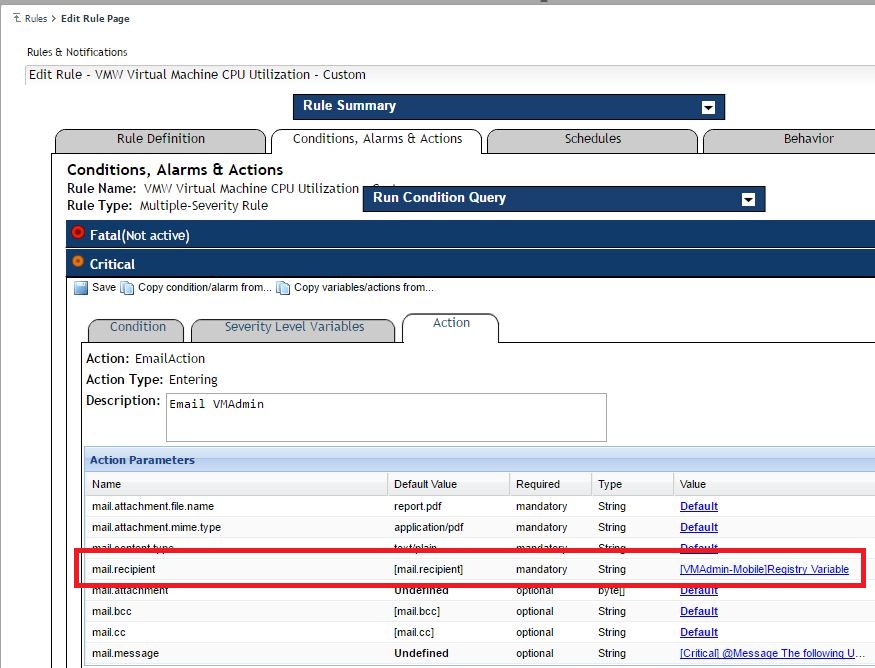
Step 3: Now, let's customize the newly created rule. First, we'll want to update the recipient of the email generated when the rule fires. We can do this by editing the rule, selecting a severity, and then navigating to the Action tab. After selecting EmailAction, update the mail.recipient parameter to reference the new registry variable we created in step #1.
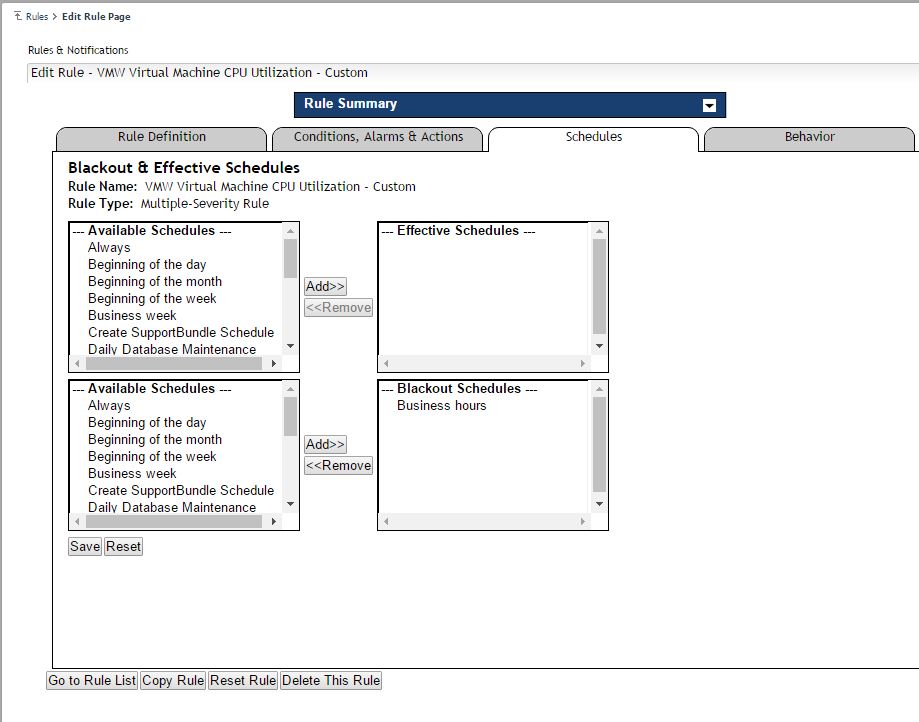
Additionally, we can also customize this rule to only be valid outside of business hours (i.e. nights and weekends). Do so by by heading to the Schedules tab and adding "Business hours" to the Blackout Schedules.
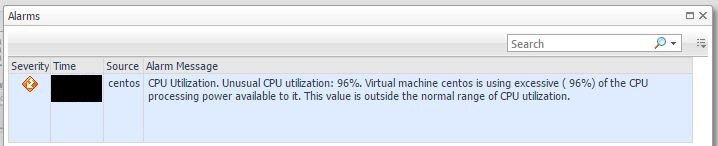
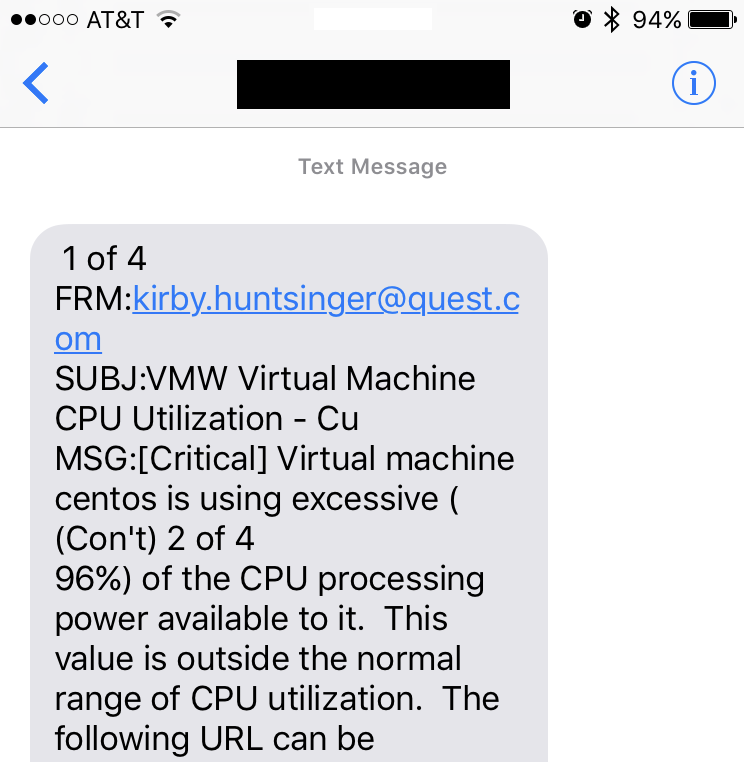
Step 4: Lastly, test out your rule and notification configuration. In my lab, I generated high CPU utilization on a VM and then saw the following notifications:
This alert was raised in Foglight's UI.
And this message was sent to my mobile device.
By following the steps outlined in this guide, you've now got the tools to begin tuning your Foglight alarms and notifications! Happy tuning!
