
Do you also feel lost sometimes when searching for a specific instance on the database overview dashboard? If you monitor hundreds of databases it is easy to lose the overview but there are some options to quickly find the database you need.
- Table filter:
The table filter is the easy and fast option to find one or several instances. The filter field is on the top right corner of the table. Type in the instance name or partial instance name to find the needed instance(s).
Foglight searches on the ‘Name’ and ‘Host’ column. When searching for ‘oracle’ you will get no result, except one of your instance or host names contains ‘oracle’.
The search is not case sensitive. You will get the same result when searching for ‘abc’ or ‘ABC‘. And Foglight always adds a ‘*’ at the beginning and end of the search term. Means when searching for ‘abc’, your result will show all appearances of ‘abc’, doesn’t matter if at the beginning, in the middle or at the end of the name.
In the example below I searched for ‘win’ and I got 2 results. The first line appears because the ‘Host’ column contain the search term. The second line shows the search term in the ‘Name’ and ‘Host’ column:
- Tiles
The next fast filter option are the tiles on top of the table. Here you can quickly filter by database provider: SQL Server, Oracle, DB2, Sybase, Mongo,…
For each database cartridge which is installed, a tile will appear, doesn’t matter if there is a running agent or not.
When clicking on tile Foglight will display only those agents which database type has been selected.
- Database groups:
Creating database groups is the most flexible option you have. You can create groups and add / remove databases to the group as needed. For example you can create a pre-production and production group or groups based on domains, etc…
How to create a database group now?
a) Open the Database Overview dashboard and on the left hand side the database groups appear
b) Now mark ‘Database Groups’ and click on the green ‘+’ icon
c) In the popup window create a name and description and add the needed databases to the new group.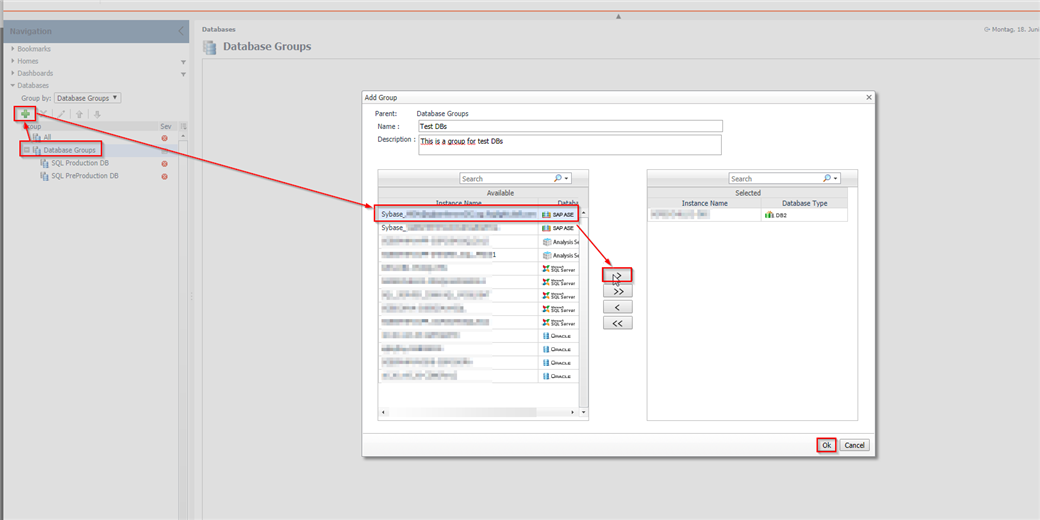
d) Once this is done, click on ‘Ok’ and the new group will appear.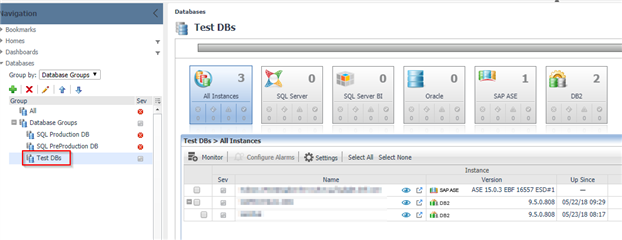
e) If you want to modify an existing group, click on the ‘pencil’ icon. To delete a group click on the red ‘X’ icon.
You will find more information about Foglight and free trial download on the product page.
