Thanks for your interest in Quest On Demand License, Management your go to software as a service solution for better understanding your Microsoft Office 365, licensing utilization, how much under deployed licenses cost your organization, and the product capabilities your users are leveraging within each license. I'm Matthew Vinton, senior systems consultant at Quest. And today, I'm going to show you how to create your Quest On Demand account, define your organization, and initially configure On Demand license management.
Now, our first step is going to be to create the Quest On Demand account. To do that, go to quest-on-demand.com and click sign up. Now, if you already happen to have a Quest account of some sort-- perhaps you've purchased Quest on premises software in the past and you have a support account-- that can be leveraged as well.
But if you don't, all you need to do is follow the simple process and click sign up. You'll get an email at this account with a verification code. When that email arrives, simply enter it. Then click verify. And you will have a brand new Quest On Demand account.
Once you create your account, it will automatically log you in and ask you to create your On Demand organization. Your On Demand organization exists purely within Quest On Demand and is designed to be the boundary of the tenants and other systems that you manage using Quest On Demand. You'll need to choose a name, and I would recommend using a descriptive name and selecting a region where your On Demand organization will be hosted. We click create new organization.
Now that the organization has been created, our next step is to add your Office 365 tenant. To do so, simply click add tenant. This step will create the application service principle required for On Demand to get access to what it needs get access to within your Office 365 tenant. Choose accept.
At this point, you're free to start a trial for any piece of On Demand. In this case, let's do so for license management. Click start trial. To sign up for your free trial, simply read the license agreement and click, I have read and accept the license agreement, click sign in for your free trial, and use your newly created or existing Quest account.
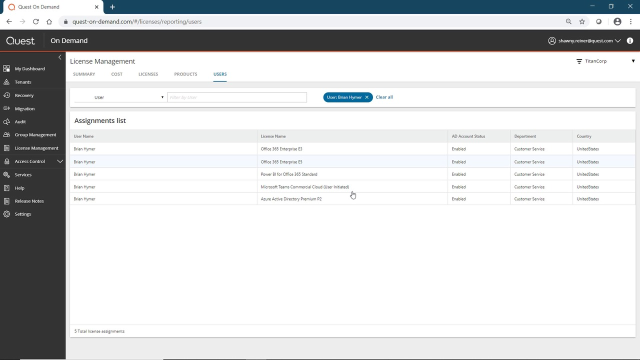
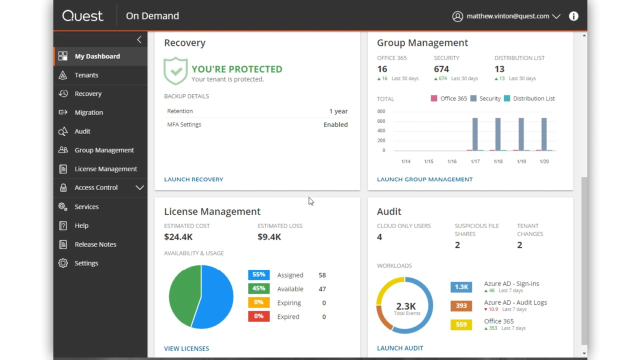
This will begin your free trial and bring you back to the Quest On Demand web interface. Now that we've requested our trial license and logged into the Quest On Demand dashboard, there's one final step that we need to do to make sure that license management has the most accurate information for your organization. Click on the left here or scroll down and click into license management.
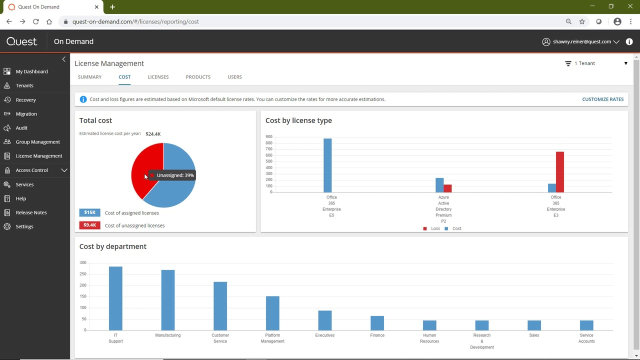
And then on the very first page, there is a link to customize rates. In license management, we include the default rates for the types of licenses that it detects in your organization. Oftentimes, though, that's not accurate. So simply choose edit and put the appropriate rates for your organization in place. Once you go back to the license management dashboard, it will update to reflect your more precise license costs.
So that has been a quick tour about how to create a Quest On Demand log in. Attach your tenant to the new organization, request a trial license for On Demand licensing, and finally, perform the initial On Demand licensing configuration. To learn more about how to use and interpret the information from Quest On Demand licensing, please follow the link on your screen. Thank you.
 05:43
05:43