Hi, and welcome to this Quest On Demand general onboarding video. My name's Luke and I'm going to take you through some basic tasks that need to be completed for you to actually get started with the product.
Now when you first sign up for On Demand or purchase a license, you'll receive a welcome email. And that's highlighted here. It'll contain information like your license and what product you have licensing for. It'll also contain some useful links like the status page of the services as well as useful KB articles on how to get started.
One of the first things you should familiarize yourself with is the On Demand status page. Here, you can view scheduled maintenance and the operational status of all the services, as well as past incidents. You can also subscribe to updates via email, text message, web hook, Adam and RSS feeds, and more.
Next, you have some options like using the Getting Started Guide or the useful KB links. But we're going to go over all this in this video. So one of the first things that you'll be presented with is the On Demand landing page. If you've already logged into On Demand, you can simply use your existing Quest log in that's tied to the licensing you received here. It's important to do this for licensing purposes, tracking, and ensuring that you get the right services when you log in.
It's also important that the email for this log in is your business email. If you're a new user and need to create a log in, you can simply click the Sign Up for New Account option and enter the information just as I'm doing here.
After you click Sign Up, you'll receive a verification email to your inbox. And you'll be asked to enter a code from that email which you do here. Then you're brought to the organization page. This is where you create your first organization and select the proper data center that you want to utilize. The organization name should reflect upon which business you want to utilize the services for. And the data center could be important depending on what your compliance requirements are.
So for this organization, we'll simply label it Onboarding because that's what we're using it for. Organizations can be thought of like a profile, for example, for all the businesses within your organizational hierarchy that are involved with the On Demand services.
And it's not just for organizational purposes either. If you're migrating multiple source tenants into a single target tenant, then likely you're going to have to create an organization profile for each of those source organizations so you can set up a migration project to the same target as the other organizations. It's also a way to ensure that staff are working on organizations that they should be working on. But keep in mind you can add and switch between organizations at any time within the On Demand console.
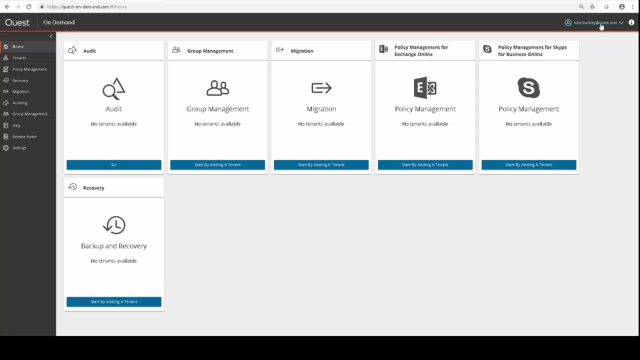
Upon creating your organization, you'll be presented with the On Demand homepage. And you should bookmark this for future use. And one of the first things we want to familiarize you with is the drop down menu with your log in. Here, you can access the region and switch between organizations, change the name of an existing organization, and sign out, et cetera.
So to create a new organization, you simply select Create New Organization. And you can label it as you wish and select the data center that's required or desired depending on your company needs. You can also access your Organization ID, which is important for support related inquiries here by clicking on your organization and taking note of this ID.
Next, we want to add our first tenant, right? So we select Tenants on the left nav bar and we select Add Tenant. We'll be notified that we need to select a Global Administrator Account. Now, you can designate a Global Administrator Account for this if you'd like. And you just enter the information here and click Accept on Granting the Permissions.
You can add other tenants as needed. But for now, we want to show you how to add Additional Admin Consent for a specific tenant. So in the Tenant section, you click Go on the tenant you want to Grant Additional Consent for. And you'll see various services listed here along with a Regrant Consent or Grant Consent option.
By clicking on Grant or Regrant Consent in the right section, you can specify the account that has permissions to perform the actions that are labeled on the screen-- for example, Basic Migration Capability or Mailbox Migration.
So in this case, we'll just grant it Basic Migration Capability. And we'll specify the global administrator account that we want to perform these actions. If we wanted to do the same for Mailbox Migration and Resource Processing, we would simply do the same thing for the other migration sections.
Next, I'd like to show you the Settings section. And in the Settings section, you'll be presented with a screen where you can download audit logs for specific services within the product. And you can specify a date range. And it simply downloads in a compressed zip format.
On the Permissions tab, you can actually add users that you want to have specific access to individual services within On Demand. So you would simply type their email and add it to the specific section of the product you want to grant them access to. And the Subscriptions section shows you the licensing information to what services you have access to.
Next, you'll want to know where to get the latest updates on the various releases that occur for On Demand Services. You'd go to the Release Notes section. And depending on what product you have selected in the left nav bar of On Demand, it'll bring up the release notes section for that specific service within On Demand.
And what
 08:01
08:01