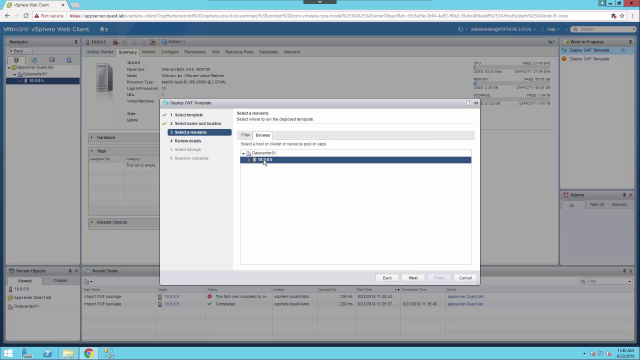
In this demo, I'm going to show you how to import the OVA template into an ESX environment. So what I have here is my vSphere web client. So I have a vSphere server running. For my demonstration, I'm using vSphere 6.5.0. And I have a data center called data center one. Then I have a single ESXi server in this data center, and this is running version 6.0.
The requirements to deploy the EVA is VMware ESX version 6.0 and above. The OVA file is approximately 10 gigs. As you can see, the one that I'll be importing in, it's about 7 and 1/2 gigs. You'll also need 16 cores at 2.3 gigahertz or higher and 64 gigabytes of RAM.
So to deploy an OVA, we can right mouse click and we can select Deploy OVF template. I will navigate to my OVA file. It's this one right here that we looked at before. We need to give it a name. This is the way it will show up in our server list in the vSphere web client.
We need to select the data center. We tell it where we want to deploy the OVA in the data center. So we'll put this on our single ESXi server. OK, we get some information about the template that we are importing.
We then need to select our data store. I have this data store here, which is 1.27 terabytes. And we will thin provision. We select a VM network.
Next thing we need to do is give it a fully qualified domain name. So in my case, I will type in td.quest.lab. We will need to make sure that td.quest.lab resolves to the IP address we're going to give it. And, of course, this would be an entry in our DNS servers.
We also need to fill out a password. So this is the password that you will use when you integrate Change Auditor with the threat detection appliance. We get a summary of all of the information we just entered. We click Finish to now deploy the OVA template. So at this point, the OVA has been successfully imported. And now we can work on connecting Change Auditor to the threat detection appliance.
To learn more about Change Auditor and the solutions it integrates with, please visit us online.
 04:00
04:00
