Hi, I'm Sean from Quest. And I'd like to welcome you to the Active Administrator server installation video demonstration. After you've downloaded and extracted the latest installation package, make sure you run the AutoRun.exe as administrator.
From the Install tab, we're going to Install the Active Administrator Server. Just click Next on the first screen. View the License Agreement. And then click Next when you've accepted the terms. Here you select the directory where you want it to be installed. And just click Install to begin the installation. The installation will take around 1 to 2 minutes, depending on server resources and such. I sped it up a bit for the purpose of this video.
So we're just going to click Finish. And then the Launch Configuration Wizard will start. Click Next to advance. From here you just click the Update License button, browse to the Licenses, just click on the dlv file and it will install the license. I'm going to speed this process up because I'm going to install all the licenses.
Here you need to enter a pass phrase to encrypt the Active Admin Data. It's very important that you take note of this password as it cannot be changed or restored.
Since this is a new fresh install, I'm going to create a New Active Administrator Configuration Database. Here you need to add the SQL Server name. If it's on an instance, add the instance also. Here's where you enter the database configuration parameters. I'm going to Accept all the defaults. But you can change the initialization file sizes. I'm going to have the installer Create the default security groups. And if you wanted to change the database and log file locations or directories, you could do so here.
Now we need to create the Archive Database. It's the same process as the last database creation. This is the same configuration settings as the last database, just click Next to go through it. Here's where you set all the Purge and Archive Settings. This will keep your database at a manageable size. All these settings are in the amount of days you keep.
You need to select a folder path to store the Active Admin Data. It stores templates, GPO history, AD backups, et cetera. You should have at least two gigabytes of space or if you have a large AD environment, 10 gigabytes is recommended.
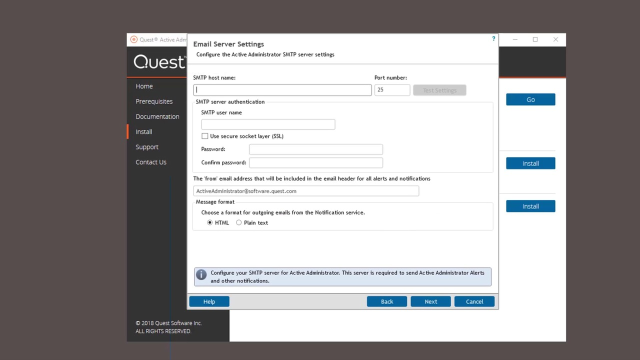
Here you need to enter your SMTP server that is used for relaying email in your environment. You need to add the credentials to authenticate to that server. You also have options to use SSL. And you can use HTML or plain text format for the out going emails from the notification service that sends out alerts and other notifications.
Now you're going to enter the owner's email address and select the features you want to Enable right out of the box. I'm just going to select them all. No changes will be made to AD. And no email notifications will be sent to any of your AD users during this process.
This is where you set the Active Template Delegation Enforcement Policy. This keeps your AD infrastructure secure by ensuring permissions you set remain in place and that you are notified when permissions are broken. Add email addresses for users that will receive notifications about delegations that are set to take effect or about to expire.
This feature backs up AD objects and provides the ability to restore objects or certain attributes. This message just tells you that you have a DC that allows you to recovery of users or computer passwords and asks if you'd like to turn the feature on to be able to restore them. All the settings on the screen are pretty straightforward.
Here's where you can add users to have unrestricted access to Active Administrator. Most of these settings can be changed and configured later in the AA Console Configuration module after the installation.
This is where the service accounts are configured for the Foundation Service and the Notification Service. These accounts need to be member of the Administrator's Group in all domains managed by Active Administrator. If you have a SCOM server, you can forward alerts and events and deploy management packs by entering the server name, username, and password.
And here is just a summary of all your configuration settings. Just take a look over them and click Finish to complete the installation of the server components. It's going to install the databases, and it's going to create all the settings that were just configured. And all green marks means a successful installation.
From all of us here at Quest, we thank you for taking the time to watch this video. And there'll be many more to come. To learn more about Active Administrator, check us out online.
 04:26
04:26
