Hello and welcome to another On Demand Migration video demonstration. My name's Luke, and I'm going to take you through the process of switching a user's mailbox and updating their Outlook profile to utilize the target account after all content has been migrated. One of the easier options for small deployments is simply to go into the File section of the Outlook client and add their target account manually by typing their target email address and inserting their target account password and proceeding through the wizard shown here.
But the main method in this video is deploying the Client Update Agent, which is much better for larger deployments and a seamless user experience. This is an area that some people overlook, because the main responsibility in a migration is to successfully and safely get all the content to the target. However, it's also one of the most important things, because what the end user sees after the migration is complete is also one of the most important factors of determining how successful a migration was.
We'll start with the source user's Outlook client. Our user, Megan Bowen, has many items in her inbox, as well as a full calendar. Megan's user account has been migrated from the source tenant to the target tenant, as well as their mailbox content. This means that Megan is ready to have her mailbox switched over to utilize the target from here on out.
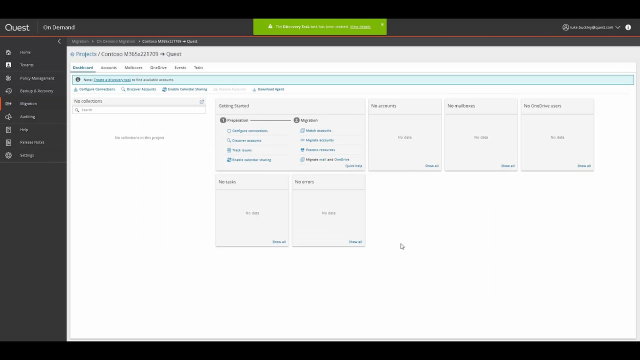
So in the Mailboxes section of the ODM console within the migration project, we select Switch Mailbox. We're presented with a window like this one. You'll notice something advising you to make sure you've already deployed the Client Update Agent in your environment. The Client Update Agent is what updates the user's Outlook profile to point to the target mailbox without them missing a beat.
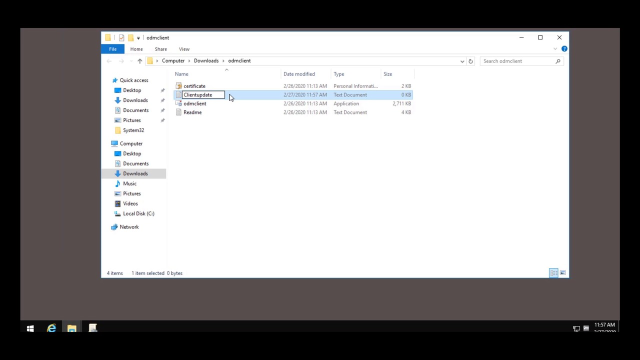
When you click on the Client Update Agent link, it brings you to another window that gives you the option to download the package. We'll have a closer look at what that package entails. Within the zip file there will be a certificate, an executable, and a Read Me. All of these are essential for the success in this process.
The certificate can be imported to the User Certificate Store through group policy or other methodology. And the ODM client executable can be run via logon script. So both of these things can be done on the administrative side without the end user having to do any sort of manual intervention.
The Read Me is extremely important, as well. It contains the specific command switch that you need to run with the executable when the end user logs in and the logon script is executed. And also contains some very useful usage instructions, such as deploying the certificate to all required computers. Next we're going to download the client and show you how to deploy it for your group policy, as well as the certificate.
So as shown previously, there's a download link. When you go to Switch the Mailbox with an On Demand Migration, it'll download a zipped package with a certificate, an executable, and a Read Me. We've just downloaded this package to our domain controller for the target or destination tenant or domain.
We're logged in as the Domain Administrator, and we go to the Group Policy Management tool. This particular domain is called Quest Demos, so we expand that. And underneath it we'll see a section called Quest Demos Computers. We've right-clicked and created a new policy called ODM Client Update Policy, for example. Then we right-click that policy and click Edit.
Within it you'll see both user and computer configuration. We'll expand computer configuration, then policies, than Windows settings. Then we expand security settings and public key policies. We right-click and select Import, and we see the Certificate Import Wizard. For the first window we click Next,
And then we are asked to select the file name. We select the certificate file that was downloaded. It's in PFX format, so you may have to change the extensions that this is looking for. We will set it with no password. We'll click Next, and we'll click Next again to import it into the Trusted Root Certification Authorities store. Then we'll click Finish, and the import succeeds, and we can enforce this policy.
If there is a specific computer you want to apply this to selectively, you can select it in this window here, simply by typing the name, clicking Check Names, verifying that it's correct, and clicking OK. Now that the certificate will be imported to all computers' Trusted Root Certification Authority store, the next step is to find a way to make the executable and command line run the way we want it to when a user logs on, so their profile updates. You can do this with the logon script, and the easiest way is to create a batch file.
You can do this by creating a new text document, labeling it accordingly, then opening it, then using the command line information from the Read Me. We simply paste it within the batch file script. There are many tutorials out there, how to create a simple batch script, and this is really fairly simple in comparison.
Here you can see the command line info we used from the Read Me file. So we ensured it was pasted in the batch file with quotations around it, along with the full UNC path that we're going to use. UNC path is just like a network share. So you can use a pass to any universally accessible network share, as well.
And we've saved the file as a .bat extension. Now we have to create a logon script policy for the users involved. Since we're targeting a directory user, we'll expand Quest Demo's directory and Users and Groups. And you'll want to right-click on the OU that you know the user resides in the organizational unit, and create a new policy. In this case, we'll just call it logon profile update, and we'll right-click it and edit it.
So instead of computer configuration like we did last time with the certificate, this is user-specific. So under User Configuration, we will expand Policies, then Windows settings. And you'll see Scripts-Slash-Logon. We'll select that and then double click Log On in the main window. You'll be asked for some details, like a Show Files button and to add an actual batch file.
First we'll click Show Files, and we'll make sure all the files associated with this script are within the directory that opens up, which is the UNC path. And we'll copy and paste them to this location. Then in the wizard, we'll click Add, and we will browse to the script that we're going to utilize. Then we'll click Apply and OK.
Now replication has to complete between all the domain controllers associated with this domain for this policy to fully take effect. This can take a little time, depending on your domain's configuration. But within Command prompt on the domain controller, you can perform a rep and min slash sync Alt command, but this is at your own discretion. Not every environment is well-equipped to handle this. And we're simply doing it because this is a lab environment and very controlled.
Then once replication finishes, and the policies are deployed, the certificate will be imported into their machine's Trusted Root Certification Authority store, and this logon script will run. We're going to show you what it would look like running on the end user's machine. And after deploying the certificate and agent all necessary computers, you can finish the Switch Mailbox wizard and run the switch task.
And for demo purposes, we'll run the client profile, updating utility manually here through command line, just so you can get an idea of what it does. Ultimately, it uses information obtained during the migration process and the migration project to determine what the source profile would look like and what the target profile looks like. It then switches over to the target profile without having to create a brand new one. And it also saves the end user having to connect a new mailbox, such as their target mailbox, manually at all throughout this process.
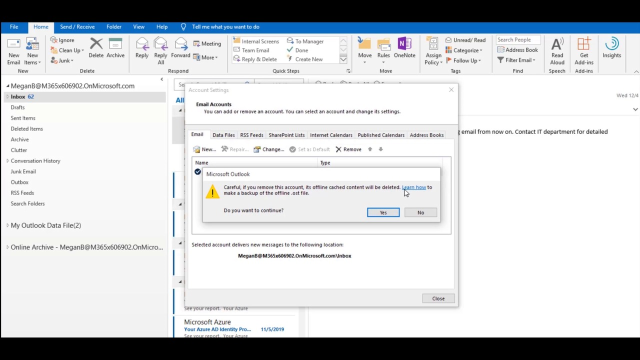
When it executes, it will ask you to shut down any Microsoft account-related applications that may be running. This includes Skype, Skype for Business, Teams, and, of course, Outlook. After the tool executes successfully, you then load up Outlook, and some profile configuration will take place.
And as you can see, the target tenant's mailbox is the primary mailbox for this profile now. And as we can see, all content that Megan needs is there, present, and usable. She's ready to keep working just like nothing ever happened.
So in this video we started with the user that had all of their content migrated. But when we went to create a Switch Mailbox task for that user, it warned us that we should have the client profile update agent present on the user's computer and ready to go. We showed you what the process of doing that entails and what's required to do it and what the tool will look like when it executes.
So when the switch mailbox task is complete and then when you execute the utility on the user's workstation, their profile is updated, and they don't notice a thing, other than they're using their target mailbox and email address. Through the Switch Task, mail redirection is also applied, so that any mail sent to the source email address is then forwarded to the target.
That concludes this video demonstration. Thank you for watching. To learn more about Quest On Demand or to access a free trial, please visit us online.
 10:07
10:07