
In Virtual Standby with AppAssure - Part 1:Creating a Virtual Standby I demonstrated how to create a Virtual Standby VM. This blog is part 2 and shows how to properly test the VM and the little tricks that you should know.
Once the Virtual Standby has been configured and the first export has finished it is time to test. It is extremely important to test Virtual Standbys ahead of time to ensure that you are familiar with the process and that there are no issues with the conversion. Occasionally in testing it has been observed in some cases that VM’s take a longer time to boot due to Windows driver issues. Testing ahead of time will let you know if there are any driver issues that need to be worked out in your environment.
In this guide the Virtual Standby will performed in the local environment on a DL4000 appliance. If you are testing a more complex scenario such a fail over to a remote Core then a few extra steps will be required before powering on the standby VM. For this test the source machine SQL-2k14-001 has been disconnected from the network to simulate a failed SQL server.
Starting the Virtual Standby is as simple as browsing to the hypervisor and clicking start. In testing on a DL4000 appliance the VM took around 3 minutes from the time Start was clicked until the time the machine was at the login screen. If you are doing a Virtual Standby of an Operating System prior to Windows 2012 you are likely to see a message that the system was not properly shutdown. Simply acknowledge this message and continue to boot the VM. In some cases it a reboot may be necessary to add new hardware.
Figure 1: Starting SQl-2k14-001-VS in Hyper-V Manager
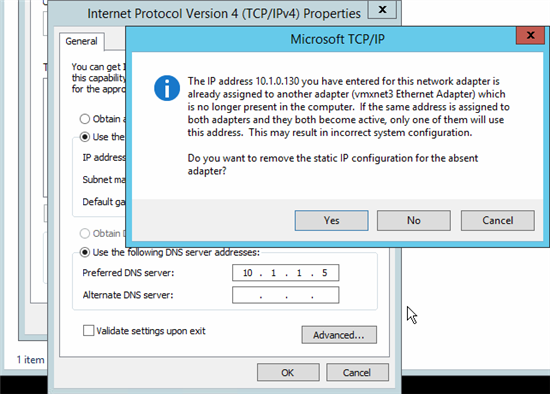
Since this is a test lab the IP address of SQL-2k14-001-VS was set after the initial login. For simplicity SQL-2k14-001-VS’s IP address was set to 10.1.0.130, the IP that the source machine used. When doing this you may get a notification that another NIC already has this IP. Simply say yes to the notification and remove the IP from the now dormant NIC (see Figure 2).
Figure 2: Setting a static IP
Once a static IP has been configured you should then proceed with the installation of any hypervisor related tools such as Hyper-V Integration services or VMware tools. This step is not necessary for a temporary machine but it a good idea for a machine that will be run long term in production. In this test, with a Windows 2012 operating system Hyper-V integration services was installed automatically on the first boot.
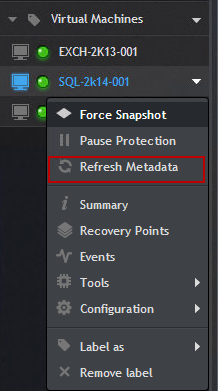
To complete the disaster recovery test browse to the AppAssure Core and force a snapshot of the standby VM. While creating a snapshot is not necessary it is a good idea if you plan to run the virtual standby for more than a few hours. If doing replication, be sure to browse to remote AppAssure Core and not the local Core. If the VM is not showing as available you can click on the agent and choose Refresh Metadata. If after a minute or two the agent still does not show up then you can restart the agent service on the VM and that should start the agent communicating with the AppAssure Core.
Figure 3: Refresh agents metadata
In testing with a Widows 2012 VM total time from powering on the Virtual Standby to having it ready for production took less than 10 minutes. While the time to get a fully functional VM may depend on several factors the most important factor is familiarity with the process. Be sure to test and document the Virtual Standby process in your environment
Items of note
When performing a Virtual Standby there are certain facts that you should be aware. Below are a list of possible situations that you may run into and should be fully aware of.
- When exporting machines as a Virtual Standby some may take a long time to boot. If this happens it is most likely due to driver issues. Try hitting F8 and booting the machine in low resolution mode or safe mode.
- There are some chances that the first snapshot after failing over to a Virtual Standby maybe be a base image. This may have an impact on your environment as it will put an additional load on Hypervisor, network and storage.
- When powering on a Virtual Standby you may get a message stating the operating system did not shutdown properly. You can simply acknowledge this message and continue the boot process. This message occurs with pre Windows 2012 operating systems. In this case it is also very likely Windows will need to be rebooted once to complete the new hardware detection process.
- If you plan to run VM that was previously on the VMware platform on Hyper-V for an extended period of time be sure to remove VMware tools. Failure to do so can result is degraded system performance.
- After using a Virtual Standby VM and failing back to the original machine there at chances that AppAssure will create another base image.
- After using a Virtual Standby VM and failing back to the original you may need to recreate the Virtual Standby VM again or edit the task and ensure the appropriate volumes are selected for export.
In the comments section below please let me know what you think of this blog and if you find it helpful. Also let me know what other topics you would like me to talk about.
