

Part two of this blog series may be found here
A few days ago, I was working with a MSP customer that had the same issue on multiple Exchange servers hosted by his own customers. Specifically, in that particular setup, due to the memory-hog behavior of Exchange, other applications including our own Rapid Recovery agent were not performing properly.
I suggested that we may attempt reducing the Exchange memory consumption and he offered me his own company environment (which was set up similarly with the ones of his own customers) to make it happen.
Being confronted with such a degree of confidence, motivated me. To make a long story short, I was able to put together a PowerShell script to do that on multiple environments quickly and on a consistent manner.
My research showed that Exchange behavior (including memory usage) may be controlled via Active Directory. Since I am not super knowledgeable in the deep entrails of Active Directory (despite many years of systems administration) and since “Do No Harm” is or should be the logo of any support engineer, I took small, safe steps in approaching this issue.
This blog post will walk you through my own discovery journey and I invite you to work with me. I know now that I could have been more direct in my coding approach but this would skip some of the logical steps that allow better understanding how to deal with navigating through ActiveDirectory and modifying attributes using PowerShell.
I would like to take the opportunity to thank to my colleague Wayne Heyer for giving me the opportunity to use his very elaborate lab environment to illustrate this post.
Let’s begin…
First step is to figure out if there are attributes allowing putting a cap on Exchange memory Usage. To do it we need to navigate the Active Directory Schema.
As you already know, the schema is the Active Directory component that defines all the objects and attributes that the directory service uses to store data. The physical structure of the schema consists of the object definitions. The schema itself is stored in the directory. (TechNet)
In layman’s terms the Schema is a collection of blueprints that show what properties may (or may not) be present on an object. In this case it is one or more Exchange Servers. Each Exchange server in the organization has (or may receive values for) these properties. One needs to differentiate between the properties that have values and the ones that do not. Giving a value to a specific property, attaches that property to the object. If the value is removed, the object does not feature that property anymore. To make an analogy, all cars are designed to have wipers (schema). You add wipers to a car (set attribute value) – you can turn them on. You remove them well… you are “wiper-less” until you add them back.
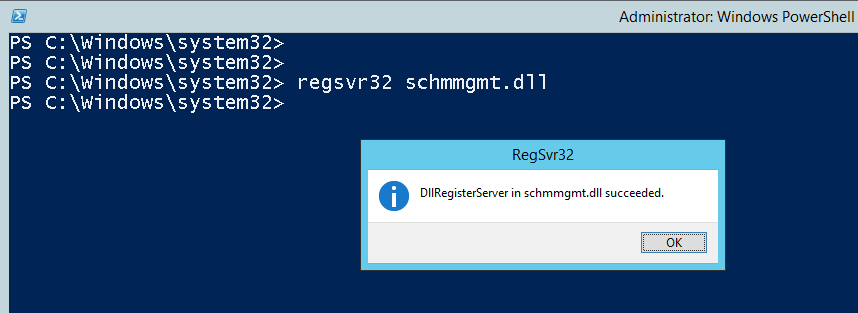
But I digress. To find out what are the attributes that may allow changing the Exchange memory settings I used the Active Directory Schema snap-in. It is not available by default. I had to register a .dll first. This is how you do it. Open an elevated Cmd or Powershell console and run the command below.
Next, type mmc in the same window, and hit Enter. On the File menu, click Add/Remove Snap-in .
Under Available snap-ins , click Active Directory Schema , click Add , and then click OK.
The mmc shows two folders: Classes and Attributes. We need to navigate the Classes folder. Please note that it may take some time to have it fully populated.
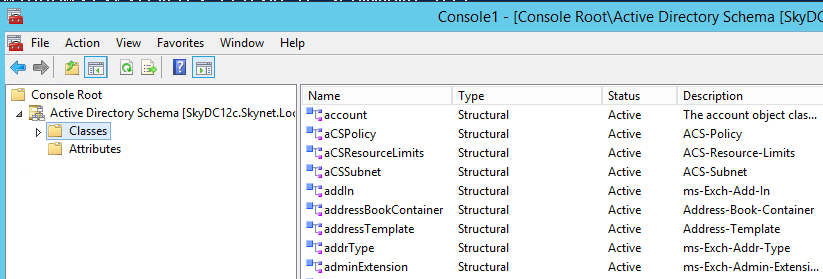
There is no way I know of to search through these classes. However, an educated guess told me that the attributes I am looking for must be related to the Information Store as it is the Exchange Component that uses the most amount of memory.
After a few tries I was able to identify the information store. It’s active directory name is “ms-Exch-Information-Store“ and the category (which is listed in the Classes folder) is “msExchInformationStore” .
The right pane is NOT sorted alphabetically. After sorting it by clicking the name column header, it is easy to identify 3 attributes: msExchESEParamCacheSize, msExchESEParamCacheSizeMin and msExchESEParamCacheSizeMax.
The first attribute seems to set the Exchange Memory usage to a fixed size. If it is indeed the case, it makes more sense to use the other two values to allow variations in the memory usage.

Later, I have found out that I could have identified the same values in a logical manner using ADSIEdit.mmc. However, when I tried using it the first time I did not find any useful information for the task at hand. That was due to EDSIEdit using LDAP by default when, for our task, GlobalCatalog is needed.
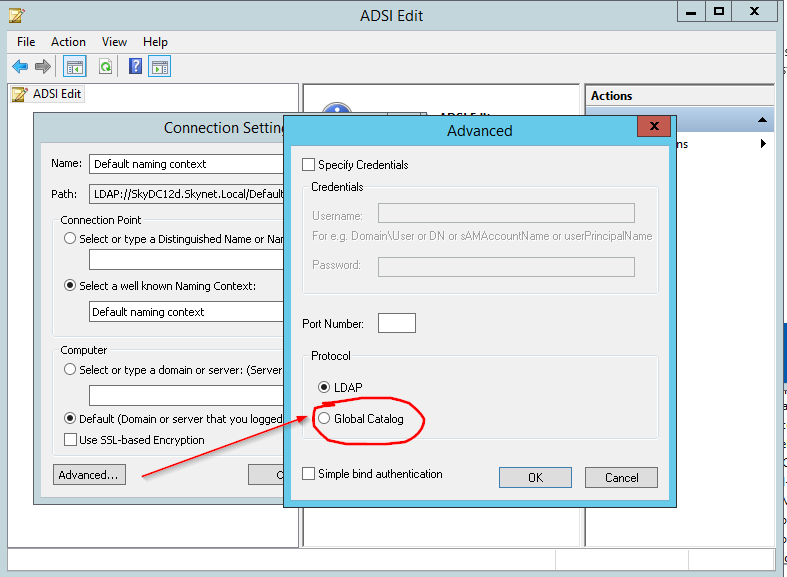
Additionally, the “Show only attributes that have values” needs to be UNCHECKED in the properties of the domain.

To summarize the current findings, we have two Active Directory attributes that set the limits of the memory cached by the information store and we need to find a way changing them. Moreover, some tedious research shows that the values held by these attributes are not (multiple of) bytes but database pages. The size of the pages is 4KB for Exchange 2007 and 8KB for any Exchange version since.
Time to begin doing some PowerShell stuff.
The script I intend to design together with you should have the following functionality determined by a few parameters.
1. I want to be able to set the minimal and the maximum amount of memory used by Exchange.
To do this, I need a specific parameter set (Setexec) two mandatory parameters –MinSize and –MaxSize. The entered values may be in KB, MB, GB or even TB if so much memory is available…
2. I want to be able to list the current Exchange memory settings. The switch –ListValues parameter circumscribed by the List Parameter set would do.
3. I want to be able to reset the values attributed to the msExchESEParamCacheSizeMin and msExchESEParamCacheSizeMax attributes. The switch –Reset parameter circumscribed by the ResetExec Parameter set would take care of this.
4. At last but not at least I want to be able to log all activity so I know when and with what effect I used the script. To do this, I introduced a new parameter called –LogPath that allows entering a path for the log and, if not specified creates a default log in my Downloads folder.
Please note that I do not want to enter manually the name of the Exchange server to process. I will pick it up from Active Directory. If more Exchange Servers are present, I want to be able to choose one or more to process at the same time.
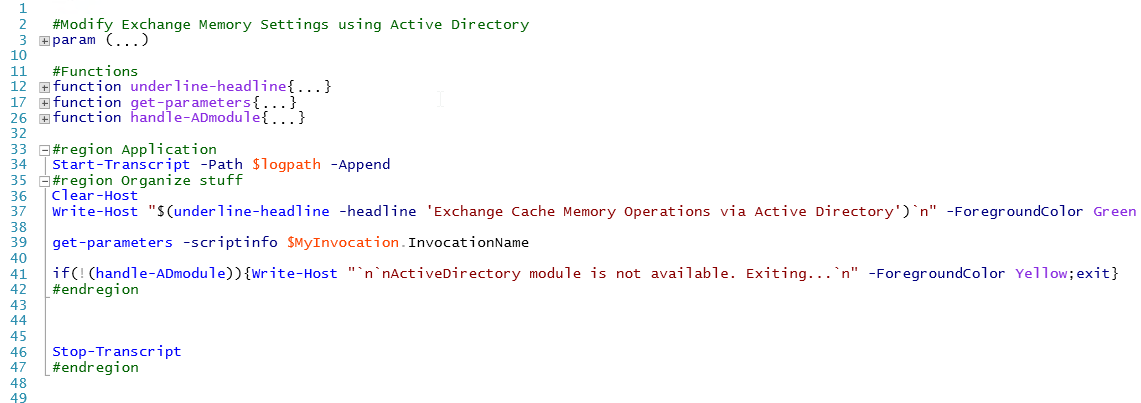
This is how the Parameters Block looks like:

To continue, I want to clear the screen, begin logging and set a title.
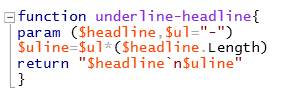
To have everything neatly displayed, I wrote a function that receives a –headline as a string parameter and an –ul parameter to specify the underline character and returns a string that when displayed shows the underlined headline. We will need it later in the script as well.
Here it is:
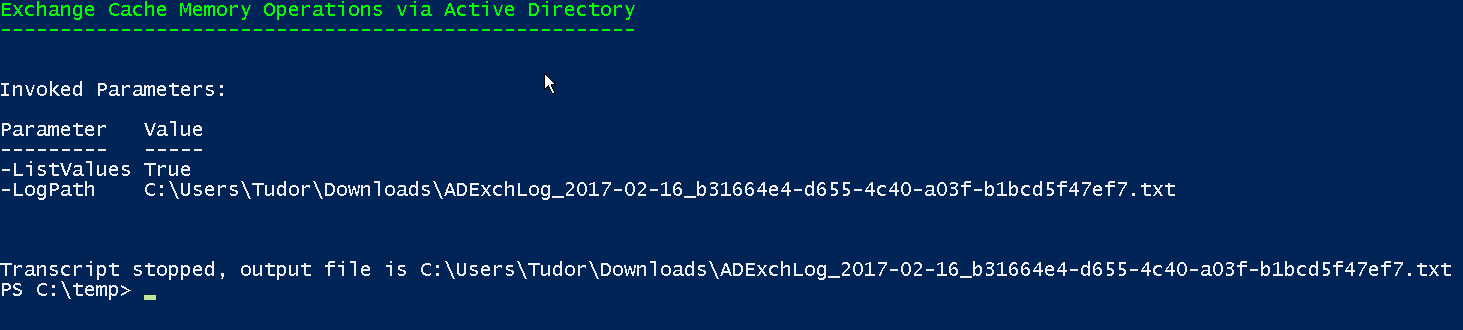
Next, to avoid parameter confusion and have a clear record of all the elements I used when running the script, I want to write some code to show me the parameter values. As you all know, you can find out the path of a script (when run from a PowerShell console) using the InvocationName property of the $MyInvocation variable. Unfortunately, this does not work if called from inside a function. As such, I use $MyInvocation.InvocationName as the value of the –scriptInfo parameter in the get-parameters function. The function returns a string containing a header and a formatted table showing the parameters I used and their value, as shown below:

Since everything from this point on relies on Active Directory functionality, thus the ActiveDirectory PowerShell module will be intensively used, it makes sense to write a new auxiliary function that handles this module.
This function does not require any parameters. It checks if the ActiveDirectory module is available, checks if it is loaded and if not it loads it and returns $true.; otherwise it returns $false. Based on the returned value, the script continues to run or it is stopped. This is achieved by a line in the main body of the script.
One may say that the most efficient way of coding this would have been to check if the module is loaded and if it is not to check if it is available or just handle the error generated if loading the module fails. However, I decided to take the “human logic” approach to stay consistent with the rest of the upcoming script. The code is shown below:

Time to start organizing the main body of the script to make sure that whatever I have already done works. For clarity, I will write everything inside a region called “Application” that I will organize in multiple sub-regions.
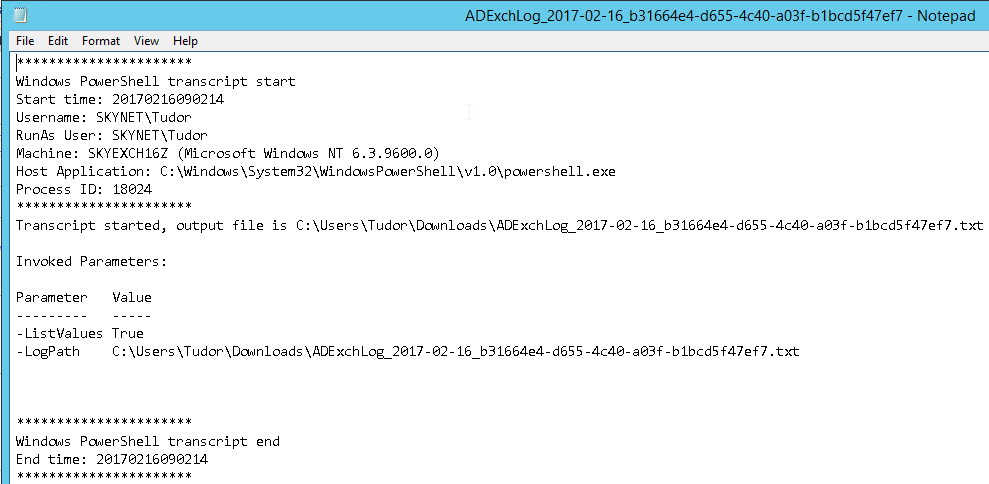
Please check the Start-Transcript line. It shows that, if the log names are NOT calculated (as I do in the default value of the log path) and the same log name is used every time, all results are appended to the same file. This may prove to be handy in some situations as allows keeping in the same place the information related to multiple runs of the script.
Now, I will launch the script from an elevated PowerShell console, with the –ListValues parameter, start logging, clear the screen, write the title and list the parameter I used. Then we will take a look at the log.
This is the command line:

This is the on-screen result:
And, this is the log:
At this point the “bones” of the script have been laid out. We need to get into the business of adding some flesh on them. However, this will be done in my next blog post.
