

Recently we had a customer reach out to us asking about using the import feature of Toad Data Point.
They started out asking about importing an Excel spreadsheet. We were able to show them how they could do that and even limit the number of rows that could be imported. They had a large spreadsheet and only wanted to import a subset of these records.
One of their concerns was that their spreadsheets were very big, with hundreds of thousands of rows. For this we suggested that they consider breaking up the spreadsheet into multiple spreadsheets based on a data range. They had eluded to the fact that there were ranges of customers/widgets/parts, whatever they were working with. This made it easy, in our opinion, to break up the spreadsheet.
Then they asked about importing a text file because sometimes their customers would send a text file instead of a spreadsheet. They weren't sure TDP could import txt files. We explained to them that they could in fact do this.
What you will see below are the steps involved to import a txt file.
To create this txt file I saved a spreadsheet to a text file in Excel. Excel recognized the data, obviously, and saved it as a TAB delimited file, which I named tab-text-file.txt
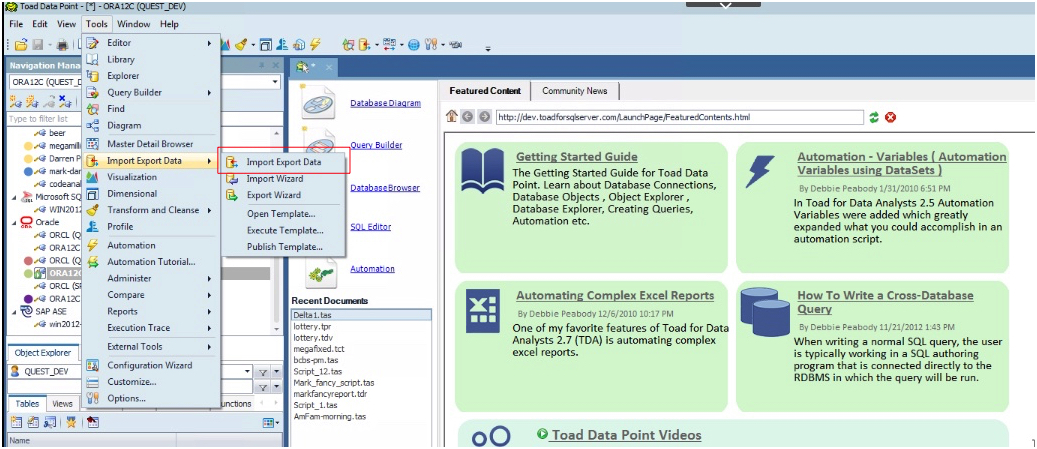
Then I went in to TDP and opened the Import Export Data Wizard from the Tools menu:
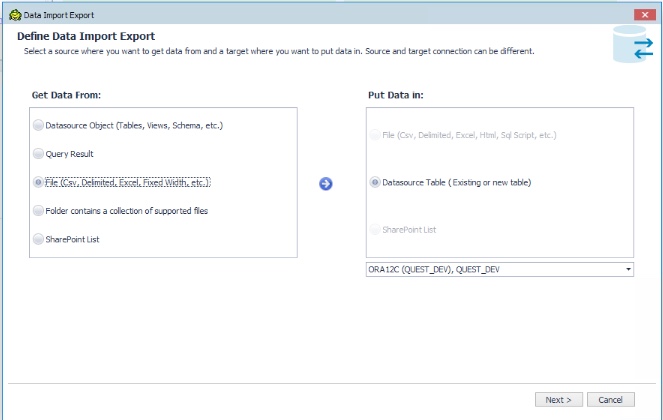
Then I chose FILE from the data source menu on the left and decided what I wanted the target to be, in this case a table in a database:
Next I selected the file that I wanted to use for the Import:

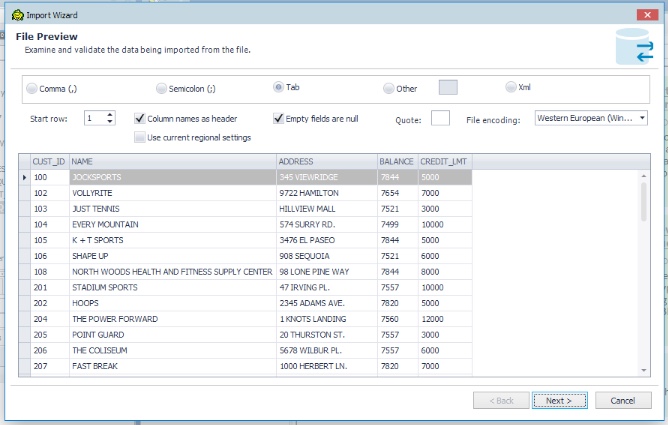
When you click on the Open button the Import Wizard will open to the File Preview window.
Below, you can see that the Wizard has already determined that this is a TAB delimited file and it displays a sample of the data in the file. You have some customization options you can choose but I am just going to use the defaults and click NEXT.
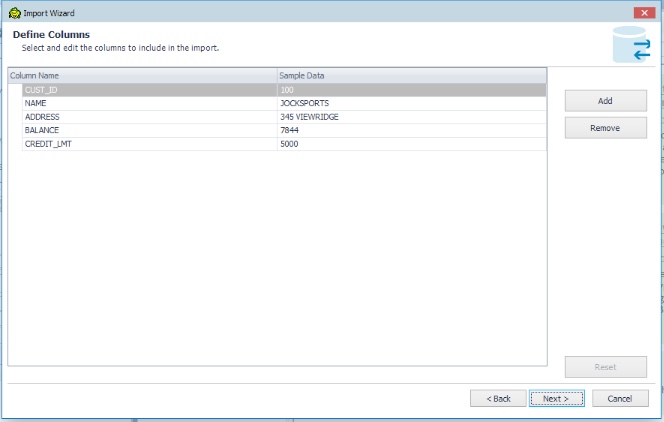
This screen gives you the option to select the columns you want to import. I am going to click NEXT and import all of them:
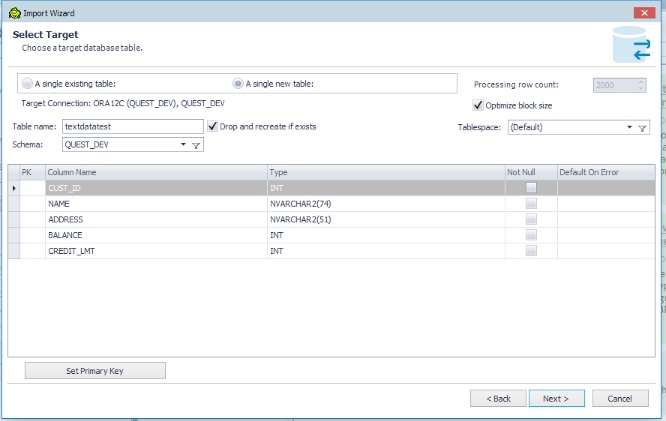
Earlier I had chosen to import into a database table. This window gives you the option to import into an existing table or create a new table. I am going to create a new table named 'textdatatest'.
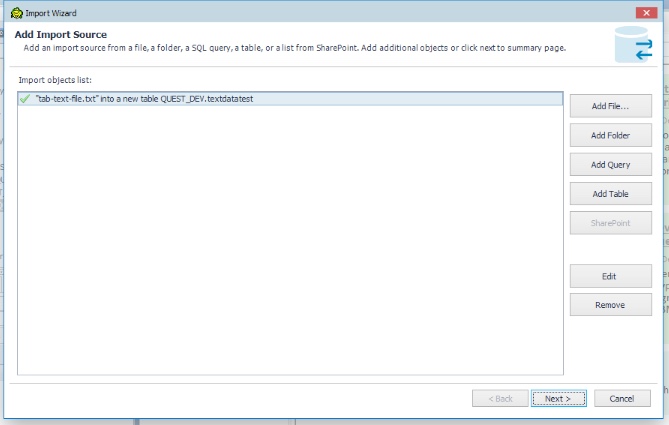
The next screen that opens is a verification/addition screen. It shows the file I want to import but you also have the ability to import multiple files. You could have 2 or more text files or spreadsheets and import them into different tables in one job stream.
After clicking NEXT in the above screen the 'Save Settings as Template' screen opens:
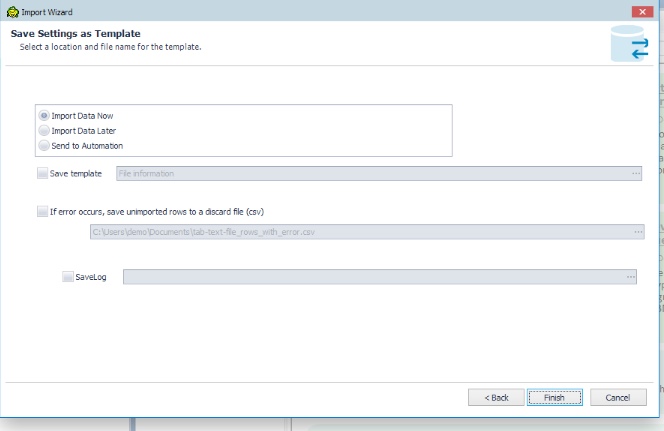
The 'Template' screen that just opened has several options to help with the import process. For my import I chose "Import Data Now" but you may want to "Import Data Later" and schedule this job or you can choose the "Send to Automation" option and automate this process.
Automation is very helpful if you are going to run this process repeatedly. Maybe you run this process every night, or even once a week. The automation feature allows you set up the job to run as needed and you can simply check the results after it runs.
This screen also allows you to capture any records that did not get processed and put them into a 'discard file'. This gives you the chance to see the 'bad' data, fix it, and re-import it.
You can also create a logfile for this job.
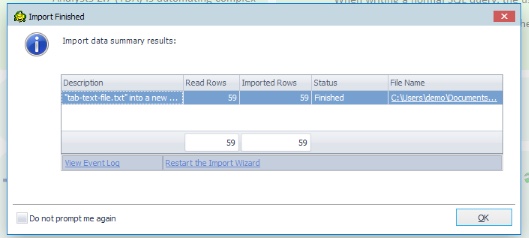
Clicking on the 'FINISH" button will start the import. When it finishes, which may take a few minutes depending upon your data load, you will see the window below. This 'summary window' will tell you how many records were read from the import file and how many were inserted into the table.
Hopefully they match :)
Click "OK" to close the summary window. This will take you back to the "Object Explorer" window and you can see the new table you just created and by clicking on the 'data' tab on the right-side window you can see that the data is there.

Now you have successfully imported text data into a new database table and your business processing can continue on with the new data.
You could just as easily import this text data into an existing table, that is one of the options on the target window in the Wizard, and continue your business processing with the new data in an existing table.
Feel free to experiment with this utility and let me know if you have any questions, or if you find any cool tips and tricks you would like to share.
For more information about Toad Data Point and all of its features visit us on the Toad Data Point Community. There you will find videos and helpful information about the whole Toad family of tools.
-Mark Kurtz