
Our team is starting to see an uptick in Linux installs for Foglight components, specifically the Foglight Agent Manager (Fglam). Most of these are done at the command line, which can make some settings less than obvious. Things get interesting when the Foglight Management Server (FMS) is set to allow https (secure http) only, or the situation dictates https only.
If you are able to use http, then you can start the Fglam installer with:
./FglAM-5_9_2-linux-x86_64.bin -- allow-unsecured
which will allow you to enter the http URL to the FMS. You can now stop reading this blog too!
However, when testing the FMS url for connectivity, a connection or authentication error sometimes shows up.
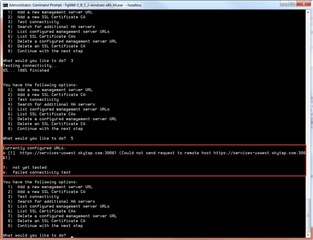
The first setting to try is adding the ssl-allow-self-signed=true and ssl-cert-common-name=quest.com values to the URL:
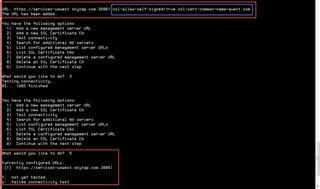
In this environment, those settings allowed the use of the default "fms" certificate issued to quest.com. The installation can then proceed.
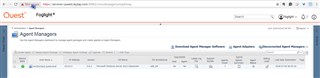
Navigating to <Foglight Agent Manager home>/state/default/config and looking in fglam.config.xml, the following section is added from the installer:
<config:http-upstream url="https://services-uswest.skytap.com:30061" ssl-allow-self-signed="true" ssl-cert-common-name="quest.com" compressed="true"/>
</config:http-upstreams>
Notice that the parameters during the initial install or subsequent re-configuration are entered as a comma delimited list, but they are stored in the configuration as space delimited. Important! If you need to update the common name or make another change, this note could save you some time.
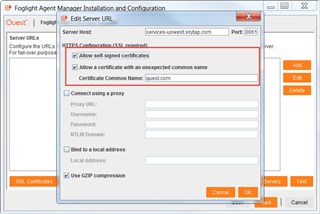
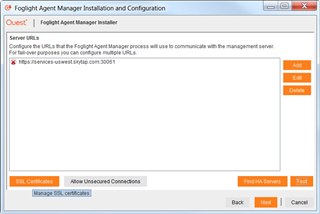
Using the GUI version of the Fglam installer, the same settings as above when entering the URL are much easier to set. Click 2 boxes and add "quest.com" if it's not already there.
It is now more common to have a CA (certificate authority) issued SSL certificate, or an in-house signed certificate. In that case, an SSL certificate needs to be imported for use by the Fglam.
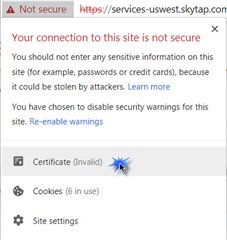
To find the certificate that the FMS is using, open the connection to the FMS in a browser and click the certificate name or the "not secure" icon next to the URL:
Click on Certificate:
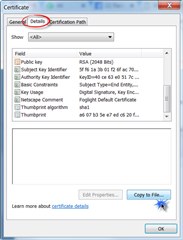
Then select the Details tab and click "Copy to File":
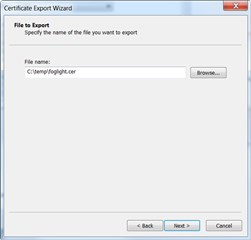
Follow the certificate export wizard:

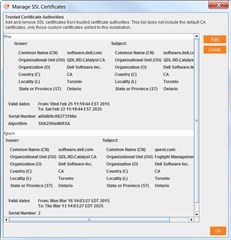
In the GUI Installer, you can import the certificate generated above via the SSL Certificates button:
Use the Add button, provide an alias for the certificate (eg. fglam) and browse to the .cer file.
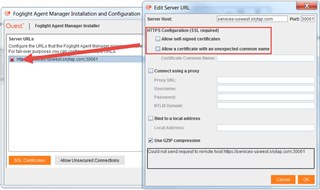
If the certificate is generated by a non-CA, then the "allow-self-signed" parameter still needs to be enabled:

What about our old friend, the command line installer? Option 2 allows the addition of a certificate, and the format "alias=path to cert/cert file.cer" is used:
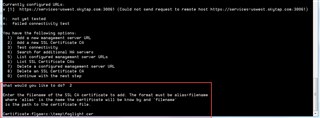
After that, #3 to test the connection, #5 to list and verify the successful connection, then 0 and a few more Enter's and the install is complete.
For more information, visit Foglight database monitoring to download a free trial.
