
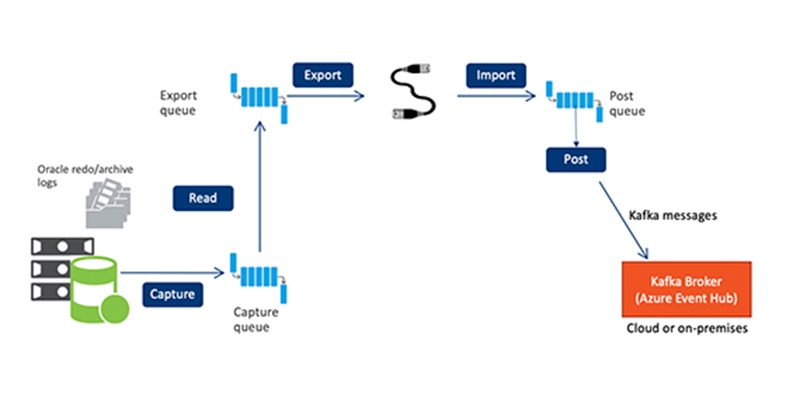
In my last blog, we discussed various business uses for turning Oracle database transactions into “business events”, and how SharePlex can be used to capture Oracle Change Data and write that data to a Kafka message queue.
In this blog, we’ll look at how to connect SharePlex to Azure Event Hub.
Collect Event Hub Information
In order receive or consume the data coming from SharePlex, you’ll need an Azure Event Hub Namespace with Shared access, an Event Hub inside that Namespace and a container. Please see your Azure documentation for information on how to create these.
For the purposes of this blog, our Namespace is named “SPEventHub1”, the Event Hub itself is named “SPEvent1”. You’ll need these, as well as the Connection string-primary key.
Configure SharePlex
Initial setup
Install the SharePlex binaries on your source system.
Make sure the SharePlex source server has network connectivity to your Azure server, using the hostname and port from the Namespace setup.
Start sp_cop in the background from the Unix command line or start the SharePlex Windows Services.
The following commands will be issued through the SharePlex Command Line Interface, sp_ctrl. Start sp_ctrl from the Unix command or click on sp_ctrl in Windows.
Create a config file
Create a config file to replicate your source tables to a Kafka target. Since the post process (which is a Kafka producer) can run on any server, the routing map should reflect the hostname of the SharePlex server that's running post, probably not the Kafka broker. For this example, we'll run post on the source server. You can use the “copy config” and “edit config” commands in sp_ctrl to create the file. You can use the “expand” keyword and wildcards to select multiple tables, and the “not” keyword to exclude tables
Here’s an example config file:
datasource:o.p19c
#source tables target tables routing map
qarun.tab1994 !kafka splexsource.mydomain
Save the file, then use the “verify config” command to be sure the file is formatted correctly.
Issue a “stop post” command to keep post from starting before we complete the setup, then use the “activate config” command to activate the config file
Configure the Kafka target
The SharePlex kafka producer, or post process, is configured with the “Target” command. Make sure post is stopped by using the “status” command before you proceed.
Enter each of the following commands as shown. Use the names you selected in the Event Hub setup.
Set the Kafka version
Target x.kafka set kafka api.version.request = true
Set the Kafka broker (Hostname - yours will be different)
Target x.kafka set kafka broker = SPEventHub1.servicebus.windows.net:9093
Set the Kafka encryption method and username
Target x.kafka set kafka sasl.mechanisms = PLAIN
Target x.kafka set kafka sasl.username = $ConnectionString
Set the Kafka password (connection string-primary key – yours will be different)
Target x.kafka set kafka sasl.password “Endpoint=sb://speventhub1.servicebus.windows.net/;SharedAccessKeyName=RootManageSharedAccessKey;SharedAccessKey=xxxxx”
Set the Kafka security protocol
Target x.kafka set kafka security.protocol = SASL_SSL
Set the Kafka topic name (yours will be different)
Target x.kafka set kafka topic = spevent1
Verify the Kafka settings
Use the command “target x.kafka show” command to list all of the settings for the Kafka target
Start Post
Use the “start post” command to restart the post process. You can verify that post is running by using the “status” command.
Replicate and verify data
At this point you can make changes to your source table. After you have performed a few operations, make sure the post queue is empty using the “qstatus” command in sp_ctrl. If there is any data backlogged in the post queue, correct any issues with connectivity or names before you proceed.
Verify the data in Azure Event Hub
Connect to your Azure portal and from the Home screen navigate to your storage containers. Find the Event Hub Namespace and navigate to Event Hub.
Under your Event Hub name, you should find a folder structure. Navigate to the LATEST folder in the structure, where you will find .avro files, which will grow as SharePlex replicates data. Click on the latest file and select “edit”. You should see the data from SharePlex, in JSON format with some additional binary information.
These files can be read directly by Azure Synapse.
I hope you find this blog useful. To request more information, or a free trial of SharePlex, click here.