Recently, I had a customer call and ask if Quest had any tools that could help with upgrading their SQL Server 2016 instance to SQL Server 2019. They had already tried to upgrade once but performance was so horrible that they had to revert to their 2016 SQL Server instance - causing even more ‘horror’!
In most of the cases, performance degradation after a SQL Server upgrade is because some queries just performed better with the older version’s optimizer (in this case, 2016). Prior to SQL Server 2014, the database compatibility level of your user databases wasn’t typically an important property to be concerned with from a performance perspective. However, the newer versions include a new cardinality estimation feature that can cause poor performance in some queries. The good news is that the database compatibility level can be changed to any supported level with a simple ‘ALTER DATABASE SET COMPATIBILITY LEVEL = xxx’ command. The following chart shows the major versions of SQL Server, their default compatibility level, and the supported compatibility levels:
|
SS Version Default Compatibility Level Supported Compatibility Levels |
|
SQL Server 2019 150 150, 140, 130, 120, 110, 100 |
|
SQL Server2017 140 140, 130, 120, 110, 100 |
|
SQL Server 2016 130 130, 120, 110, 100 |
|
SQL Server 2014 120 120, 110, 100 |
|
SQL Server 2012 110 110, 100, 90 |
|
SQL Server 2008 R2 100 100, 90, 80 |
|
SQL Server 2008 100 100, 90, 80 |
|
SQL Server 2005 90 90, 80 |
|
SQL Server 2000 80 80 |
Best practice is to upgrade to the newer version of SQL Server, change the database compatibility level to match the older version for the user databases of interest, then run your workload. To find problematic queries while running your workload, change the database compatibility level back to the default level of the Instance. For example, this customer could have upgraded their SQL Server Instance to 2019, changed the compatibility level to 130 (2016) for their user databases. They could have then run a normal workload for some period, then change the compatibility level to 150 (2019). At this point, they should have been able to find out which queries degraded by comparing execution plans and response time. Microsoft’s advice is to use query store for comparison. The downside of doing this, is that you must turn on query store for every database that your application is hitting which might affect performance. Also, query store doesn’t monitor queries that are run in tempdb or master database.
A better solution for upgrading SQL Server to a newer version is to use Quest Foglight to monitor the entire upgrade process. Let Foglight inform you of any plan changes, degradation in response time, and overall workload health. You can even use Foglight’s comparison feature to quickly view the entire workload before and after the upgrade to ensure success.
Here is an example of an upgrade from SQL Server 2017 to SQL Server 2019 while using Foglight to monitor and help control the upgrade so we can stop the ‘Horror Story’ from happening.
After upgrading to 2019, you will want to ensure that your application databases are set to the previous version’s compatibility level. In this case, I’m upgrading from 2017 so I set the compatibility level to 140 for the test database (see figure 1).
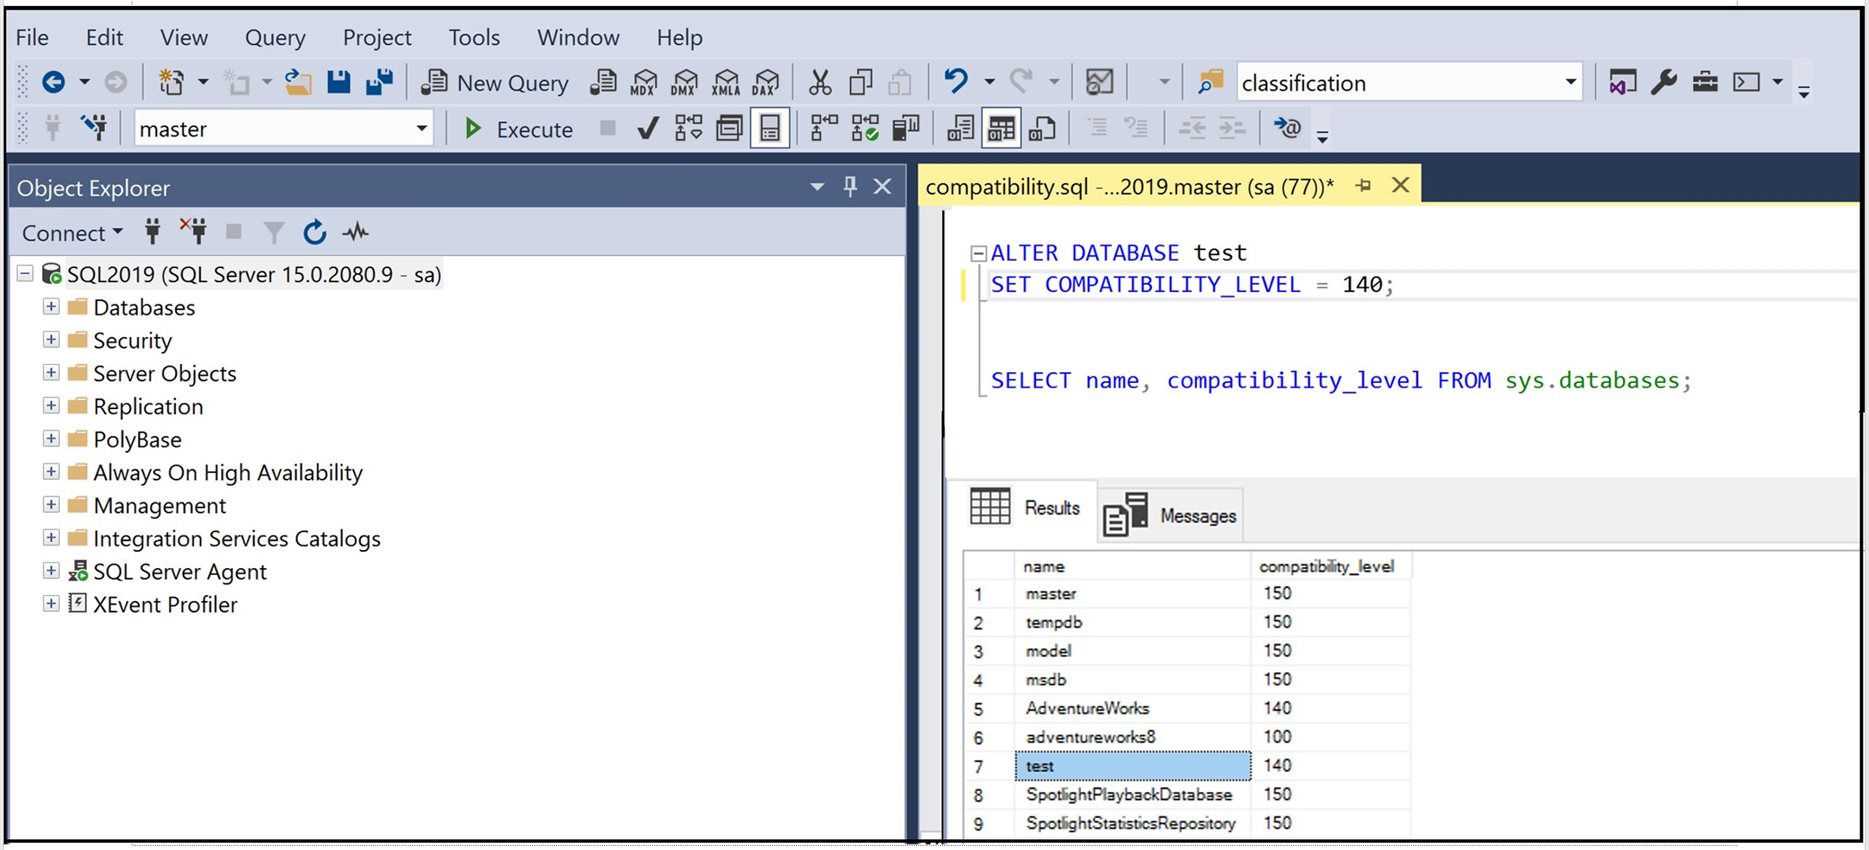
Figure 1
Foglight can track changes in a SQL Server instance. Some of the changes are automatically monitored. However, in this case, I manually enter a note that I upgraded the version of the SQL Server instance from 2017 to 2019 and I changed the compatibility level of the test database to 140 (2017).
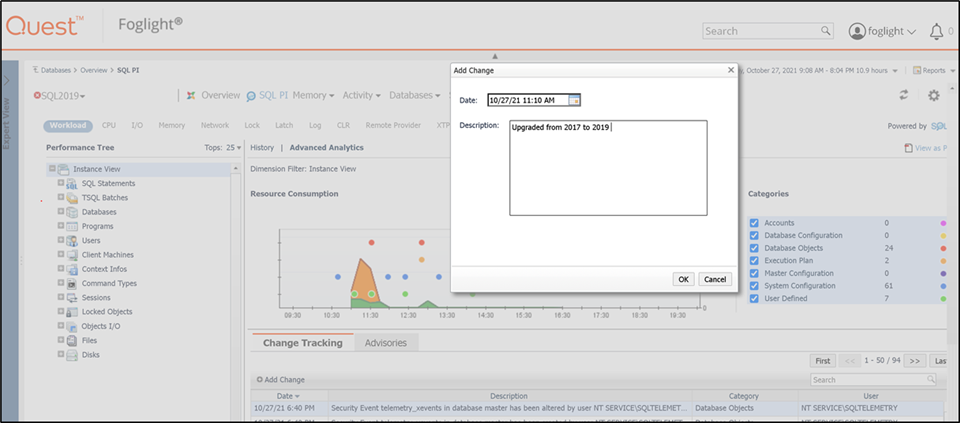
Figure 2
After entering my notes, Foglight’s Change Tracking dashboard now has a record of when I upgraded to 2019. By changing the compatibility level to 140 (2017) and adding a note in Foglight’s Change Tracking dashboard, I will capture a baseline of my current workload in 2017 (figure 3).
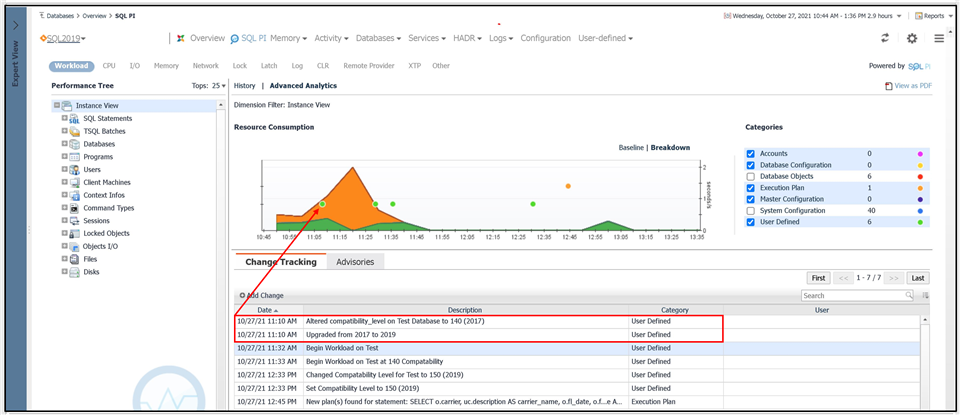
Figure 3
It’s also useful to note the time when the actual workload was running at peak production rate (2017) so you can compare this with the peak production rate* when you change the compatibility mode to 150 (2019).
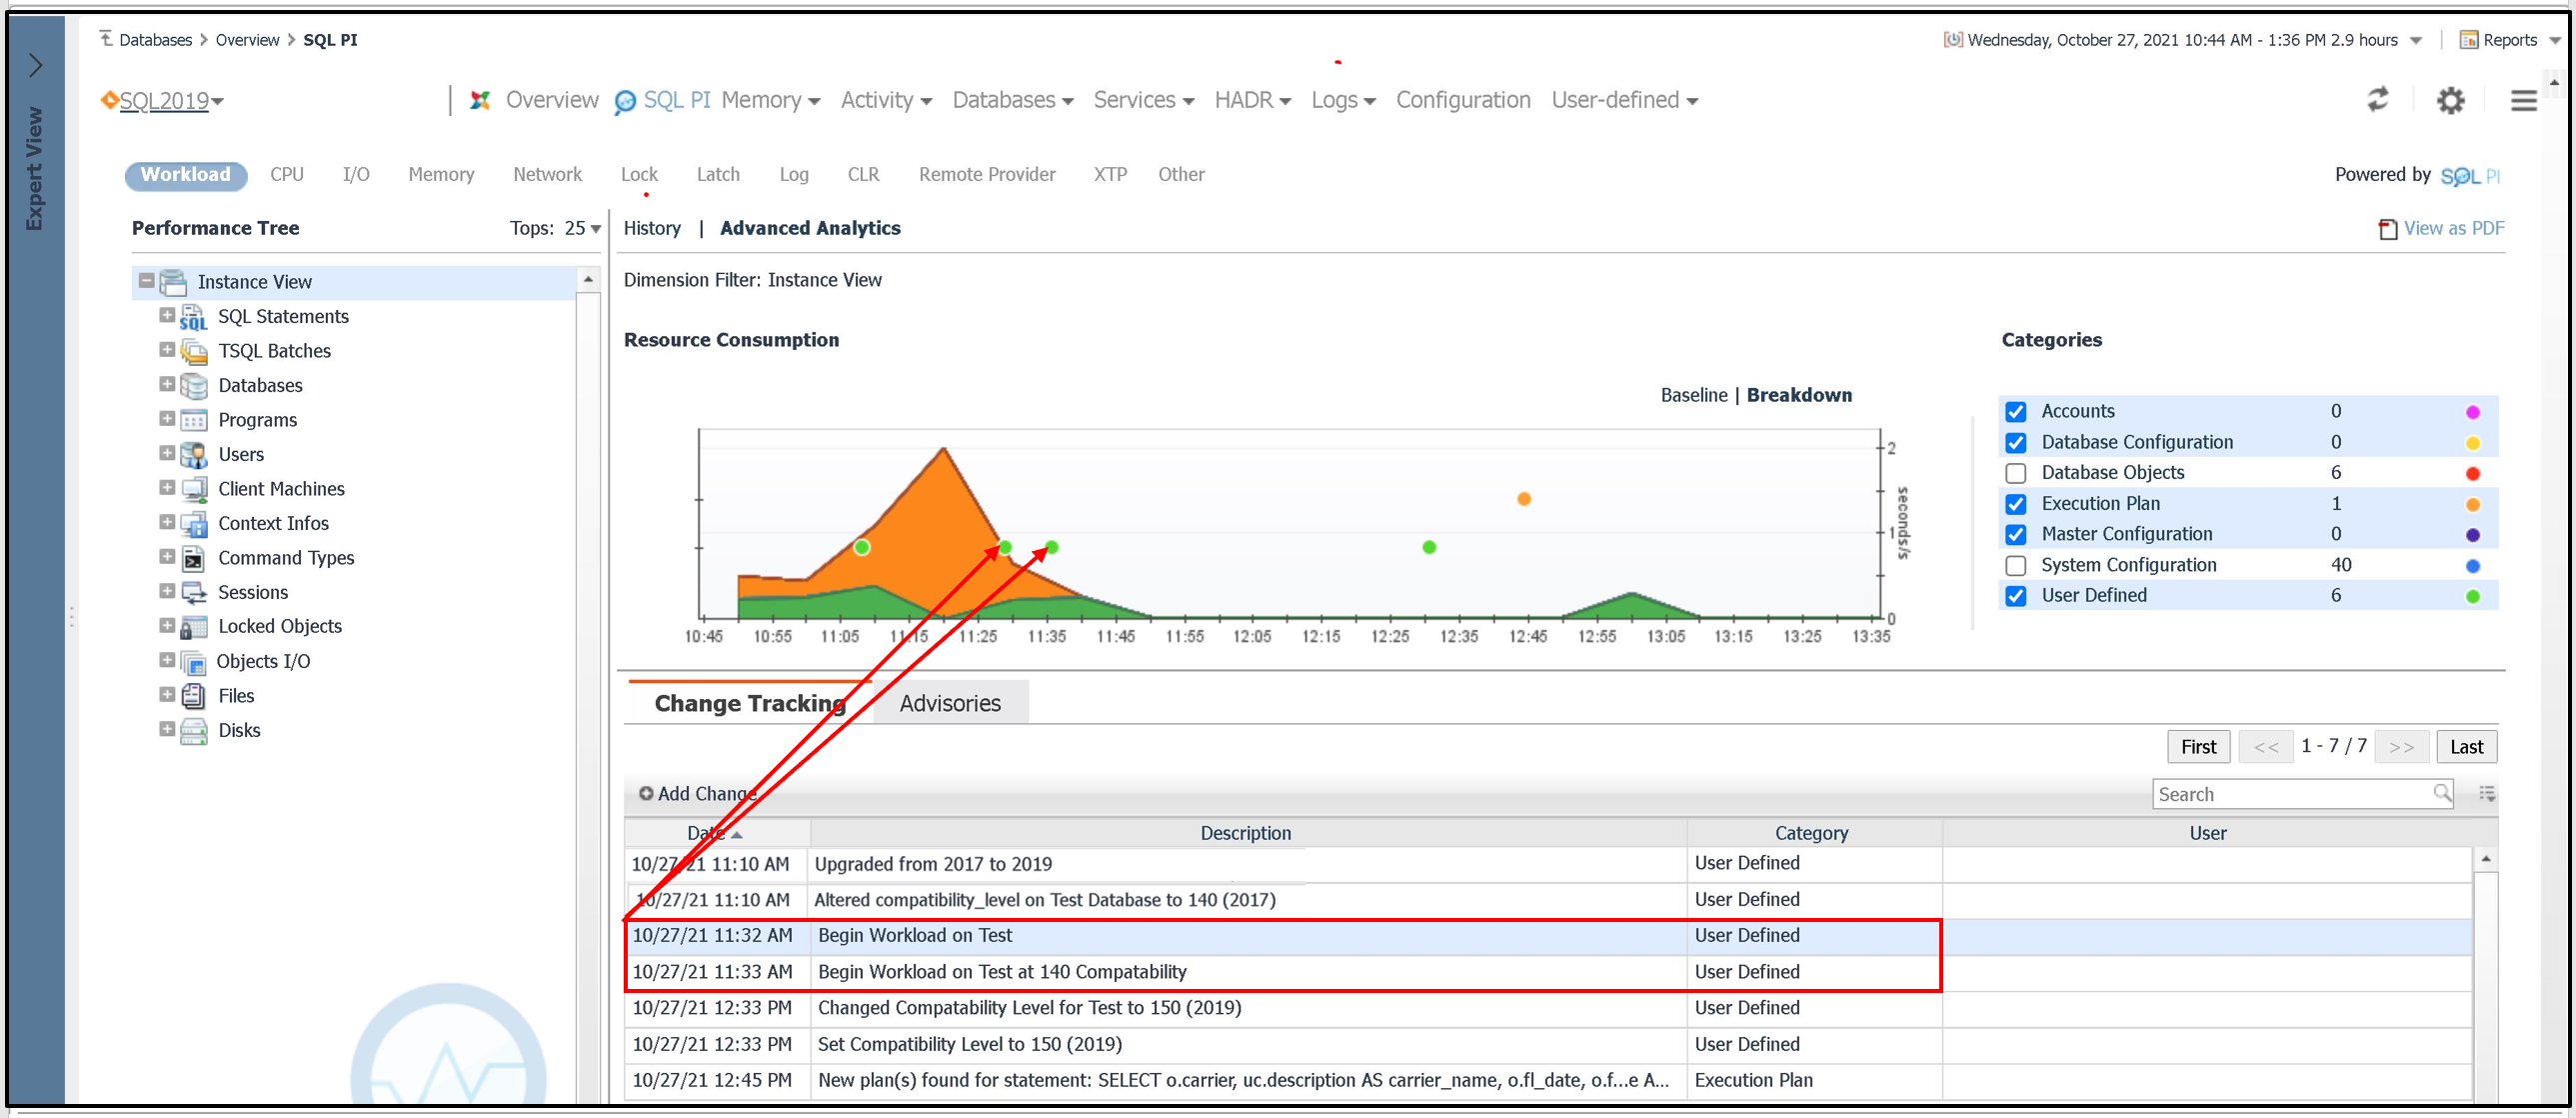
Figure 4
In my example, the 2017 workload runs for 1 hour before I change the compatibility level to 150. Notice that after I changed the compatibility level to the current version (2019), Foglight automatically identified a plan change (figure 5).
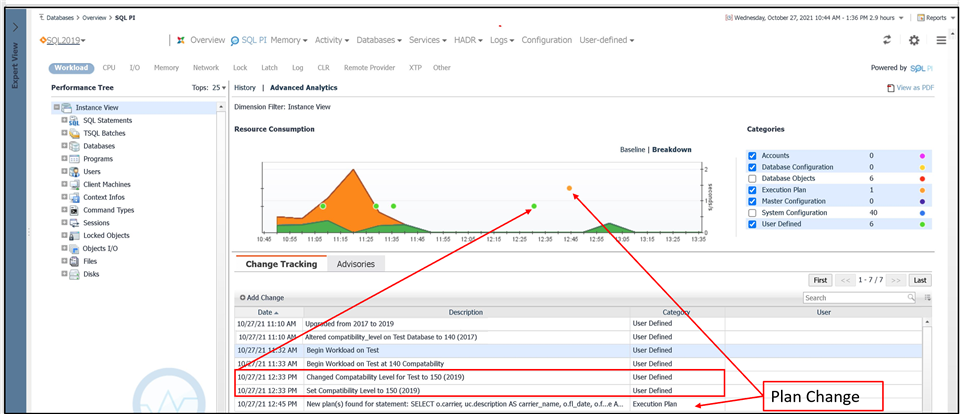
Figure 5
Foglight has a great comparison feature that allows you to compare different timeframes, baselines, or even different instances. I’m going to use this feature to identify changes in performance just by reviewing the differences in workloads between the hour that the workload ran under 2017 compatibility, and the hour that it ran under the current version, 2019. To navigate to the comparison dashboard, choose History > Instance View > Compare.
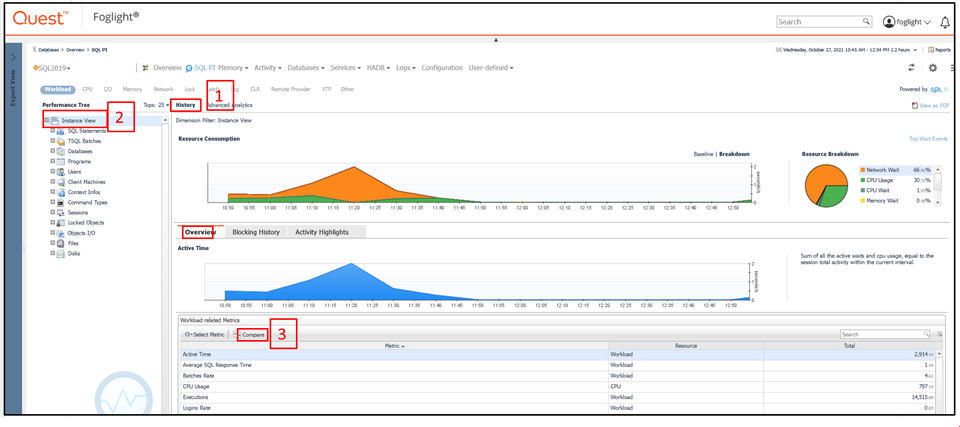
Figure 6
The comparison screen for the 2 timeframes at the Instance view do not show any significant change in overall workload between the 2 versions. However, this is a bird’s eye view which only shows that the entire workload hasn’t increased or decreased. You will need to dig deeper into the actual queries, any plan changes, and maybe other dimensions to get the real picture of performance (figure 7).
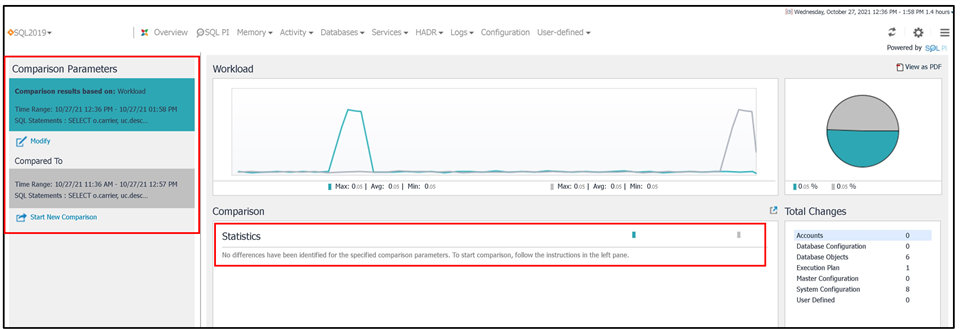
Figure 7
Further investigation in Foglight shows that the query with the plan change was the most active query in the entire Instance. By reviewing the timeframe before and after the upgrade, you can get a true picture of how this query will perform going forward. Notice that after the upgrade, there is very little change in response time which looks promising (figure 8).
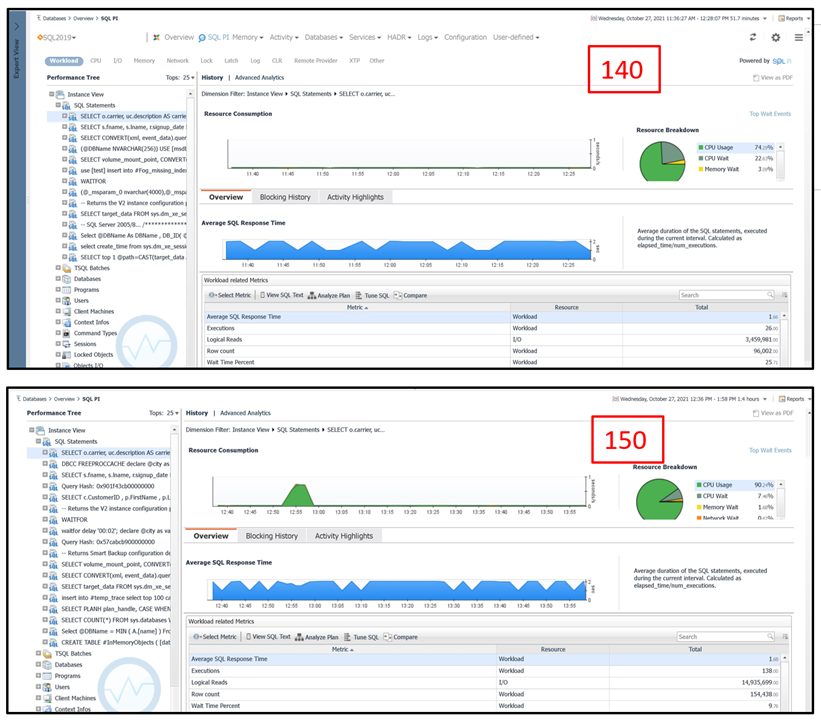
Figure 8
Foglight easily displays the SQL statement and the plan changes. In this case, the plan change made no significant difference in performance (figure 9).
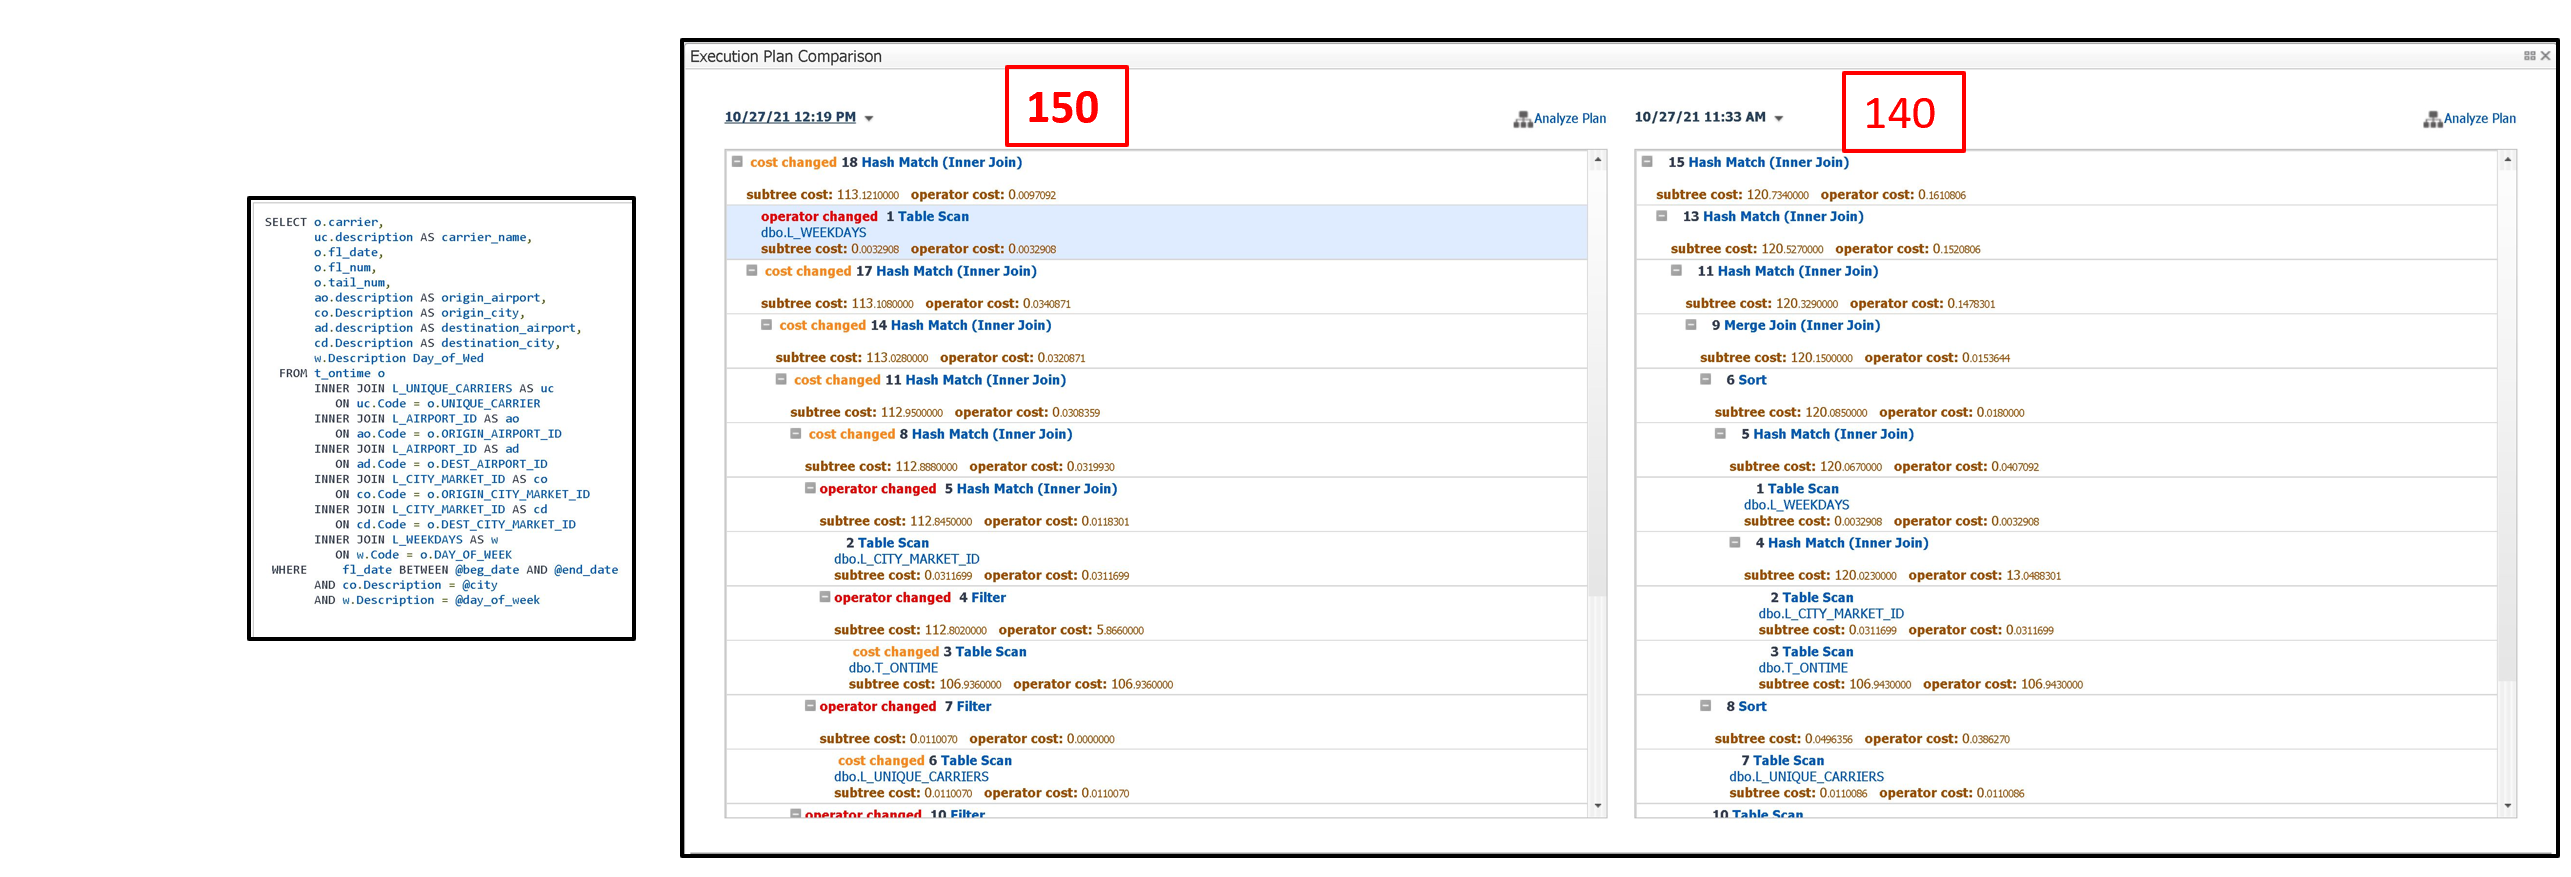
Figure 9
Further analysis of the top queries spending the most time in the database, while utilizing Foglight, should continue until you are satisfied that the new version of SQL Server will perform adequately. By utilizing Foglight’s change tracking and comparison features, you can rest assured that your SQL Server upgrades will be a success! No horror stories here, folks!


