
Simple Rule Editor simplifies the process of creating custom rules. The view of Simple Rule Editor contains the links that allows you to manage Infrastructure rules and alarms.
For more information, see the following topics:
Prerequisites
- Foglight Management Server 5.9.2 or later
- Infrastructure Cartridge 5.9.3
Rules table
The Rules table shows the following columns by default:
- Enabled:Indicates if the rule is enabled
 or disabled
  . Click "Enabled" to sort the rules by status.
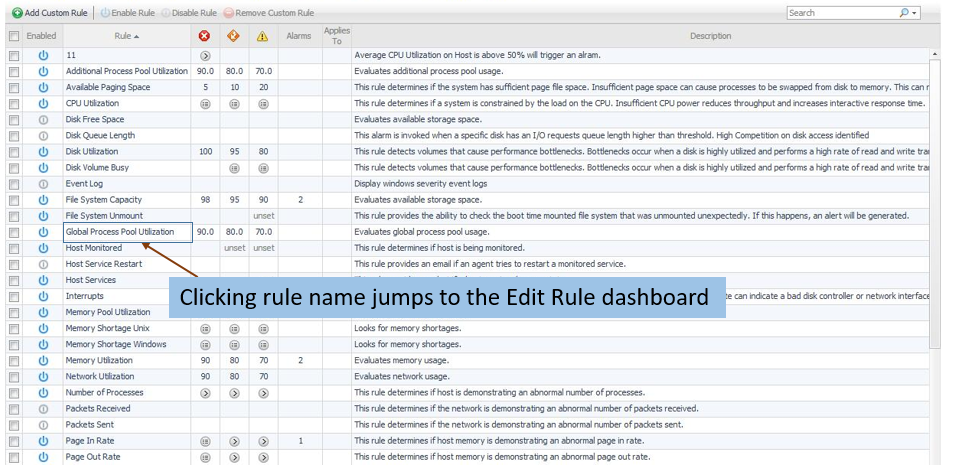
 - Rule: Shows the rule name. Click the rule name to view or edit the selected rule through the Edit Rule dashboard.
- Fatal
 , Critical
  , and Warning
  thresholds (multiple-severity rules only):
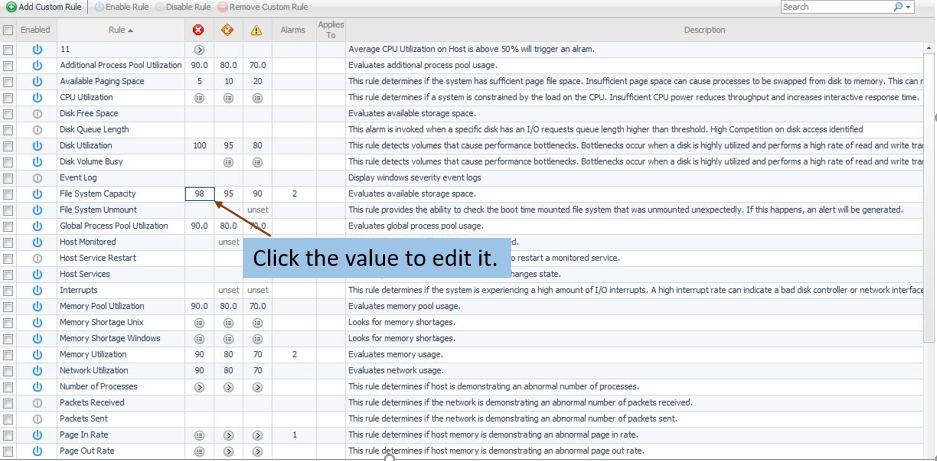
- For expressions that include one registry variable, these columns contain the current value of that variable. Click the value to edit it.
- For expressions that include multiple registry variables, the column shows the icon
 . Clicking that icon shows the list of referenced registry variables and their values. Click a value to edit it.
 - For expressions that do not include any registry variables, this column shows the icon
 . Clicking that icon navigates to the Edit Rule dashboard.
 - For rule states that do not have a conditional expression defined, this column is empty.
- For expressions that include one registry variable, these columns contain the current value of that variable. Click the value to edit it.
- Alarms: Contains the number of alarms (multiple-severity rules only) generated by the rule. Clicking that column shows a list of alarms, which indicates the alarm severity, the date when the alarm was generated, and the alarm message.
- Applies to: Shows the object name that is applied to this custom rule.
- Description: Contains the rule description.
Enabling/Disabling rule(s)
The Rule Configuration dashboard shows a list of existing rules and a set of rule management commands on the top of the Rules table. Use the Enable Rule ![]() and Disable Rule
and Disable Rule ![]() buttons to activate or deactivate one or multiple rules.
buttons to activate or deactivate one or multiple rules.
To enable a rule:
- Log in to the Foglight browser interface.
- Ensure that the navigation panel is open. To open the navigation panel, click the right-facing arrow
 on the left.
 - On the navigation panel, under Dashboards, click Infrastructure. The Infrastructure dashboard opens.
- Click Administration > Rule Configuration. The Rule Configuration dashboard opens.
- On the Rules list, select one or more check boxes in the left-most column, and then click Enable Rule . The Enable Rules dialog box opens.
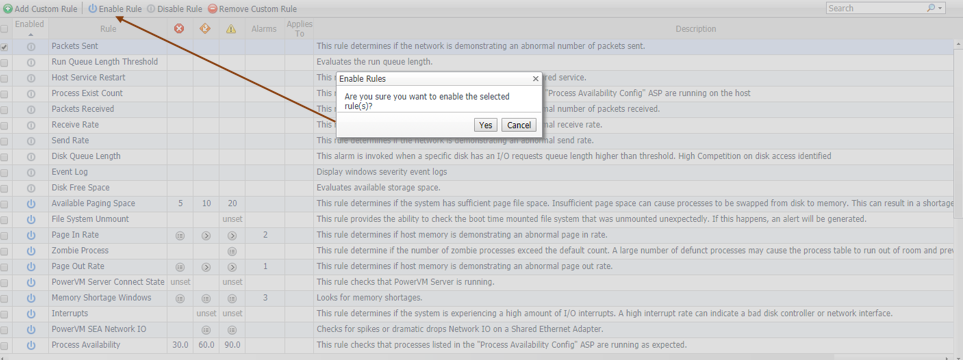
- In the Enable Rules dialog box, click Yes. The Rules table refreshes with the rules’ status updated automatically.
To disable a rule:
- Log in to the Foglight browser interface.
- Ensure that the navigation panel is open. To open the navigation panel, click the right-facing arrow on the left.
- On the navigation panel, under Dashboards, click Infrastructure. The Infrastructure dashboard opens.
- Click Administration > Rule Configuration. The Rule Configuration dashboard opens.
- On the Rules list, select one or more check boxes in the left-most column, and then click Disable Rule . The Disable Rules dialog box opens.
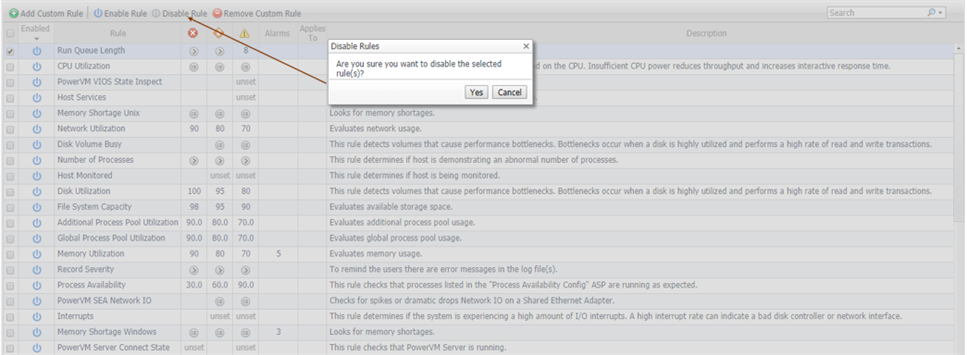
- In the Disable Rules dialog box, click Yes. The Rules table refreshes with the rules’ status updated automatically.
Adding a custom rule
The Rule Configuration dashboard shows a list of existing rules and a set of rule management commands on the top of the Rules table. Use the Add Custom Rule button  to create a new rule as needed.
To customize a rule:
- Log in to the Foglight browser interface.
- Ensure that the navigation panel is open. To open the navigation panel, click the right-facing arrow
 on the left.
 - On the navigation panel, under Dashboards, click Infrastructure. The Infrastructure dashboard opens.
- Click Administration > Rule Configuration. The Rule Configuration dashboard opens.
- Click Add Custom Rule . The Create Custom Rule dialog box opens.
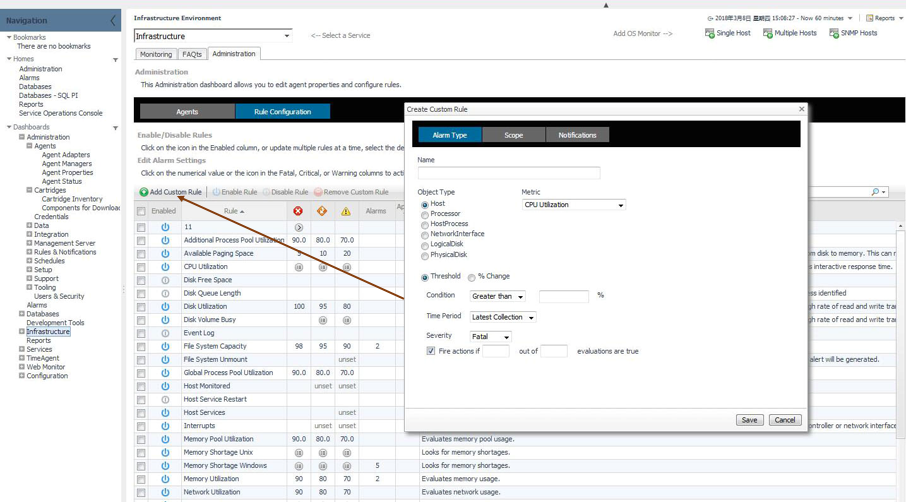
- In the Create Custom Rule dialog box, specify the following:
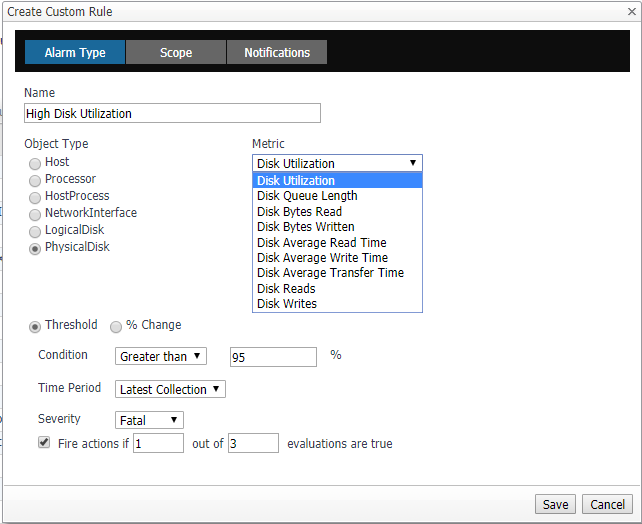
- 1.Alarm Type:
a. Type the name of custom rule in the Name field.
b. Select an Object Type, and then select a metric from the Metric drop-down list. The value of Metric varies from the Object Type.
c . Select either Threshold or % Change, and then specify the following values as needed.
- Threshold: Specify Condition, Time Period, Severity, and then specify whether or not fire actions if the specified data attempts are reached. The value of Condition cannot be negative.
- % Change: Specify Condition, Time Period, and Severity Label. The value of Condition cannot be negative.
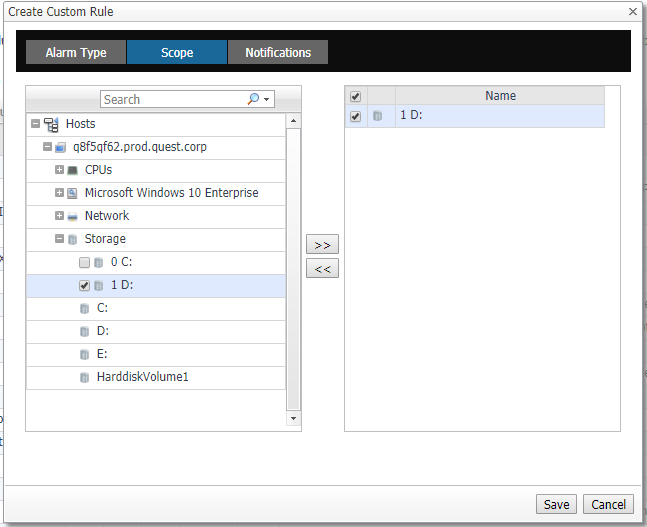
- (Optional) Scope: Choose the objects to which you want to apply this rule. If no objects are selected in this step, the custom rule will apply to all objects which type is the Object Type specified in Step 6.b.
- (Optional) Notifications: Click Add New, then the Edit Notification Config - Dialog box appears. In this dialog box, type the E-mail Address and Description as needed, and then click Add.
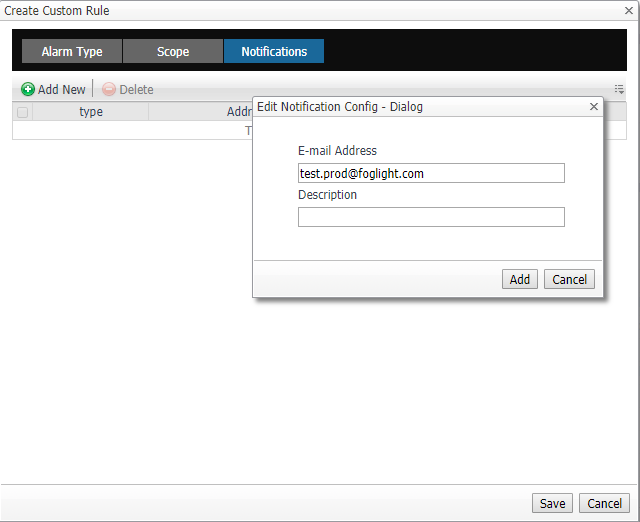
7. Click Save. The Rules table refreshes automatically to show the newly added rule.
Removing custom rule(s)
The Rule Configuration dashboard shows a list of existing rules and a set of rule management commands on the top of the Rules table. Use the Remove Custom Rule button  to delete existing custom rule(s) as needed.
To remove a custom rule:
- Log in to the Foglight browser interface.
- Ensure that the navigation panel is open. To open the navigation panel, click the right-facing arrow on the left.
- On the navigation panel, under Dashboards, click Infrastructure. The Infrastructure dashboard opens.
- Click Administration > Rule Configuration. The Rule Configuration dashboard opens.
- Click Remove Custom Rule
 . The Remove dialog box appears.
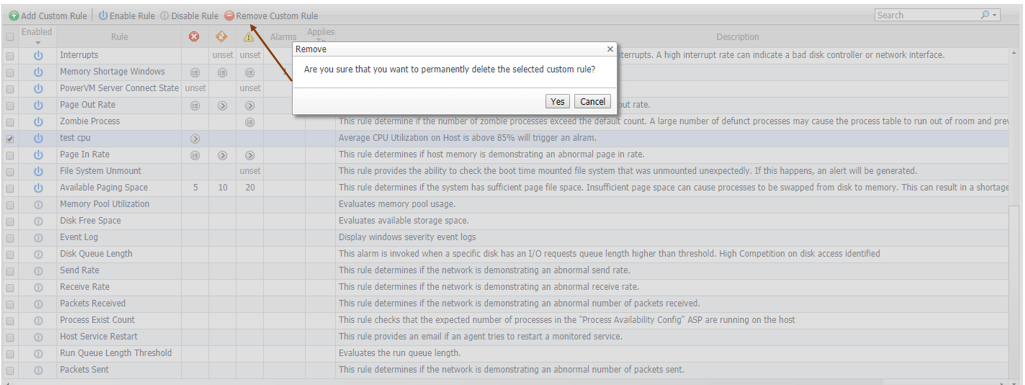
- Click Yes. The Rules table refreshes automatically and removes the selected rule.
-

Darren Mallette
over 6 years ago
-
Cancel
-
Up
0
Down
-
-
Reply
-
More
-
Cancel
-

Russell.Chen
over 6 years ago
in reply to Darren Mallette
-
Cancel
-
Up
0
Down
-
-
Reply
-
More
-
Cancel
Comment-

Russell.Chen
over 6 years ago
in reply to Darren Mallette
-
Cancel
-
Up
0
Down
-
-
Reply
-
More
-
Cancel
Children