If you’d like to try out Foglight for Databases or Foglight for SQL Server, you can download the full software for a 30-day evaluation, and one of us here at Quest will be happy to assist you with getting it set up. The brief Installation Requirements section of this post will show you what you’ll need to have ready for our call.
But it’s an easy install, so you might just want to go ahead and try it yourself. The Walk-Through section of this post covers that, step-by-step.
By the way, this post applies to the latest version and is based on the Deployment Guide. For later versions, please search the Technical Documentation section at the Quest Support Page.
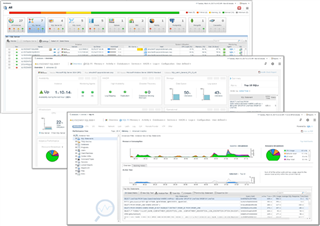
Foglight does a lot, but the installation is pretty easy!
Installation Requirements
To be prepared for an install, you’ll need to:
- Download the installer here: Foglight for Databases.
- Have a service account that Foglight can use to connect to the servers you’d like to monitor. The easiest approach is to use a single domain admin account that has SQL andWindows Administrative permissions on the instances and hosts that you’d like to monitor.
- Have a physical or virtual machine to host Foglight, meeting the hardware requirements based on the total number of Database + OS connections you’d like to monitor. Depending if you configure SQL Performance Investigator (SQL PI), which gives you the multi-dimensional analysis for SQL Server and Oracle, you will need a SQL Server database to house the SQL PI repository. To monitor 20 connections or less, the requirements for an All-in-One installation of Foglight with SQL PI configured, is listed below. Please refer to the Deployment Guide for larger implementations.
All-In-One Installation With SQL PI configured
Monitored Connections <20
CPU cores (2.4GHz) 6
RAM 30
FMS JVM Settings 6144 MB
Maximum SQL Server Memory 20480 MB
Drive Space Total 160 GB
Two disks
- Disk 1 for SQL PI Repository: 60 GB
- Disk 2 for Foglight Repository: 100 GB
Important!: If hosting Foglight on a virtual machine, it is highly recommended that both the CPU and RAM allocations be reserved for better performance.
For VMWare Reservations:
Run C:\Program Files\VMware\VMwareTools\VMwareToolBoxCmd.exe stat cpures from the command line in the VM itself to see whether CPU is currently reserved. A result of "0Mhz" means that it isn't reserved.
Run C:\Program Files\VMware\VMwareTools\VMwareToolBoxCmd.exe stat memres to see if memory is reserved. A result of 0Mb means that it isn't reserved.
If you find that these resources have not been reserved, please have your VMware administrators do so.
- The Foglight Repository and the SQL PI Repository databases can reside in the same SQL Server instance. This can be on the Foglight host, in which case the above specs will be fine, or you can point Foglight to an external database server. It is best to install the repositories on a back-office or tools server, not one of your production systems so it doesn’t interfere with performance.
Walk-Through
On the machine where Foglight will be hosted, double click on the installation file (which should be named something like “Foglight-for-Cross-Platform-Databases-installer-Windows-64bit_59520”. This will bring up a simple intro screen:
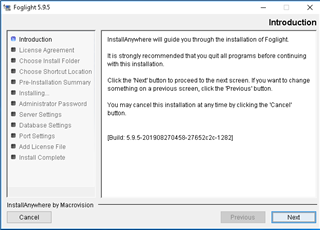
Nothing to do here but have a quick read and hit Next.
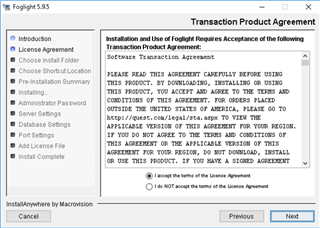
You’ll have to accept the License Agreement to continue.
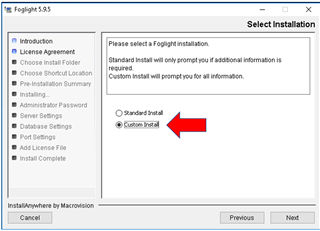
Choose Custom Install so you can see all of the options in the wizard.
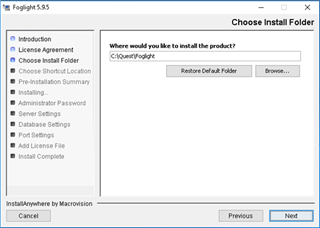
Specify the drive location where Foglight should reside.
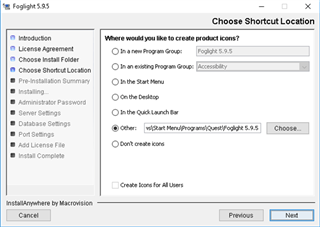
This screen is just an overly complicated way to say that we will be creating some Foglight shortcuts in the Start menu. Just hit next, because if you want shortcuts on the desktop or in Quick Launch bar or wherever, you can just drag them there from the Start menu later, as you would with any program.
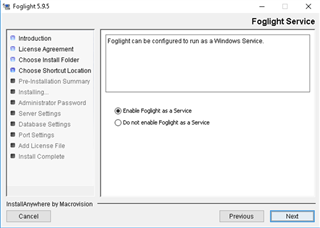
Go with the default setting of Enable Foglight as a Service. That just means Foglight will automatically start up when you bounce the machine it’s on, instead of requiring you to manually start it.
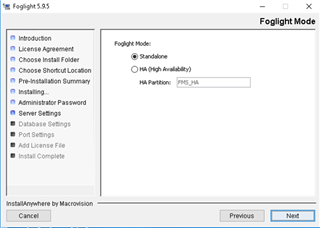
You have the option to create a second, standby Foglight server that can be failed over to in the event that your primary Foglight host experiences a failure. This is rare requirement and can be set up later, so we’ll cover it in separate documentation. So another Next here.
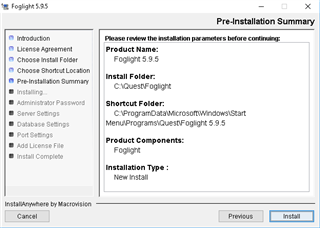
This screen is just a review of the selections we’ve made. If you’re happy with what you see, hit Install.
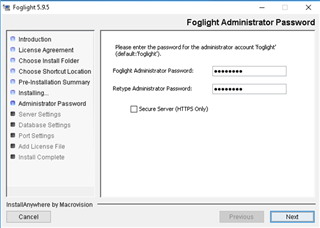
After the installation is complete, we’ve got a little setup to do. This screen is just telling you that the administrator login to the Foglight console will default to a user name of “foglight” with a password of “foglight”. You could specify something else here if you’d like, but you can also change it later at any time, so you can leave it as-is for now.
There’s also an option to use an HTTPS connection to Foglight. This isn’t typically critical to do because most users connect to Foglight from within a secure network or across a VPN.
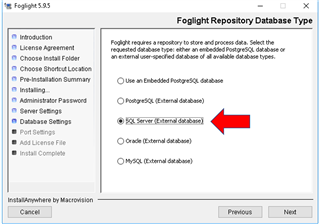
ability to create its own Embedded PostgreSQL database for this purpose, or you can create the database in PostgreSQL, SQL Server, Oracle or MySQL server that you already have in your environment. Choosing SQL Server or Oracle will give you the best performance. Also, if you are installing SQL PI, you will need a SQL Server database to hold the performance data.
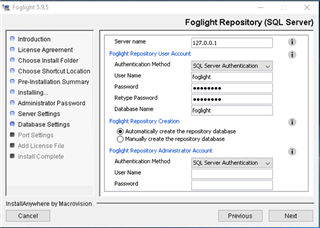
In this example, I’ve chosen SQL Server to host my Foglight repository, and I’ve got a SQL Server right on the same machine where I’m hosting Foglight itself, so I can go with localhost IP address of 127.0.01. But you can of course point to an external server somewhere for Foglight to use, just remember that it should be a back-office/tools server, not one of your production systems.
You don’t need to change anything under Foglight Repository User Account, because this is simply the account that Foglight uses to write data to and read data from the repository database (called “foglight”). The database isn’t really designed to be queried directly by users, but if you were so inclined you could create an account for yourself later for this purpose.
The last section on this screen (“Foglight Repository Administrator Account”) is the account uses to create the repository database. We just use it once for this purpose, and the credentials you enter here don’t get saved off anywhere.
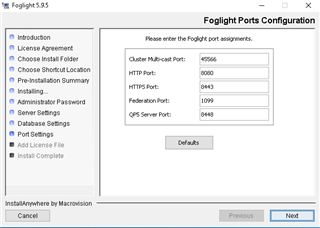
This box shows the ports that Foglight uses. Only two of the ports (8080 and 8443) are involved in any traffic inbound to or outbound from the Foglight host – they are simply the HTTP and HTTPS ports that you connect to Foglight over when you bring up its browser-based interface. All the rest of the ports are only used locally on the Foglight host for the various components of Foglight to talk amongst themselves. So really, just a Next here.
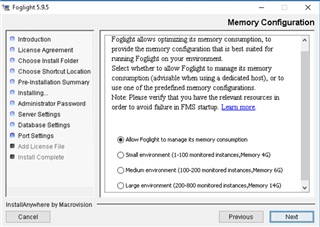
If the machine hosting Foglight is not running any other major software packages, you can choose the default of allowing Foglight to manage its memory consumption. If the host is not dedicated to Foglight, then choose the size of the environment that you will be monitoring so that Foglight better shares resources with the other applications you are running on its host.
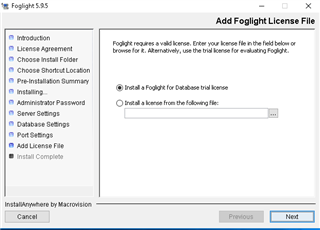
The default trial license option will give you 30 days to try out all of Foglight’s features, on as many systems as you’d like to monitor. If you’ve been sent a license file you can browse to it here, but that can also be done later from within the Foglight console.
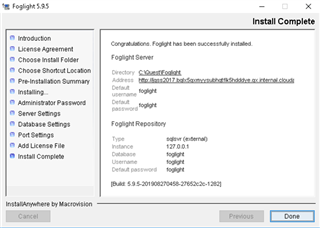
This screen just gives some review of what we’ve set up. Review end click Done.
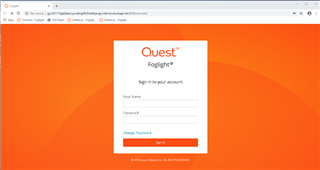
The Foglight console might automatically pop up, but if it doesn’t just navigate to in in a browser at http://localhost:8080 or https://localhost:8443 if you’re on the Foglight host, or replace “localhost” with the name of the Foglight host server if you’re connecting from another location.
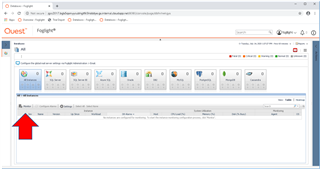
Now we’re at the start page, and the next step will be to point Foglight to the SQL Instances and Windows hosts that we’d like to monitor. That is covered in another post which can be found here.
A couple of manual changes
For optimal performance of Foglight, please manually make the following changes:
In the table below, find the JVM Settings size necessary for your desired number of monitored connections, and then use it to edit the files mentioned below as follows:
Monitored Connections <5 <50 <100 <200
JVM Settings 5.1GB 10.2GB 12.3GB 18.4GB
Edit the <Foglight installation directory>\config\server.config file.
For 5.1 GB (for example), ADD the following lines:
server.vm.option0 = "-Xms5100m"; server.vm.option1 = "-Xmx5100m";
Edit <Foglight installation directory>\fglam\state\default\config\baseline.jvmargs.config file
For 5.1 GB (for example), ADD the following lines:
vmparameter.0 = "-Xms5100m"; vmparameter.1 = "-Xmx5100m";
If you will be monitoring more than 50 SQL Server + Windows systems:
ALTER the following lines in
<Foglight installation directory>\fglam\state\default\config\fglam.config.xml to the below values:
config:upstream attribute max-disk-space="102400"
config:downstream attribute max-disk-space="102400"
vmparameter.2 = “Dcom.quest.connection.regulator.maxActiveConnectionsCap=1024”;
When you're done making these changes, restart the Foglight service.
All of Quest Database Performance blog posts can be found here.


-

muhammad nazwiyansyah
over 1 year ago
-
Cancel
-
Up
0
Down
-
-
Reply
-
More
-
Cancel
-

Janis Griffin
over 1 year ago
in reply to muhammad nazwiyansyah
-
Cancel
-
Up
0
Down
-
-
Reply
-
More
-
Cancel
Comment-

Janis Griffin
over 1 year ago
in reply to muhammad nazwiyansyah
-
Cancel
-
Up
0
Down
-
-
Reply
-
More
-
Cancel
Children