Moving data between servers can be a painful process because of the security involved over the data. Moving the same data between servers, which are in different domains, is even more troublesome. Trying to move data between forests/domains which are being migrated without resolving the security to the new domain, or relying on SID History, can be the precursor to a disaster. In the end, the data will have Access Control Lists (ACLs), which contain Access Control Entries (ACEs) from the original domain.
How can one resolve these situations in a migration and maintain one’s sanity? Let’s take a look at it.
Assume that you have moved data from one server to another server in a different domain using a solution, such as Quest Secure Copy, or have joined an existing server to a new domain. In either case, there are ACLs which contain ACEs pointing to accounts in the source domain and may have SID History entries attached. This is not the optimal condition for data access and security management.
For the data to be secure on the server two things must happen at a minimum – the ACEs from the trusted/trusting domain must be converted to the accounts in the new domain, and the SID History should be removed. Depending on the amount of data and the number of explicit ACEs, this effort could be daunting.
The solution for this situation is Quest’s Security Explorer. With Security Explorer, a user may browse to any Windows server where they have administrative rights and manipulate the security of the volume(s). This includes searching/modifying for permissions be they explicit or inherited, searching for invalid SIDs or SID history for removal or the bulk modification of NTFS or Share permissions.
First, the issue of the ACEs from the source domain in the ACLs of the data. This must be resolved before the data can truly belong to the new domain. Assume that the new domain has been populated with users and groups. In this case, assume that the users and groups from the source (original) domain have been created in the new domain so that there is a 1:1 match with the users and groups from the source domain to the target domain. The goal is to convert the ACE in the ACL from <source domain\account> to <target domain\account>.
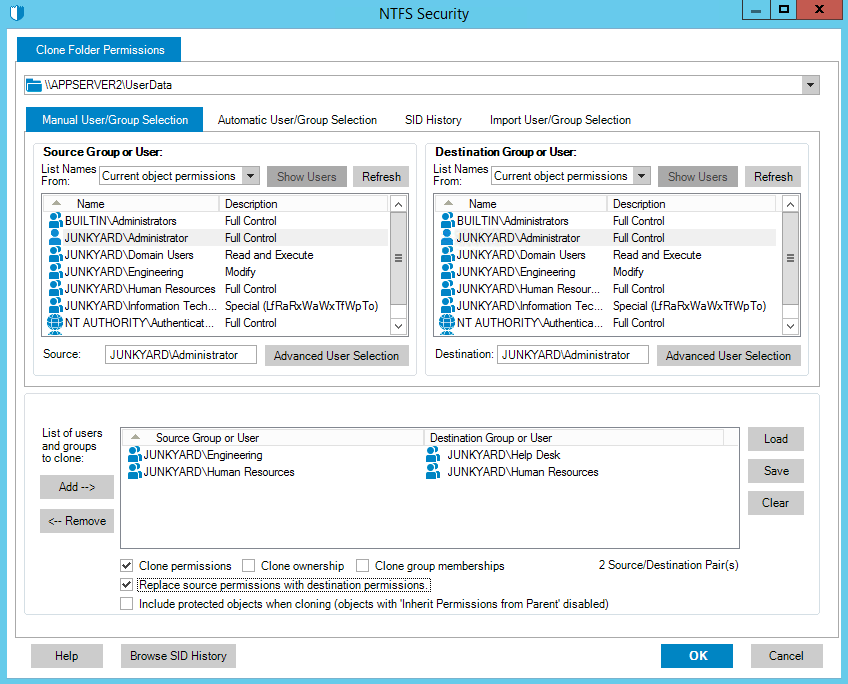
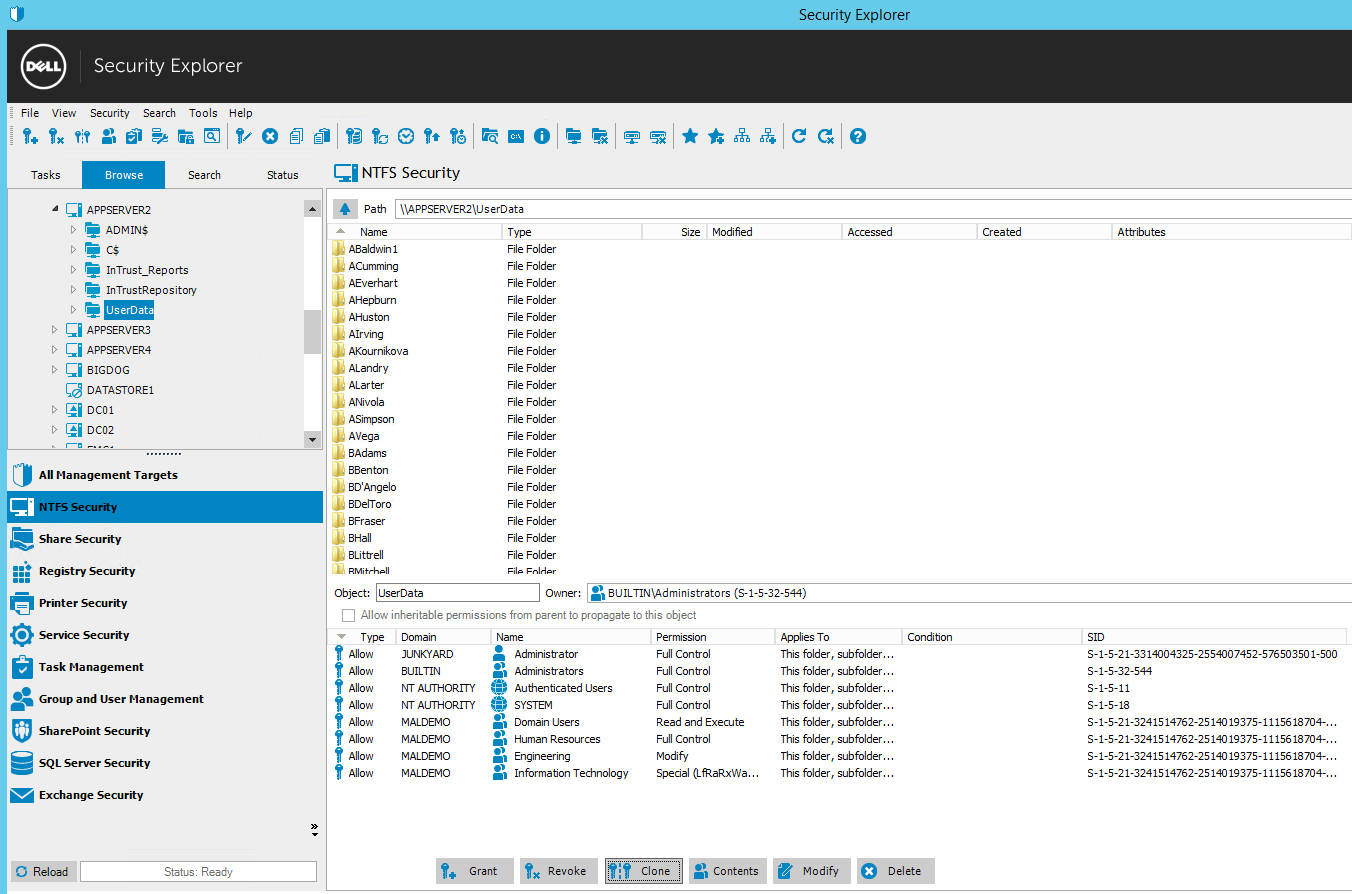
Through Security Explorer, a user would be able to select the directory where the migrated data is located in the target domain. Notice that in this case the security shows a mix of domain groups having explicit permissions at the root of the directory structure. All of the groups in this example are either built-in or belong to a domain names Junkyard, which is the source domain.
The goal is to convert the JUNKYARD\account ACEs to reflect the new domain in the format MALDEMO\account.
With Security Explorer, this can be done in one maneuver utilizing the Clone feature under NTFS Security. The Clone feature has a manual and automated processes for this operation. If the number of accounts are small, they can be paired source to target. This allows the user to assign NTFS permissions to different accounts on the target domain than were identified in the source domain as shown below:
If there are a large number of accounts listed in the ACLs then Security Explorer has an automated function for this operation. The automation allows Security Explorer to detect the matching users, and or groups, in the source and target domains then use this matching data to convert the ACEs from the accounts in the source domain to the accounts in the target domain.
To utilize the automated function, select the Automatic User/Group Selection tab these define the source and destination domains. Select to search for Groups or Users or both. Using both groups and users could take some time to enumerate.
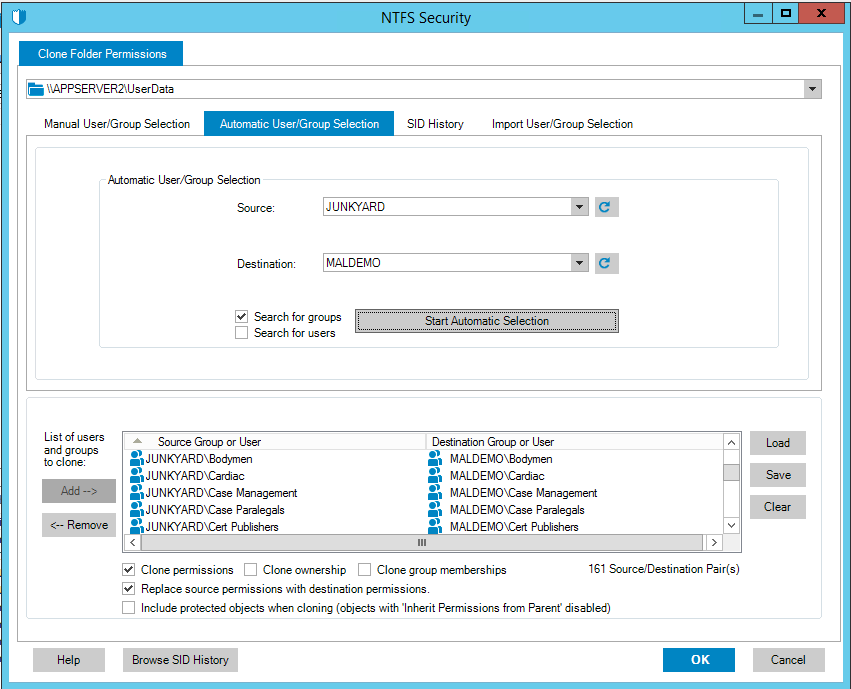
Notice that the Source and Destination groups reflect the source and target domains.
Select the option to “Replace the Source Permissions with the destination permissions” then click the OK button. Notice that the permissions are quickly converted from the source to the target domain values.
This is a great way to automate a process which is typically time consuming and unpleasant for the administrators.
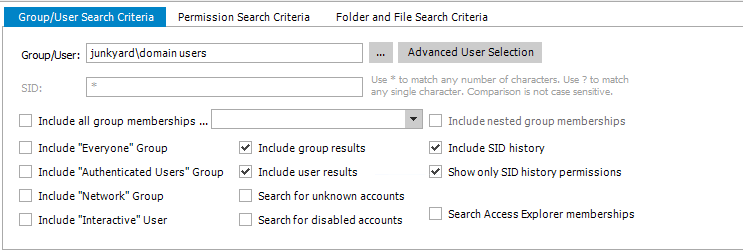
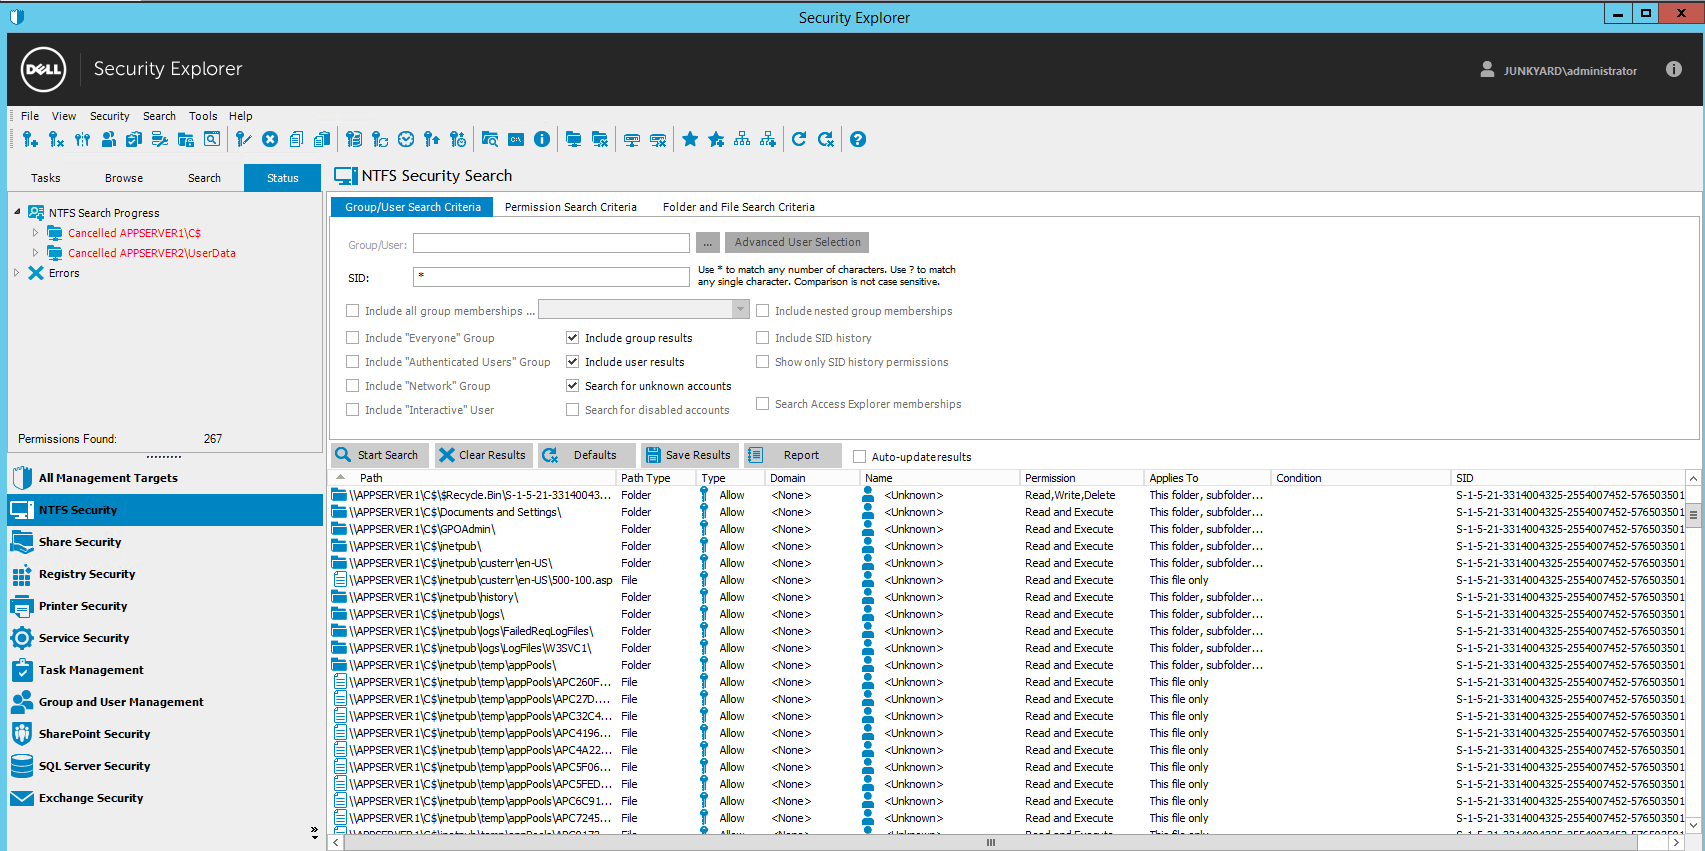
The second step is to remove all of the unknown or unresolvable ACEs, which are indicated by the presence of a SID rather than a user name. In Security Explorer, leveraging the Search function will identify all of the unknown SIDs in the selected volume, enabling their deletion.
From the NTFS Security slider, select the Search option. Add server\share or server\drive combination to the search scope then select the “Search for unknown accounts” option. Optionally, in the search data pane, the user can change the Permission Search Criteria to “Explicit only” to produce a concise list of unknown account references.
Once the list is rendered, the user may select and delete the invalid SIDs.
The third option is to remove the SID History from the data. This uses the same mechanism of the search for unknown accounts, of course with different options. SID History will search for the SID History of specific objects in the NTFS ACLs. Therefore, a user or group object must be selected. By defining the search scope, as before, then selecting the Include SID History and Show only SID history permissions, Security Explorer will allow the user to locate and delete SID History references from the selected data.