

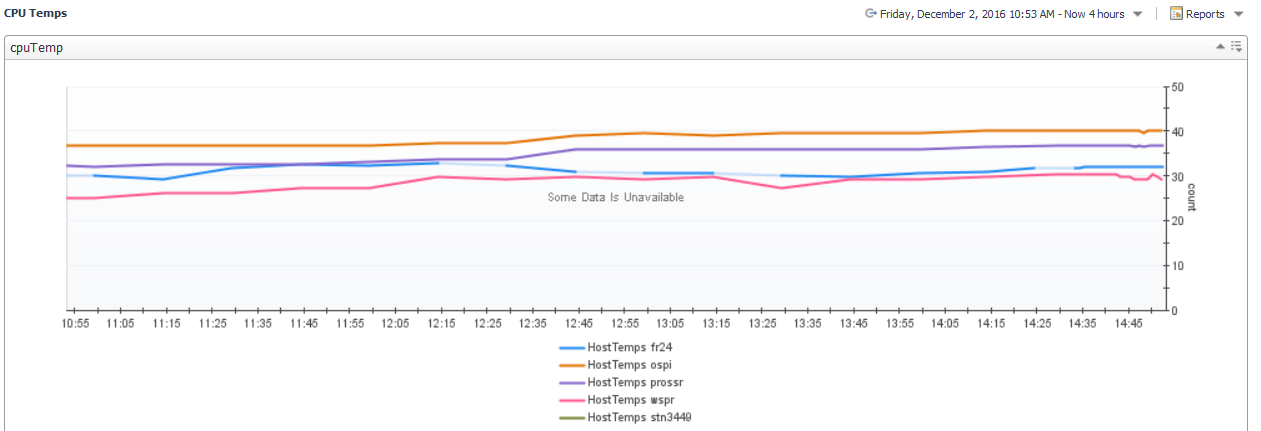
In Keep Your Pi from Burning with Foglight, I showed how to use script agents to collect data from a Raspberry Pi's built-in CPU temperature sensor and display a graph like this:
In this installment, I'll show you how to create a rule that will check those temperatures to be sure your Pi's not burning.
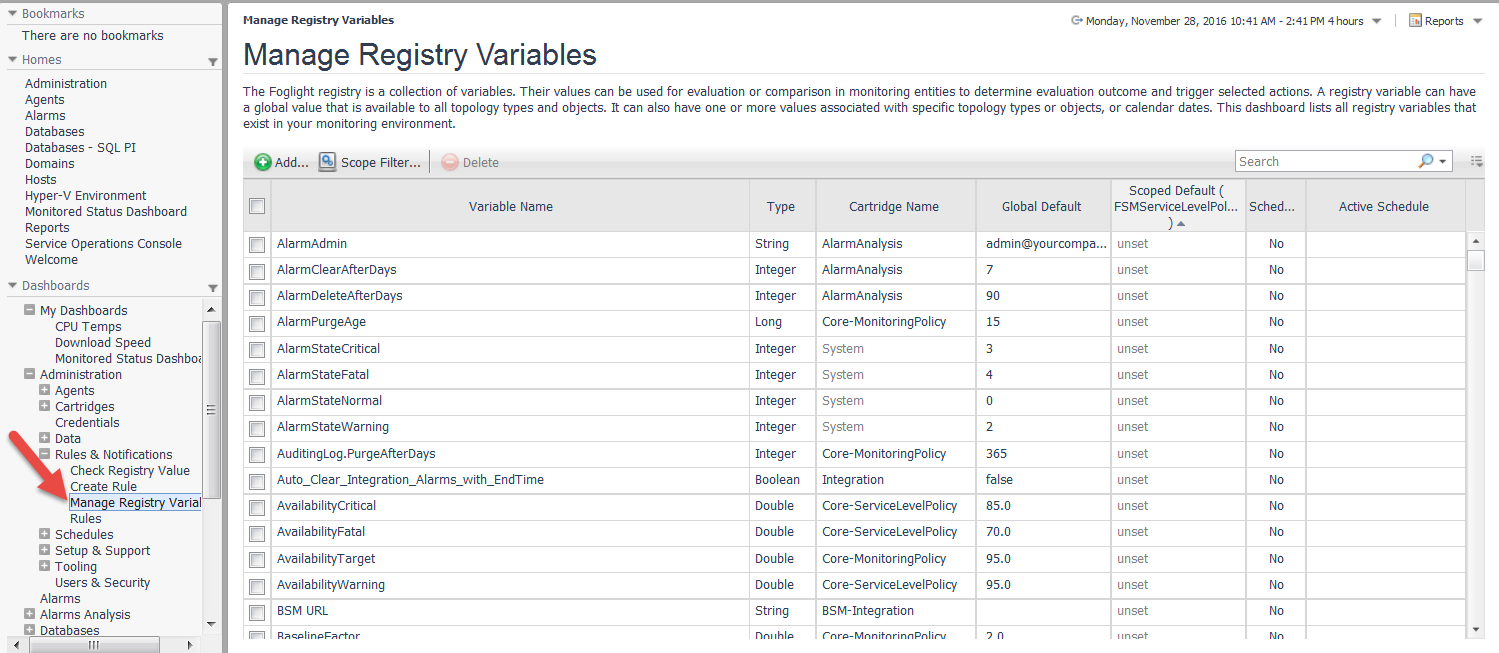
We'll start by defining some thresholds, one each for Warning, Critical and Fatal temperature values. By defining the thresholds as registry variables, if we want to change one later, we don't have to change code in each rule. From the left hand menu in Foglight, select Administration->Rules & Notifications->Manage Registry Variables
and then click the green "Add.." button. We'll need to select a type, in this case the Default of "Double" is fine, so we can click "Next". Then, we give the variable a name and a Description. For my warning level, I used "CPUTempWarning" as the name. When you click "Next", you'll be asked if this is a Static Value or a Registry Reference. We can accept the default of Static Value and click Finish. You should see a screen that looks like this:

There are a lot of options here; but we really only need to worry about the Global Default value for this case. If we needed to change the value of the variable based on a schedule or for a specific object, we would do so using the two windows at the bottom of the screen. Repeat the same process to define Critical and Fatal thresholds.
Now that we have our thresholds defined, we can create a rule. From the left hand menu, select "Administration->Rules & Notifications->Create Rule". You should see this screen:
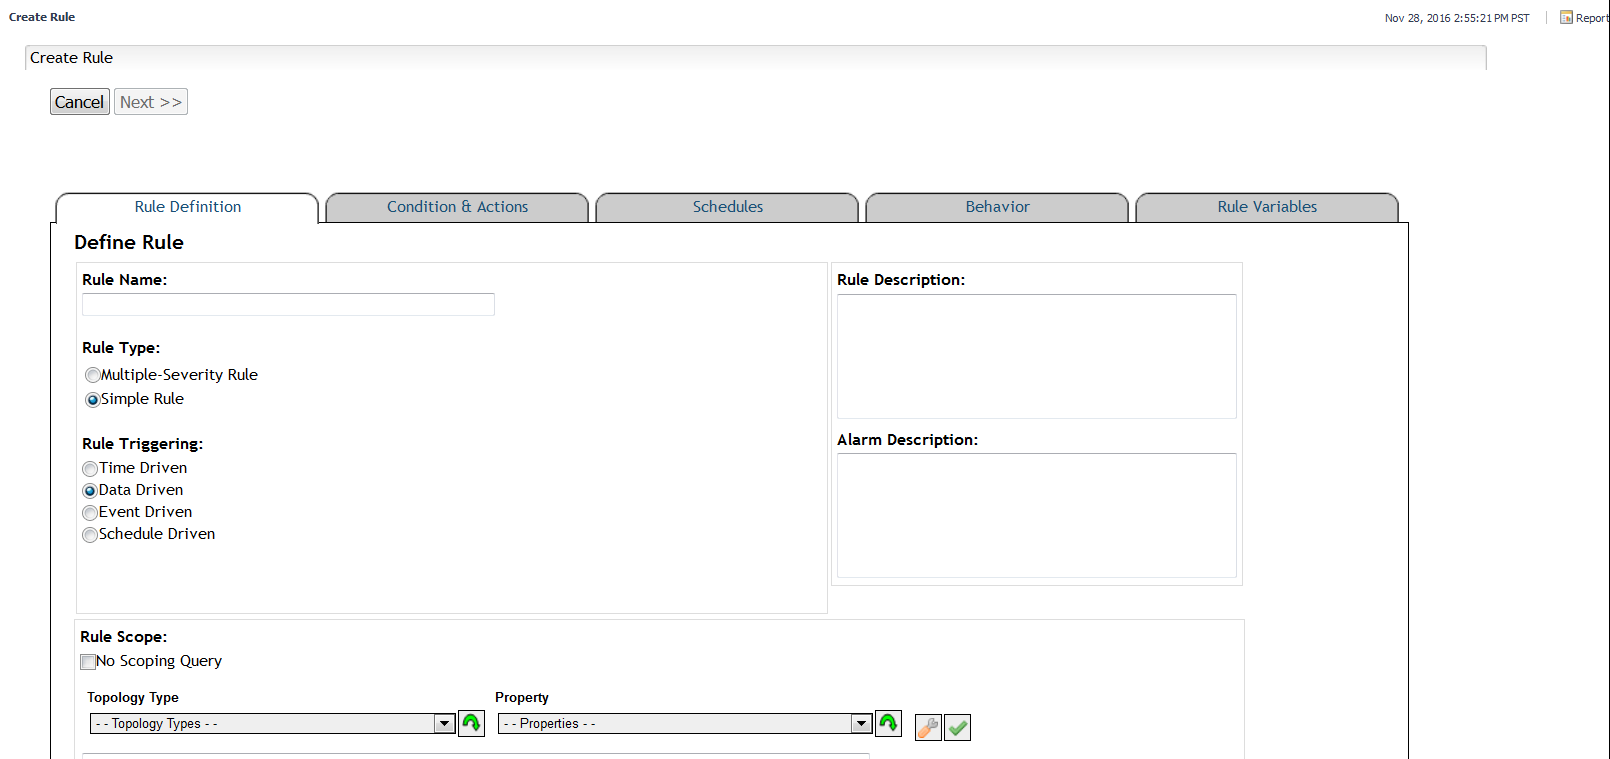
Since we have multiple levels for this rule, we'll want to select "Multiple-Severity Rule". Our rule is driven by the data we're collecting, so we can leave that button selected. We want this rule to apply to our Temperature Monitor, so we can pull down the "Topology Type" menu and select "Temp_Mon_Agent_Table" (from the previous blog). Once you've selected Topology, click the green "insert" button.

And then click the "Validate" button.

You should see a window like this:
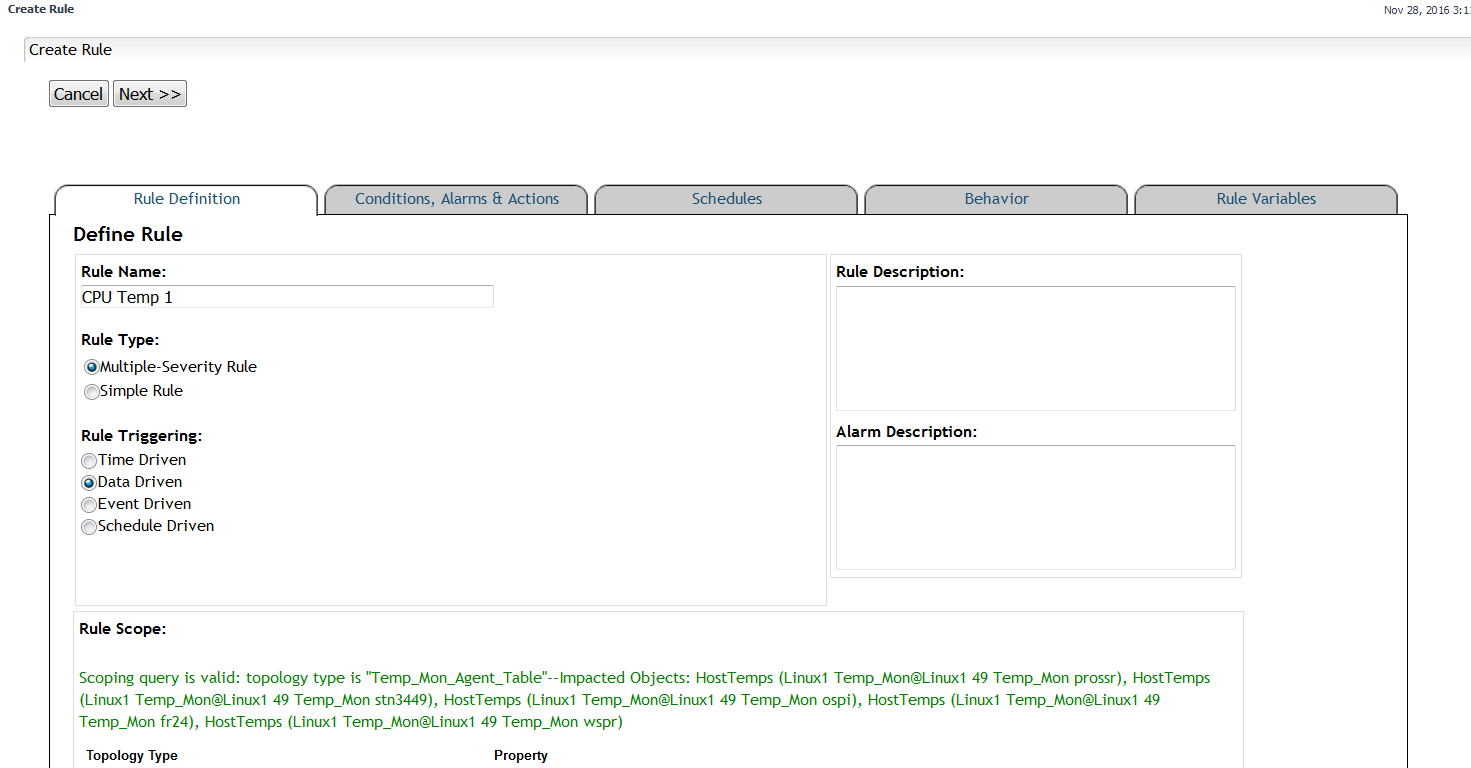
Foglight, performance monitoring software tool, has found all of the impacted objects, in this case, all of the hosts we're monitoring. Click "next" and we'll edit the Conditions, Alarms & Actions.
For this blog, we'll just set up Fatal. Critical and Warning can be set up in the same fashion. Click on the red dot to open the "Fatal" condition. You should see a screen that looks like this: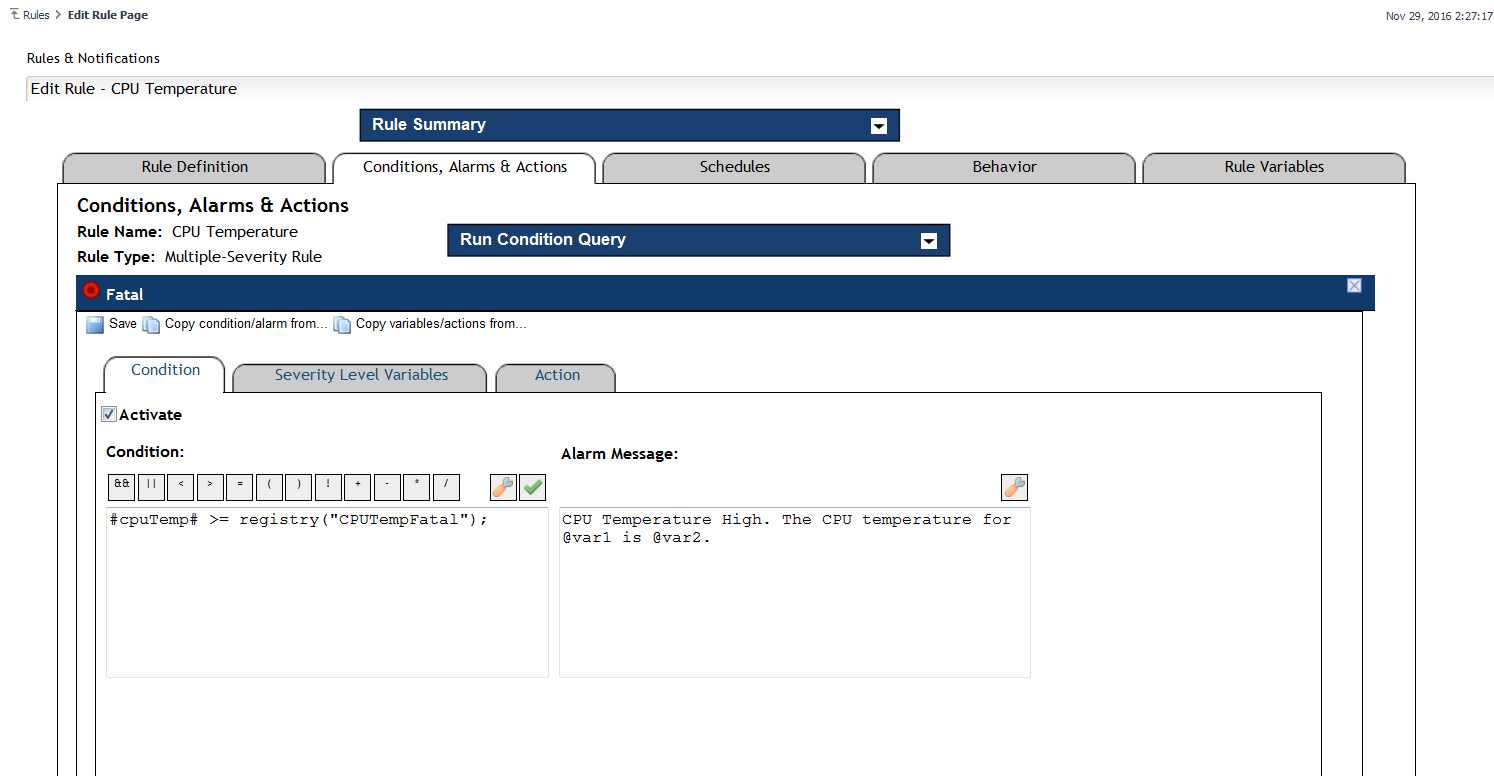
This one's already populated. In the Condition box, I used the Tool symbol in the Condition Editor

To bring up a list of available metrics, selected "Metric Property and "Subtypes of Scope" and then scrolled down to find "cpuTemp"
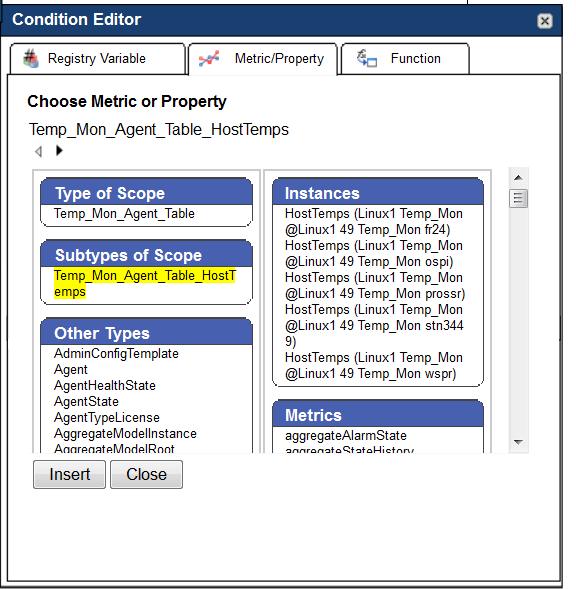
When you click "Insert", the string #cpuTemp# will get inserted into the condition. The "#" before and after tell Foglight that the text references a Metric Property. You can then click the ">" symbol, and the "=" symbol to get a comparison. Then click the tool symbol again, and select our Registry Variable (CPUTempFatal). Click insert, and that will be inserted into your condition box. Add a closing ";" to complete the query.
At this point, you'll probably want to click "Save" (above the condition box) so we don't loose any work.
Next, we need to add a few variables, that we can reference in the other parts of the rule. Switch to the "Severity Level Variables" tab, enter Name and an Expression, and click on Add. Again, we've pre-populated the variables for you:

When you're adding expressions, the "@" is a prefix that tells Foglight that the next item is a variable. The "scope.get" function returns the value of the named element, in this case, the hostname.
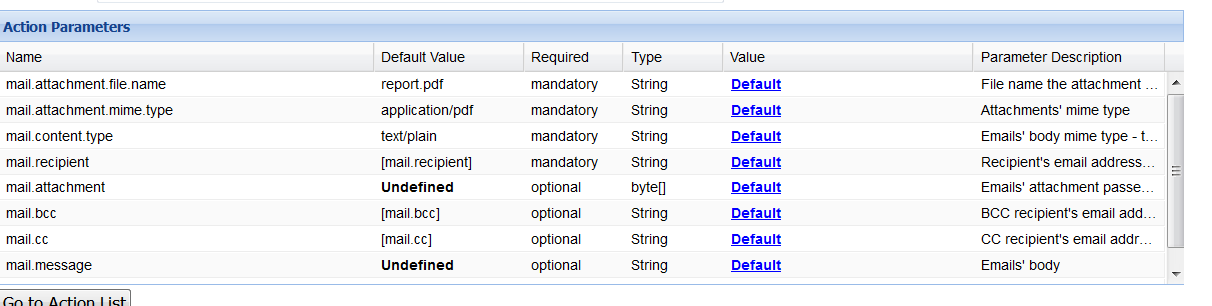
Once you have all of the variables set, save your work (click "Save" in the upper left) and select the "Action" tab. Most actions for rules are taking as you enter the state, controlled by the "Entering" Action Type. To have this alert send us an email, select "EmailAction" from the Action drop down, and click the Add button\
 .
.
On this screen, we'll enter the email recipient address, the message text, and any other parameters we need to set. Let's start with the recipient, by clicking "Default" on that row. This will bring up the Action Parameter Editor:
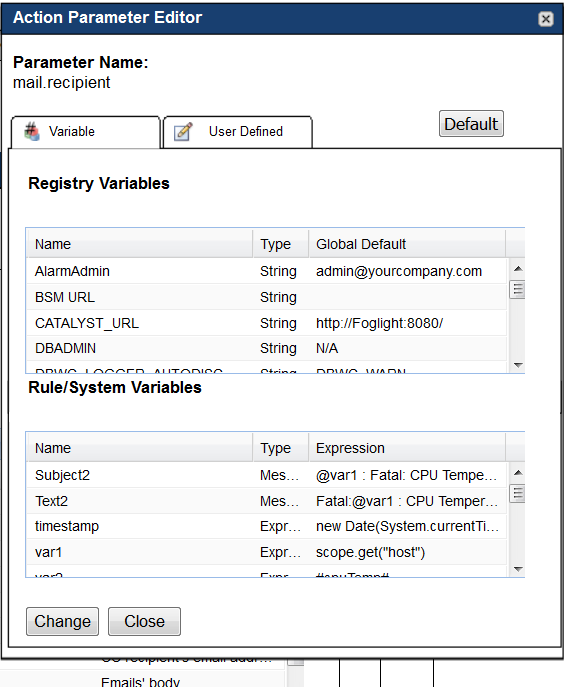
Select var4 and click Change. You can add the mail message in the same way; by selecting "Text2" from the Rule/System Variables table. Repeat this process again to set the mail subject. Once you have populated all of the fields, click save, then click "Go to Action List" to return to the previous screen.
Now that we have variables and actions set, we can go back to the Condition Tab and enter the Alarm Message, using the variables.
Finally, click save.
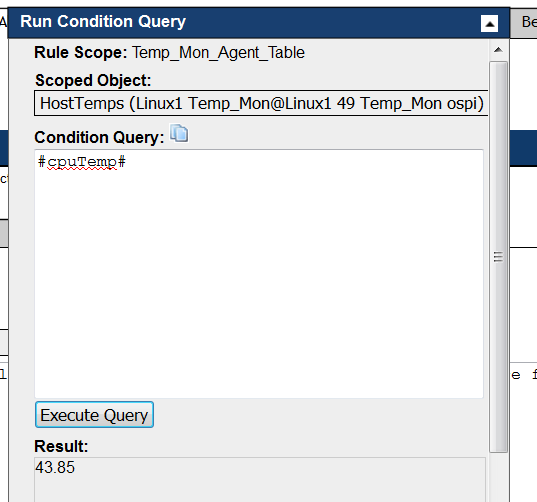
At any point in this process, you can use "Run Condition Query" to test a query or check your work. For example, click on "Run Condition Query" to open that window, enter "#cpuTemp#" in the "Condition Query" box, and click "Execute Query". You'll see a window that looks like this:
The "Schedules" tab can be used to schedule your alert, so that it only runs during a certain schedule.
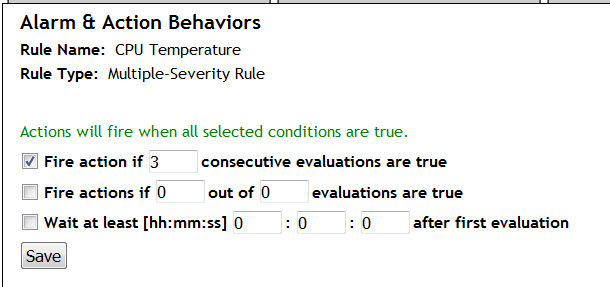
The Behavior tab is used to change the way the rule behaves to reduce false, or nuisance alarms.
The Rule Variables tab allows you to define variables at the Rule level, as opposed to the individual Severity Level.
When you've completed entering all of your rules, you can Save one final time, and then select "Go to Rule List" from the bottom of the screen. You should see a screen that looks something like this:
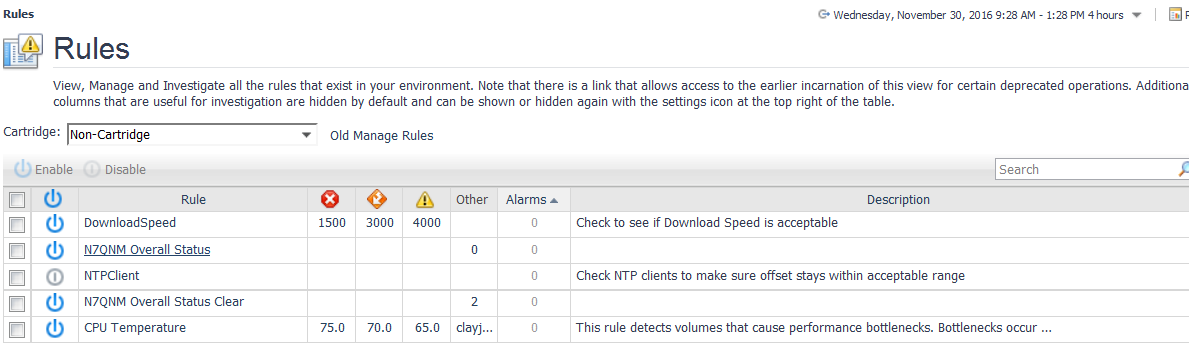
You can see that the CPU Temperature rule is now in our list, along with the threshold values and your email address in the "other" field. You can test your rule by changing the thresholds here and make sure you receive the email. You can also click on the rule name.
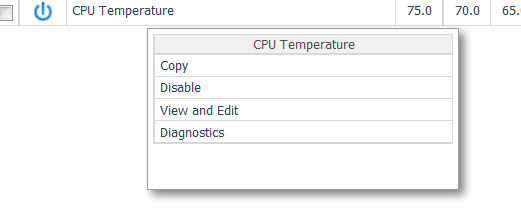
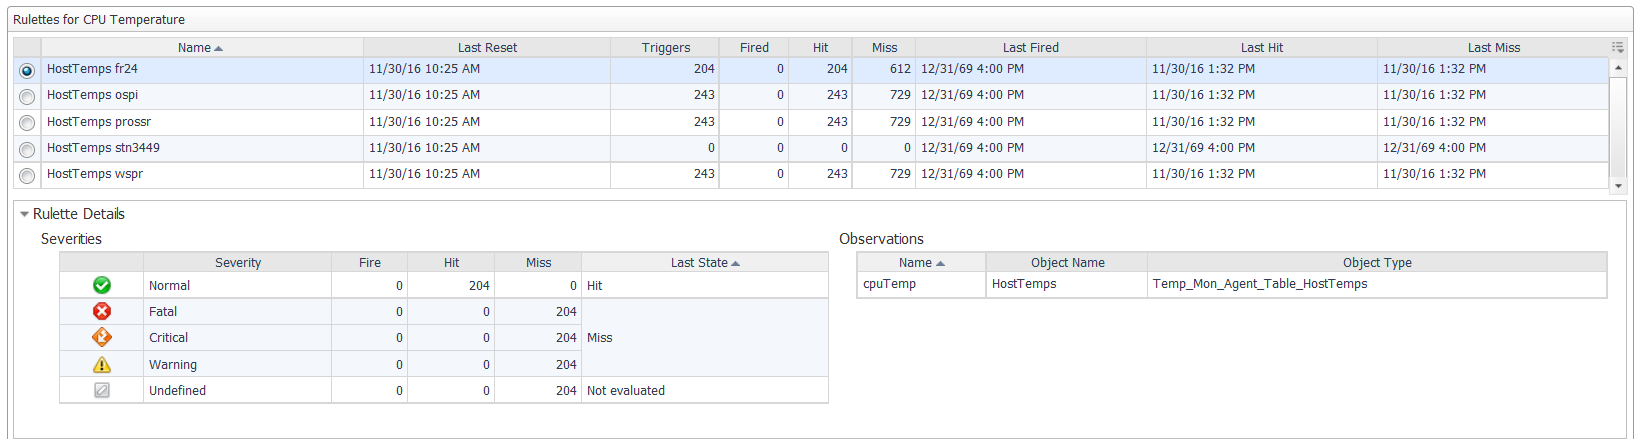
Then click on Diagnostics and you'll see information on your rule's performance:
I hope you've enjoyed these two blogs and have learned more about how Foglight can be extended to monitor just about anything connected to your network.
Visit the Foglight forums for more info
