
Many organizations planning to make it easier for their employees to work remotely. To assist with this effort, they planning to migrate their networked file system to Office 365. Typically, they are looking at one or more of the following targets: SharePoint Online, Teams, and OneDrive.
Fortunately, Essentials for Office 365 supports all these targets. And it is easy to do!
Prerequisites
Let’s start with migrating files to Microsoft Teams. A bulk upload of networked file system content into a Microsoft Team File Library has the following requirements:
- The account used to perform the upload needs to have access and at least Read permissions from this computer to all the networked file system drives.
- The account used to perform the upload needs to be a Global Administrator in this Office 365 tenant.
- The person performing the upload will need to know the relationship (mapping) between each networked file system path and the corresponding Microsoft Teams Name.
- The Microsoft Team must already exist.
Download and Configure Metalogix Essentials for Office 365
Next download a trial of Metalogix Essentials for Office 365. The trial download lets you migrate up to 300GB of content.
Follow the Installation Guide to install and configure Essentials.
Review the Performance Optimization Guide for larger migrations.
Important
You may need to setup and configure OAuth for your migration to work properly. See Using OAuth authentication with Essentials for Office 365 and Content Matrix for a short video on using OAuth authentication.
You need to setup OAuth if you see this error in your log. OAuth authentication is required by default.

Configure the Migration
Switch to the Drives tab and click the Copy File Share dropdown and then the "Copy File Shares to Microsoft Teams" migration button.

Give your project a name.

Enter the URL to the SharePoint Admin Center in your Office 365 tenant. Click the Connect button and then enter the Username and Password of your Global Administrator to authenticate. The SharePoint Admin Center URL will look similar to this: https://YourTenantName-admin.sharepoint.com

In the Map File System to Groups section, load the file that maps the relationship between the networked file system drives and the corresponding Microsoft Teams. During upload all the content, files, and sub-folders (if configured), will be migrated from within the root of this network path and uploaded into the Microsoft Teams channel.
See the file attached below named Migrate-FileSharesToOffice365Group-CSVExample.csv for an example mapping file.
My mapping file appears as below.

Next, load the mapping file into the configuration.

After the mapping file is loaded, click the Check for Microsoft Teams button to run a validation test. This option is designed to validate the existence of the mapped user in Microsoft Teams and to check for the availability of each Team.
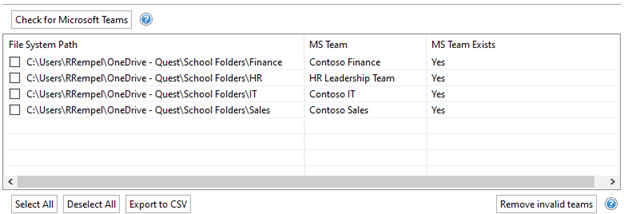
The following results can be displayed in the "MS Team Exists" column:
- Yes - The Group has been found in this Office 365 Tenant and this Group's Site has already been provisioned.
- No - The Group has been found in this Office 365 Tenant, but this Group's Site has not yet been provisioned.
- Invalid Group - The Group was not found in this Office 365 Tenant and therefore cannot be included with this operation as currently mapped.
After the validation process, select from the valid mappings in the list to include in this operation and click Next to continue.

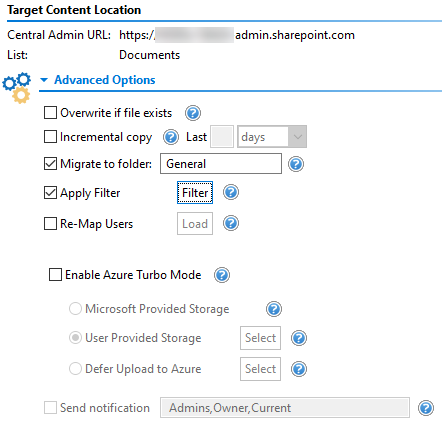
If required, modify your Content Option settings in the dialog box below.
Note: See pages 356 to 358 in the Essentials for Office 365 User Guide for descriptions of the Content Option settings.
Set the Migrate to folder option to “General” if you want all of the files to appear in the General channel of each team.
Filtering is very important. Otherwise content (e.g. large files) that is outdated or irrelevant for collaboration are taking up too much space in Microsoft Teams.
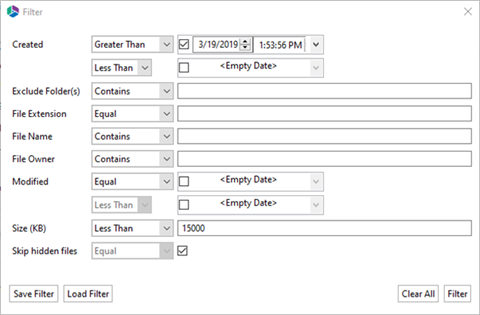
Click Filter to close the Filter screen.
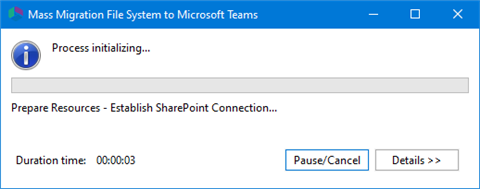
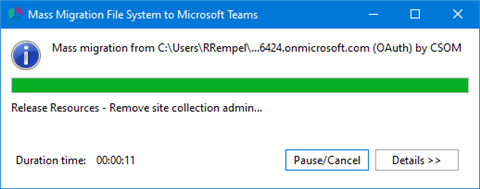
Click Finish to begin the migration.
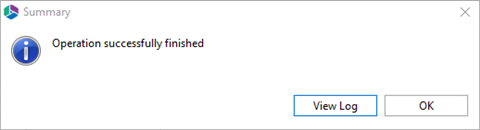
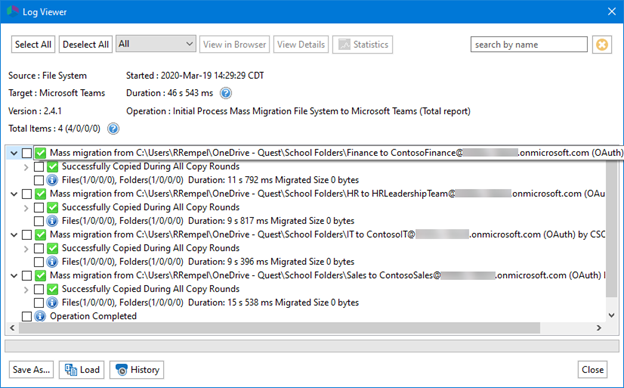
Click on View Log to view the log details. You can see how many items were migrated.
Click Close to close the log screen.
Results
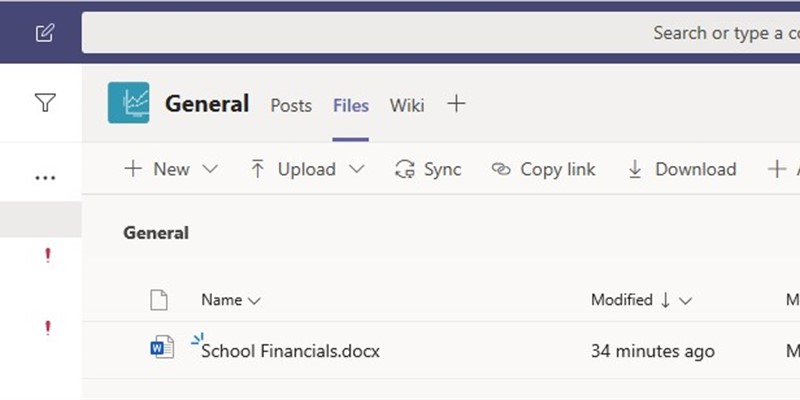
I had a single Word document in each of the four folders that I was migrating. Below you can see that I have the School Financials.doc in the School Folders folder.

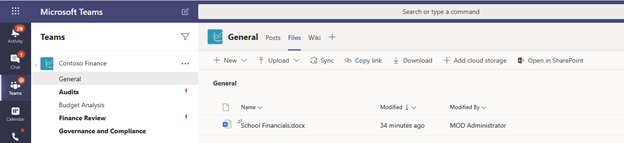
And here is the same document in the Files tab in the General channel of the Contoso Financials team. Remember that I set files to migrate into the General channel in the Content Option settings.
Success!
Quest / Metalogix has a solution to migrate your networked file system to Office 365!
Next Steps
Read the Essentials for Office 365 User Guide for the configuration steps to migrate to SharePoint Online and/or OneDrive.
Download a trial of Metalogix Essentials for Office 365
Contact Sales when you are ready to buy licensing to proceed with your full migration.