

Organizations created large file share systems on their networks to provide a shared store of files for their office workers. Folder structures were defined, and common naming conventions were encouraged. For the most part, workers knew what their files were for and where they were. The knowledge of workers and teams were stored in these file shares.
Many organizations have moved to collaboration platforms like SharePoint and Microsoft Teams. However, many workers have left their files behind on network file shares. With a sudden increase in workers working remotely, workers would benefit with easier access to their files. That is, share the files within the same collaboration platforms that workers use daily.
This blog post reviews
- the configuration of the scanning feature in Essentials for Office 365 and
- the Excel Report that is created after the scanning and rules analysis process completes.
Recommendations are made to help you be successful with this feature.
Start by downloading a trial of Metalogix Essentials for Office 365.
Scanning
The first step in this move is to scan the file shares. Use Essentials for Office 365 to scan and report on the file shares that you want to move. The scanning effort will help organizations decide which files to move and where to move them to.
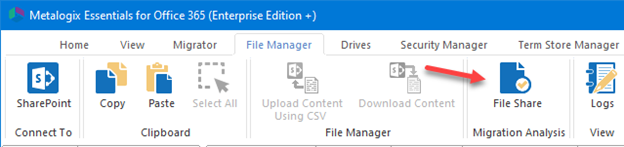
In Essentials for Office 365, click on File Manager \ File Share Migration Analysis.
1. Select the source folder that you want to scan and analyze:
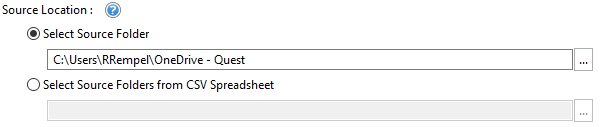
Note: I am pointing to my OneDrive in this example because that is where I store my working files that I don’t share in SharePoint or Microsoft Teams. I also share these files with my fellow workers rather than email copies of files.
2. Set the target SharePoint location in which you plan to upload this content. This is an optional field and you can leave it blank.

Next, set the analysis parameters.
Please review this Microsoft Support document titled “Invalid file names and file types in OneDrive, OneDrive for Business, and SharePoint”.
3. Set the file path length. To stay within the guidelines of SharePoint, this option will scan this file share location and identify file path lengths that are 'Equal', 'Greater Than' and 'Less Than' this defined value. Remember that you will need to add the name of the SharePoint server, folders, site name, and list name to the file path.
Note: The entire path, including the file name, must contain fewer than 400 characters for OneDrive, OneDrive for Business and SharePoint Online. The default setting is 256. However, legacy versions of Microsoft Office files will only support 256 characters – with some lower limits.

4. Set the component name length. This setting checks the length of the file path and the file name separately. The default setting is 128. This analysis will help you determine if a limit is exceeded within the file path length.
Note: SharePoint enforces limits to the number of characters in a path component; more specifically, this path component refers to the length of the name of files and folders.

5. Set the name contains invalid characters.

Click the ellipsis to see the list of invalid characters.
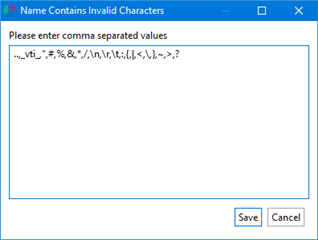
Note: Characters that aren't allowed in file and folder names in OneDrive, OneDrive for Business on Office 365, and SharePoint Online: " * : < > ? / \ |
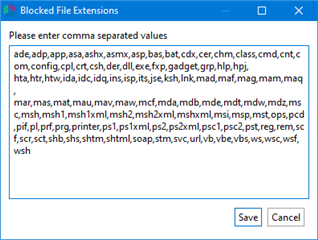
6. Set the blocked file extensions. Recent improvements in SharePoint Online have removed the limitations on types of files that can be added. There are currently no known types of files that cannot be added.
Note: See “Types of files that cannot be added to a list or library”.

Click the ellipsis to see the list of blocked file extensions. You may want to review this for awareness; but it may not be a problem to upload these files.
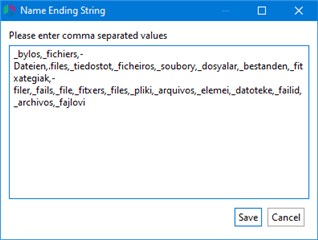
7. Set the name ending string. Due to SharePoint restrictions, file and folder names may not end with any of these defined strings. Microsoft notes that these names aren't allowed for files or folders: .lock, CON, PRN, AUX, NUL, COM0 - COM9, LPT0 - LPT9, _vti_, desktop.ini, any filename starting with ~$.

Click the ellipsis to see the list of blocked name ending strings. Review the list and update appropriately.
8. Set the File Size Limitation (MB). File upload size limits have increased significantly! The limit is 100GB for OneDrive and 15GB for OneDrive for Business and SharePoint Online. However, at this time, the Azure migration pipeline is limited to uploading files with a size limit of 2GB.
But maybe you don’t want to migrate all your largest files online. Thus, you can use the analysis process to identify very large files. You may want to set this to 1024 to identify files that exceed 1GB.

9. Set the search for duplicate files. Enabling this option will scan the file share location and identify the files with same name and extension stored in folders structure. The intent with this analysis is to reduce or eliminate the duplication of files online.

10. Set the created date filter and check the box. This analysis is used for the quick, visual identification of old or stale content. You may want to set the value to a date that is one to two years earlier. Then you can see how many old or stale files that you have.

11. Set the last modified date.

12. Set the last accessed date.

13. Set detailed reporting level for the specified SharePoint sites. When this option is enabled, the report will include detailed information about all items, regardless of their reported Condition level. The use of this option can greatly increase the size of the report. When this option is disabled, the report will include detailed information about only those items with a Condition 2 or 3 status, meaning ones where the tool has detected a potential issue for your consideration. You want to leave this option disabled if you are only scanning and analyzing your file share.
14. Set the summary only. Enabling this option will provide a summary report only that calculates the total number, size and average size of the objects (files and folders) in the specified Source Location. You want to leave this option disabled if you want to see the details in your file share.
15. Set the save to CSV. When this "Save to CSV" option is enabled, the output of this analysis will be saved to a CSV file (.csv) rather than the default Excel file (.xlsx). The benefit of using this option is an increase in analysis performance, however the downside is that the native functionality of Excel files is lost (color, sorting, additional worksheets, etc.). You want to leave this feature disabled if you want the benefit of detailed Excel reports.
Below are the settings on my screen.
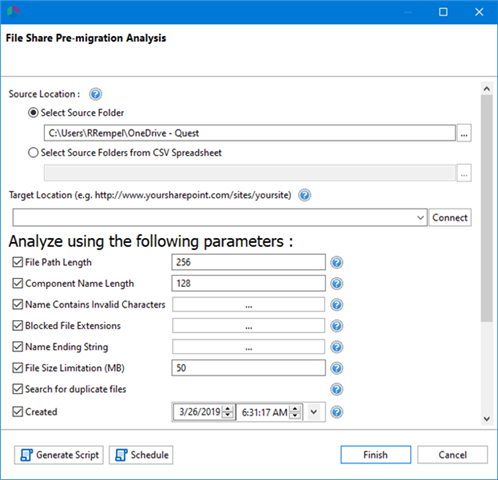
Click Finish to continue.
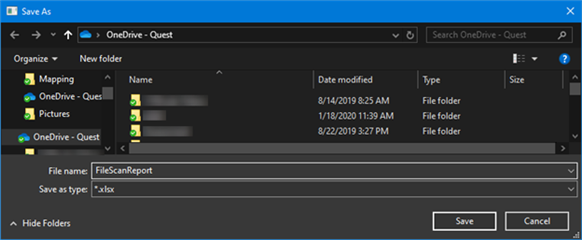
Set a file path and filename to save the Excel file. Click Save to continue.
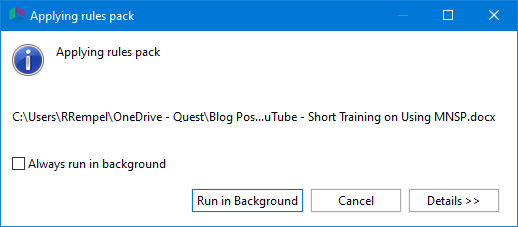
The scan process starts immediately.
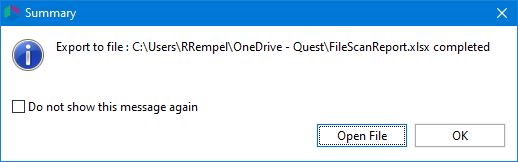
The process completes and the Summary dialog box is displayed. Click Open File to view the Excel report.
You should also see this Summary dialog box.
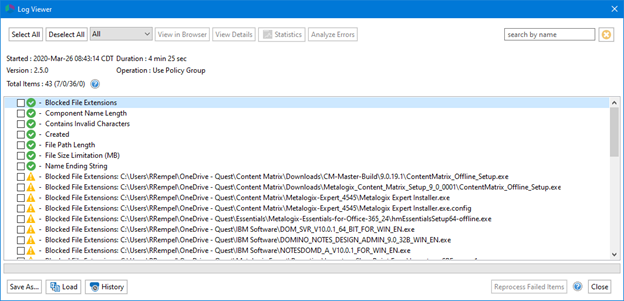
Click View Log and the Log Viewer window is displayed. The warnings are files identified with file size limitations. The entire process took only 4 minutes and 25 seconds to run for me. Click Close to close the Log Viewer.
Reporting and Analysis
The first tab “Results” in the Excel file displays all the scanned files with additional results from the scanning rules. You can filter and/or sort the result columns for analysis. For example, you can find
- duplicate files
- files that are too old
- files that exceed the files size limit
- files that exceed the file path length and/or the component name length
- files that contain invalid characters in the file name
- blocked file extensions

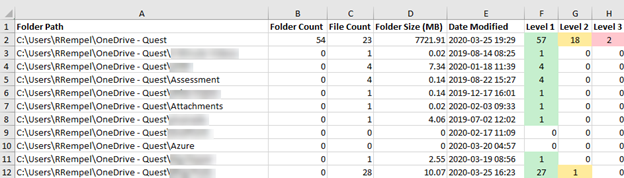
The “Folder Summary” tab displays the results of the scanning rules applied to folders. You can filter and/or sort the result columns for analysis. For example, you can find:
- the folders that contain the largest content based on file size
- the folders with the most files
- the oldest folders
Use this report to analyze your file share environment and make recommendations on:
- which files and folders to move
- where to move the files and folders to
- what to do with files and folders that are old or stagnant
Next Steps
Read the blog post Your Office is Locked Down and You Need to Access Files On-Premises? to learn about migrating your file shares to Microsoft Teams. Read the Essentials for Office 365 User Guide for the configuration steps to migrate to SharePoint Online and/or OneDrive.
Read the blog post Setting up Metalogix Essentials for Office 365 to Use OAuth and Claims to learn how execute long-running migrations by configuring claims authentication and OAuth authorization to keep the user's authentication alive with bearer tokens.
Download a trial of Metalogix Essentials for Office 365
Contact Sales when you are ready to buy licensing to proceed with your full migration.
-

neil langston
-
Cancel
-
Up
0
Down
-
-
More
-
Cancel
Comment-

neil langston
-
Cancel
-
Up
0
Down
-
-
More
-
Cancel
Children