

Our Quest On Demand product provides successful tenant merging and consolidation. The SharePoint migration workload migrates documents and other valuable data stored in SharePoint sites and document libraries. Some SharePoint content migration may also be performed by our Content Matrix and Metalogix Essentials for O365 products.
Our solutions can share the user mapping in order to make this content migration easier and maintain the consistency of users.
This blog posting will show you how to:
1. export the user mapping from our Quest On Demand product
2. import the user mapping into our Essentials for O365 product
3. import the user mapping into our Content Matrix product.
Note that the user mapping file will have to be edited and reformatted.
Quest On Demand
We start with exporting the user account mapping from the Accounts screen in our Quest On Demand product.
1. Select user accounts
2. Click Export
3. Save the file.

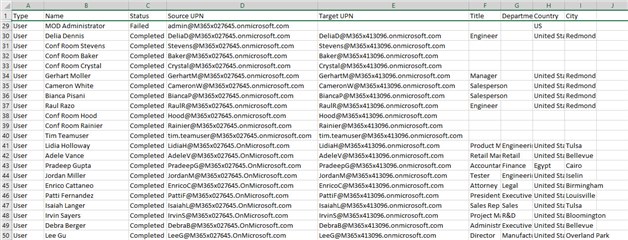
The exported user and group mapping file has more detail than we need. You will have to edit the file so that it conforms with the user mapping file for Essentials or Content Matrix.
For example, the file below has the group entries hidden and the columns are resized.
Essentials for Office 365
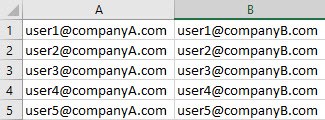
Edit and reformat the user mapping file so that it matches the sample file format below. Note that the Essentials user mapping file does not have column headers.
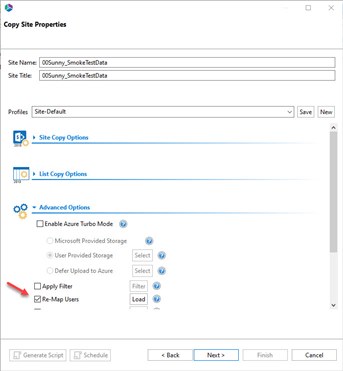
You can use the user mapping file when you copy a list or site. For example, in the Copy Site Properties screen, you check the Re-Map Users check box under Advanced Options.
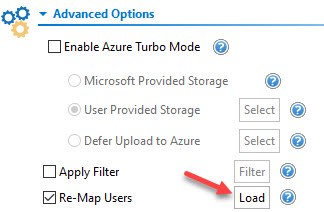
Then click Load.
Select the User Mapping file and click Open.
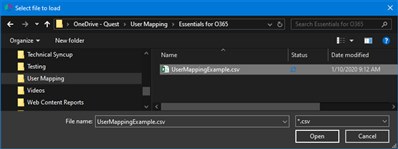
The users are mapped - see display text beside Load.

You can continue with the Copy Site configuration.
Content Matrix
Edit and reformat the user mapping file so that it matches the sample file format below. Some columns must be removed.
Note the column headings and the format of the target username. The column headings should be edited to match the format below.
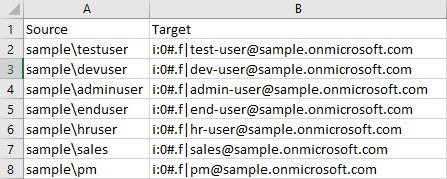
Convert the email address in the Source/UPN column to the format of domain\user.
Add the claims text "i:0#.f|membership|" in front of the email address in the second column.
Note: You might need to use a different claims text in front of the email address if your claims token is different.
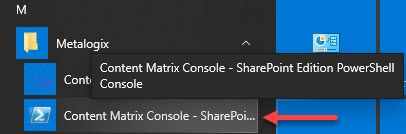
Run the PowerShell console – using the Content Matrix Console. The PowerShell console shortcuts are added to the same Start Menu folder location where shortcuts to Metalogix Content Matrix consoles are placed after installation.
The console appears on the desktop.
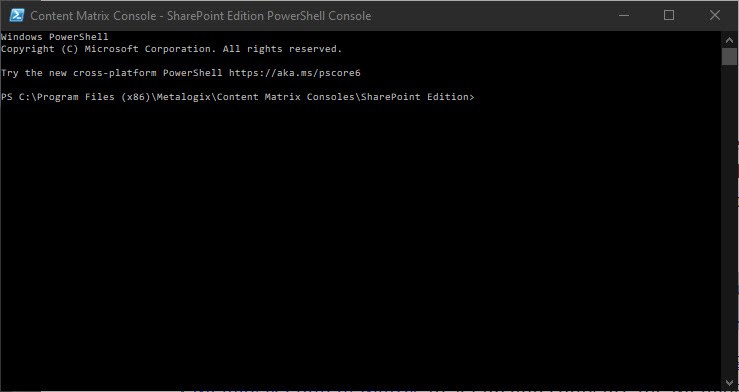
Import the user mappings from a CSV file.
An example is provided below:
Load-GlobalUserMappings "C:\user-mappings.csv" -Verbose -SkipHeader
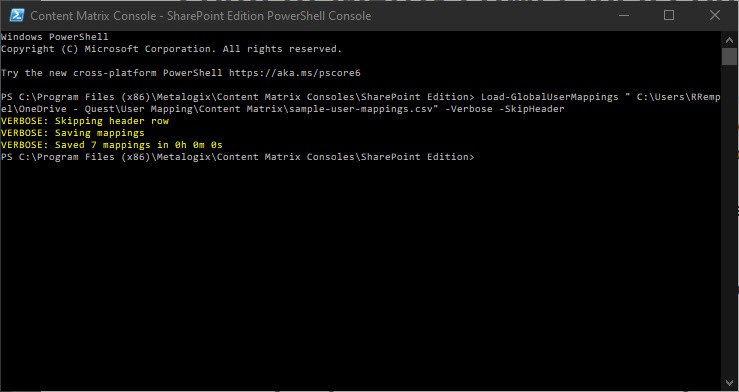
7 user mapping are imported.
Next you can run the Print-GlobalUserMappings cmdlet to generate a list the global user mappings in the PowerShell console.
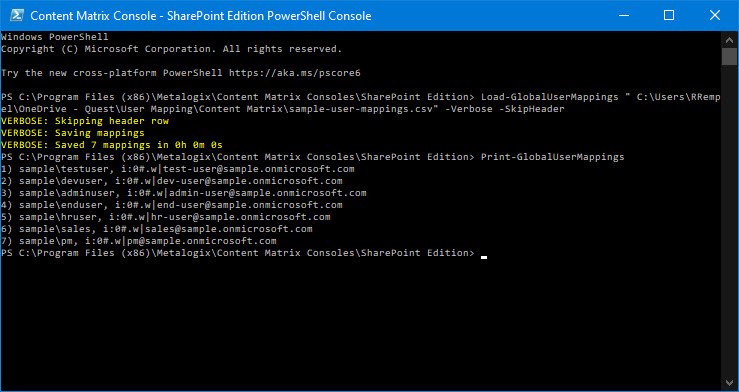
You can continue with migrations using the global user mappings.
Click here for more information on our Metalogix migration solutions including Metalogix Essentials for Office 365 and Content Matrix.
Click here for more information on our On Demand Migration solution.