Hello. My name is Joe Gostnell. I'm here to demonstrate the RemoteScan Enterprise User Edition license server installation as well as registering your RemoteScan license server software on the terminal server, and then finally, setting up your Active Directory.
If you haven't already, go ahead and download the RemoteScan Enterprise User Edition install file from your account onto your terminal server. Once you've done that, go ahead and just double-click on it.
OK. We strongly recommend that you exit out of all Windows programs before continuing. Once that's verified, go ahead and click the Next button. This is our license agreement page. Once you've read through it fully, go ahead and click the "I agree" and then the Next button.
The RemoteScan User Edition install file includes the client, the server, and the license server installer. The client and the license server are to be installed on the terminal or a Citrix server, while the server software is to be installed on the scanning workstation that has a USB-attached scanner. Once you understand all of these processes, go ahead and click Next.
We are installing the license server software. So let's make sure that that radio button is selected. And click Next.
This is the default location where RemoteScan will write onto your workstation. We do recommend that you keep those default settings. And then click the Next button.
This is to restart RemoteScan license server software any time you restart your computer. Go ahead and click Yes if you want to do that. I do recommend it. And then click the Next button.
Here, you will need to input the IP address of your Active Directory server. Once you input that, go ahead and click Next. OK.
You will need to update the personal firewall on your computer if you're running Windows XP or older or a Windows Server 2003 and older. If you're not too sure, go ahead and check that, anyway. It's not going to hurt anything. And now we'll just click Next.
OK. We're ready to install. Let's click the Install button to execute. You will now see it write the RemoteScan files to your Windows directory. The installation is now complete. You'll see the license service warning. Click Yes to install the RemoteScan service.
You should now see the success window. Go ahead and click OK there. And you also will be asked to start the license server. Go ahead and click Yes to start that. Also, notice that in the bottom right-hand corner of the screen, there is the RemoteScan Enterprise license icon with the alert saying there are currently zero users assigned to the Active Directory. So once that's through, go ahead and click the Finish button. The installation is complete. And that concludes the license server install process.
OK. Please note the RemoteScan server icon in the system tray with a red X over it. If we right-click on that icon and select Register, notice that the "Not Registered To" at the top of the window is present. So to register your RemoteScan server, you will need the license key and the site message that you received in an email with the subject line "Your License File."
Copy and paste the two entries from your email into the fields and click the Check License button. You should receive "the key is valid" message. Go ahead and click the OK button. Notice that your product key and license number are now showing.
So now we can go ahead and click the Save button. Note the RemoteScan icon. Click the icon. And the About window will open. You will now see that the RemoteScan license server says "Registered to," and it shows your username.
In order for users to scan with RemoteScan, they will need to be added as a user within the Active Directory group RemoteScan. I'm going to open up our scanning application on the license server and try to run a test scan.
Now, if we go to the file and then Acquire, the RemoteScan user interface will open. Note at the bottom of the window, it says your username. Jgostnell is not authorized to scan. Let's go ahead and close that window as well as the scanning application.
So to resolve this issue, we will need to log in to our terminal server with Active Directory, which I will open up here. Click to open up your Active Directory Administrative Center. You will then see the Windows general practice security warning. Just click the Yes to open the Active Directory.
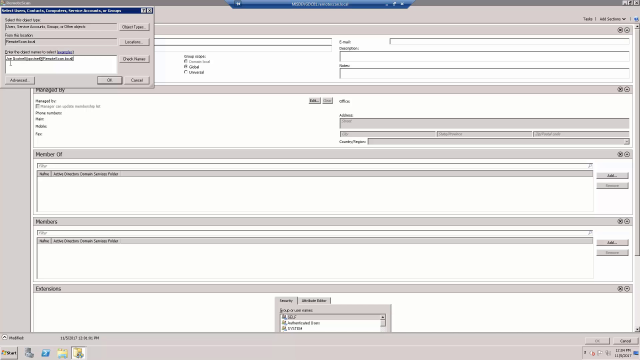
One thing to take note of-- you will need to have the group RemoteScan created in your Active Directory before adding users to enable scanning. First, you will need to go to the Global Search and find your RemoteScan group. Double-click the group to open the Group Management page. You will need to scroll down to the Members section and click the Add button.
Go ahead and type in a full or partial username. And then hit the Check Names button. Once the full object name displays, we can click the OK button to finish adding. Finally, we will need to click OK to update the group.
So if we go back to our RemoteScan license server and click the RemoteScan icon, we can now see that there is one user assigned to the RemoteScan group in Active Directory. We can then open up our scanning application.
Once we select the Acquire button, the RemoteScan user interface will open. We can now see that the "not authorized" message is no longer present. And we can begin scanning.
OK. That concludes the RemoteScan registration process. Thank you for watching this series. And I hope you have a great day.
 05:55
05:55
