This blog is a continuation of Adventures in Agent Creation - Part 2
In my previous installment, I introduced the concept of creating a high-performance collector for Foglight to gather Windows system counters. I would like to expand on that introduction now by diving deeper into the code.
First, a little background; Foglight has two methods of absorbing new data beyond the agents that come out of the box. These two mechanisms are SDK agents and script agents. A script agent is a special type of agent that can be written in any language but must produce a structured output to STDIO. Script agents provide amazing flexibility when consuming new data. Data generated by script agents can be used in a variety of ways including rules, metrics, dashboards, and other Foglight components.
Script agents themselves come in two flavors; a type one script agent essentially executes once and terminates, whereas a type two script agent continues to execute until some internal condition causes it to self-terminate. The interval at which either script agent executes is controlled by the Foglight Agent Manager for the platform on which the agent runs.
This subject of this article is a type two script agent.
In preparing this article and in designing the code I wanted to get it right by including only metrics essential to understanding web site performance. I used as boilerplate Microsoft’s own guide to improving web performance. “Improving .NET Application Performance and Scalability” proved to be an excellent handbook in deciding which counters were key to understanding how to measure performance.
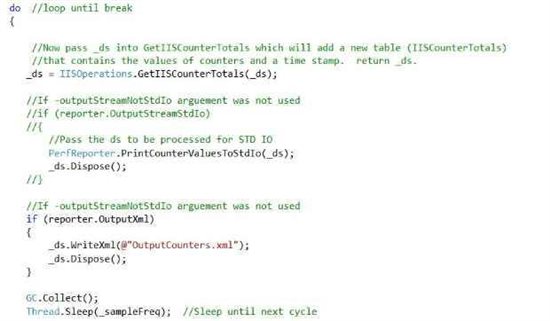
Figure 1 – program main
Earlier versions of my agent suffered terribly from poor collection performance primarily due to excessive recursion. For this version I was determined to reduce recursion to an absolute minimum.
I ultimately achieved the desired level of performance by doing a kind of “counter look up” only once and in advance of beginning collection – at agent instantiation. This query in advance was necessary because I could not guarantee that any given target would have on it the desired counters published, nor could I guarantee the number of instances (applications) that I would be collecting.
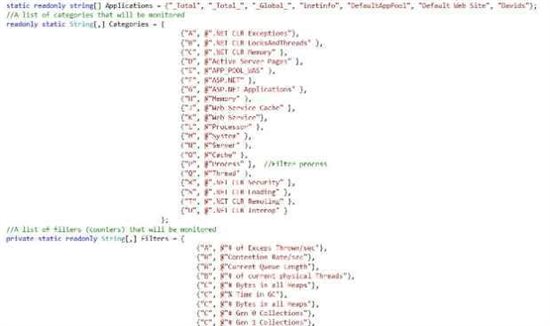
Figure two shows an abbreviated list of the counters that we will be collecting.
Figure 2 – Counters
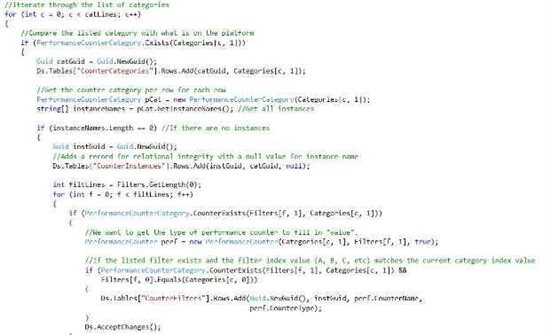
Armed with a list of counters, the agent begins by comparing this list to counters published on the target. This is accomplished by first building three data tables within a dataset; one for categories, one for instances, and one for filters (counters). Referential relationships are then built between the three tables.
Once the dataset is built, I iterate through the list of categories and counters – adding only those counters from the list published and active on the target.
Figure 3 – Building a dataset of counters
There is, of course, a delay in producing the dataset as I look for all counters on my list. But this hit is only once at start up. In this way we avoid looking up counters at runtime that do not exist. The advantage to this approach is that I incur my “cost” once during instantiation. The disadvantage is that I must restart the agent if a new counter is published.
At this point the dataset is completely built and we enter the working portion of our code – the do-while loop.
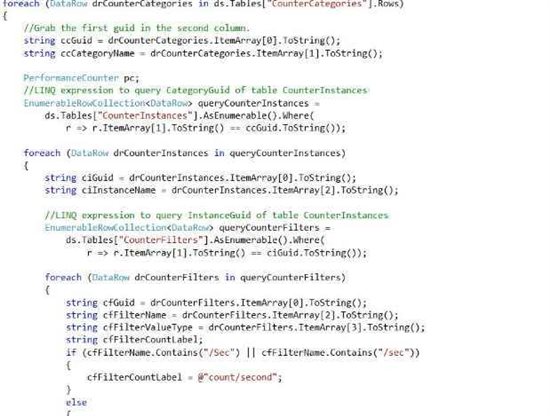
The loop begins by getting the current data values for each counter within the dataset. This is accomplished by using LINQ expressions to query the dataset for category and counter names instead of using recursion – saving a ton of time in the process. As we’ve already validated the counter’s existence prior to entering the loop we eliminate the need to do a lot of conditional management.
All we have to do now is create a new instance of the counter and sample data from the target.
Figure 4 – Reading the dataset
Output from the LINQ queries are added to a forth table in the dataset, and a dataset is returned.
Finally, the dataset is passed into a routine that will output the contents of the newly-created table containing sampled values in a format that Foglight expects.
The agent code compiles into an executable and using this method improved throughput tremendously. Next I will take you through incorporating this agent into Foglight.
Integrating the script into Foglight
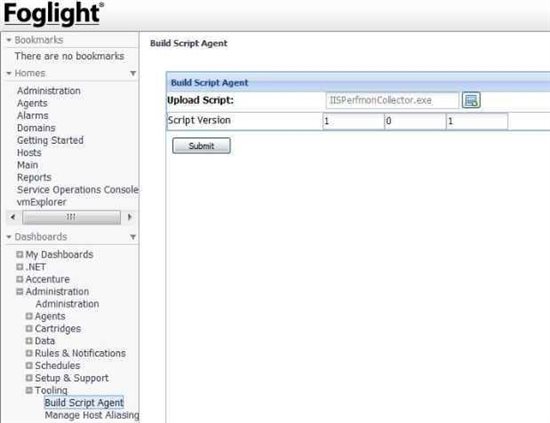
Foglight provides a convenient mechanism to upload scripts and create agents that can be centrally controlled using Foglight administration. Under Administration -> Tooling, click Build Script Agent. Then simply point to the agent you wish to upload.
Figure 5 – Foglight Build Script Agent
Lastly, in Administration -> Agents -> Agent Status you can first deploy the newly created agent to your target, and then create a new instance of the agent using “Create Agent”.
In the final installment of this series, I will create a new dashboard using the data now collected from our counter agent.


